Regarding cabinet installation, scribe molding is crucial in achieving a flawless and seamless finish. From concealing gaps to adding a touch of elegance, scribe molding has become an essential element in cabinetry. This article will explore details you need to know about scribe molding, including its purpose, installation techniques, and various applications. So, let’s dive right in and discover the world of scribe molding!
What is Scribe Molding?
Scribe molding, often made of wood or wood composite, is a narrow strip that bridges the gaps between cabinets and adjacent surfaces. Its primary purpose is to provide a seamless transition and cover any imperfections that may arise during the cabinet installation process. In addition, by achieving a precise and custom fit, scribe molding ensures a cohesive and visually appealing integration between your cabinets and the surrounding surfaces.
Scribe Molding for Cabinets
Scribe molding is a versatile solution for various cabinet types and configurations. Here are some specific applications of scribe molding for cabinets:
- Scribe Molding on Upper Cabinets: Upper cabinets often have a little gap between them and the ceiling or soffit. Scribe molding fills this gap, creating a finished and polished look.
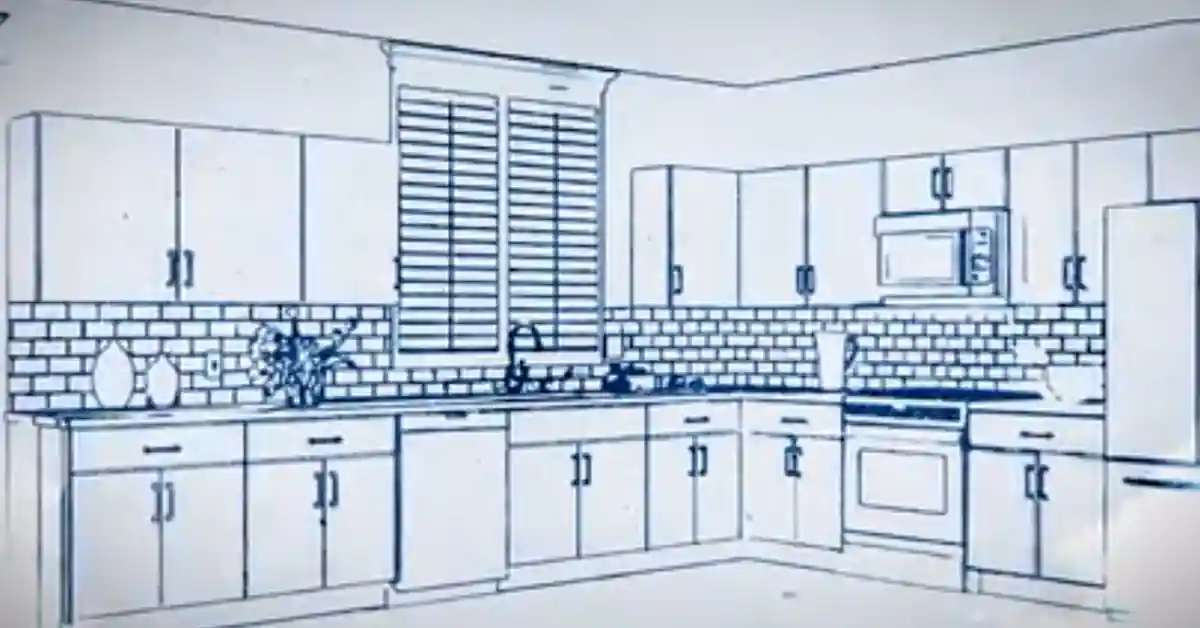
- Scribe Molding for Kitchen Cabinets: In kitchen installations, scribe molding addresses irregularities between cabinets and walls, ensuring a seamless and professional appearance.
- Scribe Molding on Base Cabinets: Base cabinets may require scribe molding to bridge gaps between the floor and the bottom of the cabinets, resulting in a neat and unified look.
- Cabinet Scribe Molding: Scribe molding designed explicitly for cabinets is meticulously crafted to match the style and material of the cabinets, achieving a cohesive design aesthetic.
What is scribe molding used for?
Scribe molding is a type of trim used in woodworking and carpentry projects. It serves a specific purpose and is commonly employed in various applications. Here is an explanation of what scribe molding is used for:
- Seamless Transitions: Scribe molding creates seamless transitions between different surfaces or materials. It is commonly utilized to bridge the gap between cabinets, walls, countertops, or other architectural elements. Scribe molding helps create a smooth and visually appealing transition by filling irregular or uneven spaces.
- Concealing Gaps: There may be gaps or inconsistencies between different components in construction or installation projects. Scribe molding is used to conceal these gaps and create a finished and polished look. It provides a decorative cover that masks imperfections or unevenness, ensuring a cohesive and professional appearance.
- Custom Fitting: Scribe molding is often used to achieve a custom fit in carpentry projects. It allows for precise adjustments and modifications to accommodate irregular or non-standard dimensions. By carefully shaping and installing scribe molding, carpenters and installers can tailor the trim to fit perfectly, even in challenging or non-standard spaces.
- Enhancing Aesthetics: Scribe molding also serves an aesthetic purpose. It adds a decorative touch to the all-up design of a room or piece of furniture. With its unique shape, profile, and detailing, scribe molding can complement the style and character of the surrounding elements, enhancing the visual appeal of the space.
- Versatile Application: Scribe molding finds applications in various areas, including cabinetry, furniture, flooring, and architectural millwork. It is frequently used in kitchen and bathroom installations, where it helps achieve a seamless look between cabinets, walls, and countertops. Additionally, it can be employed in custom carpentry projects, such as bookshelves, mantels, or built-in furniture.
Scribe molding is a versatile trim crucial in achieving a professional and visually pleasing finish in woodworking and carpentry projects. Whether concealing gaps, creating smooth transitions, or adding aesthetic appeal, scribe molding is an essential component that enhances the overall quality and appearance of the finished work.
How to Install Scribe Molding?
Installing scribe molding requires attention to detail and precision. Here is a step-by-step mentor to help you through the technique:
Step 1: Assemble the Necessary Tools and Materials
- Tape measure
- Scribe tool or compass
- Miter saw or coping saw
- Finishing nails or adhesive
- Sandpaper or file
- Paint or stain (optional)
Step 2: Accurate Measurements
- Find out how long the space is where you want to put the scribe molding.
- Transfer these measurements onto the scribe molding, ensuring precise markings.
Step 3: Scribing the Molding
- Use a scribe tool or compass to outline the contour of the adjacent surface onto the scribe molding.
- Carefully cut along the traced line, ensuring a custom fit that matches the irregularities of the surface.
Step 4: Test Fit and Adjust
- To check the fit, place the scribe molding against the cabinets and the adjacent surface.
- Make any necessary adjustments by trimming small sections until the molding sits flush and snug.
Step 5: Finishing Touches
- Sand the edges of the scribe molding to ensure a smooth and seamless transition.
- Apply paint or stain to match the color scheme of your cabinets, if desired.
- Secure the molding using finishing nails or adhesive, ensuring a firm attachment.
Where do you put scribe molding?
Regarding cabinet installations, scribe molding is a handy addition that helps bridge the gaps and seamlessly integrate cabinets and adjacent surfaces. But where exactly should you put scribe molding? Let’s dive in and explore the different areas where scribe molding can be used.
- Between Cabinets and Walls: One of the primary applications of scribe molding is to fill the gaps between cabinets and walls. During the installation process, it’s common to encounter irregularities or variations in the wall’s surface. Scribe molding comes to the rescue by providing a tailored fit that conceals these gaps and creates a cohesive look.
- Between Upper Cabinets and the Ceiling: In kitchen or bathroom installations, there is often a tiny gap between the upper cabinets and the ceiling or soffit. This gap can create an unfinished appearance. Scribe molding can be used in this space to bridge the gap and add a polished finish, ensuring seamless integration from top to bottom.
- Between Base Cabinets and the Floor: Similar to the gap between the upper and ceiling cabinets, there might be a small space between the base cabinets and the floor. Scribe molding can also be used here to cover the gap and create a uniform and clean look. It adds that extra detail that takes your cabinetry to the next level.
- Around Peninsulas or Islands: Scribe molding can seamlessly blend the cabinets with these structures if you have a peninsula or an island as part of your cabinet layout. By carefully measuring and scribing the molding to match the contours, you can achieve a cohesive appearance and eliminate unsightly gaps.
Remember, scribe molding aims to create a seamless transition and conceal gaps that may occur during cabinet installations. Its flexibility allows it to be used in various locations where a tailored fit is needed.
So, whether you’re working on kitchen cabinets, bathroom cabinets, or any other cabinetry project, consider incorporating scribe molding to achieve that professional and polished finish. It’s a simple yet effective way to enhance the overall aesthetics and ensure a visually pleasing result.
In summary, scribe molding finds its place between cabinets and adjacent surfaces, filling gaps and creating a seamless integration. It can be used between cabinets and walls, upper cabinets and the ceiling, base cabinets and the floor, and around peninsulas or islands. By carefully installing scribe molding in these areas, you can achieve a cohesive and visually appealing look for your cabinets.
What does scribe trim look like?
Scribe trim, or scribe molding, is a narrow strip used in cabinet installations to fill gaps and create a seamless transition between cabinets and adjacent surfaces. It’s usually made of wood or wood composite, although other materials may also be used. So, what does scribe trim look like? But first, let’s explore its appearance and characteristics.
Size and Shape: Scribe trim is usually a thin strip, ranging from around ¼ inch to 1 inch in width. The exact size may vary depending on the specific design and manufacturer. It is typically rectangular or square, with straight edges and smooth surfaces. The trim length can be customized to fit the specific installation requirements.
Profile: Scribe trim often features a brief profile. It may have a flat or slightly curved surface, depending on the desired aesthetic and the design of the cabinets. The profile ensures a clean and seamless transition between the cabinets and the adjacent surfaces.
Material and Finish: Scribe trim is commonly made of wood or wood composite materials. These materials are chosen for their durability, ease of customization, and ability to match various cabinet styles. Wood options such as oak, maple, or pine are popular choices. The trim can be left unfinished to showcase the common beauty of the wood or finished with paint, stain, or varnish to become the desired color scheme or complement the cabinets.
Texture: Scribe trim typically has a smooth and polished surface. The texture may vary based on the material and finishing treatment. It is essential to ensure that the trim’s surface is free from imperfections, as any irregularities could affect the overall appearance and fit of the molding.
Color: The color of the scribe trim can be customized to match the cabinets or the surrounding decor. If the trim is made of natural wood, it can retain the wood species’ natural color and grain pattern. Alternatively, it can be painted or stained to achieve a specific color or finish that complements the overall design scheme.
Scribe trim is designed to blend seamlessly with the cabinets and create a cohesive and visually appealing look. It’s slim profile and customizable features allow it to fill gaps and conceal imperfections, resulting in a polished and professional finish for your cabinet installations.
Remember, the specific appearance of scribe trim may vary based on the manufacturer, materials used, and individual design choices. Therefore, consult with professionals or refer to product catalogs to find the scribe trim that best suits your project requirements.
How do you scribe around baseboards?
Scribing around baseboards is a technique used to achieve a precise fit between cabinets or other structures and the existing baseboards. It allows for a seamless integration that eliminates gaps and creates a polished finish. Here’s a step-by-step guide on how to scribe around baseboards:
- Prepare the Cabinets: Ensure the cabinets are installed and positioned correctly before scribing. Ensure they are level and securely in place.
- Position the Cabinet: Place the cabinet in its desired location, ensuring it is flush against the wall and aligned with adjacent cabinets or structures.
- Identify the Scribing Area: Identify where the baseboard intersects with the cabinet. This section needs to be scribed.
- Place the Scribe Molding: If using scribe molding, position it along the edge of the cabinet, overlapping the baseboard. The molding will act as a guide for scribing.
- Use a Scribe Tool: A scribe tool or compass can be used to trace the contour of the baseboard onto the cabinet. Adjust the scribe tool to match the depth of the gap between the baseboard and the cabinet.
- Trace the Contour: Hold the scribe tool firmly against the baseboard while tracing along its profile. Keep the tool perpendicular to the cabinet to ensure accurate measurements.
- Cut along the Scribed Line: Use a jigsaw or coping saw to cut along the line carefully. Following the traced contour, take your time to achieve a smooth and precise cut.
- Check the Fit: After cutting, check the fit of the cabinet against the baseboard. It should now fit snugly without any gaps or unevenness.
- Adjust if Necessary: If there are any areas where the fit is not perfect, use sandpaper or a file to carefully adjust and refine the cut until the fit is seamless.
- Secure the Cabinet: Once the scribing is complete and the fit is satisfactory, secure the cabinet using appropriate screws or fasteners. Ensure the cabinet is level and properly aligned.
Scribing around baseboards requires precision and attention to detail. By carefully tracing and cutting along the baseboard contour, you can achieve a professional and seamless fit between the cabinet and the baseboard.
Remember to exercise caution and use proper safety equipment when working with tools. Suppose you need more clarification on performing the scribing yourself. In that case, it’s always a good idea to seek the assistance of a qualified installer or carpenter who can ensure a perfect fit and finish for your cabinets.
How do you scribe wall molding?
Scribing a wall molding is a technique to achieve a precise fit between the molding and an uneven or irregular wall. It allows for a seamless and professional finish. Here’s a step-by-step guide on how to scribe a wall molding:
- Prepare the Molding: Select the molding you intend to install on the wall. Ensure that the molding is of the appropriate size and design for your project.
- Measure the Wall: Use a tape measure to determine the wall length where the molding will be installed. Take accurate measurements and note any irregularities or variations in the wall surface.
- Position the Molding: Hold the molding against the wall in the desired location. Align it horizontally and ensure it is level. Make a mark on the molding to indicate where it intersects with the uneven portion of the wall.
- Use a Scribe Tool: A scribe tool, such as a compass or contour gauge, transfers the shape of the wall onto the molding. Change the depth of the scribe tool so it fits the space between the wall and the border.
- Trace the Wall Contour: Hold the scribe tool firmly against the wall, with the wall side of the tool pressed against the uneven surface. Slide the scribe tool along the wall, maintaining even pressure, to trace the contour of the wall onto the molding.
- Cut along the Scribed Line: Use a coping saw, jigsaw, or appropriate cutting tool to carefully cut along the scribed line on the molding. Take your time and follow the traced contour as accurately as possible.
- Check the Fit: After cutting, hold the molding against the wall to check the fit. It should now follow the contour of the wall, filling any gaps and creating a seamless appearance. If adjustments are needed, use sandpaper or a file to refine the cut until the perfect fit.
- Secure the Molding: Once the scribing is complete and the fit is satisfactory, secure the molding to the wall using appropriate nails, screws, or adhesive. Ensure that the molding is level and properly aligned.
Scribing a wall molding requires patience and precision to achieve a professional result. By accurately tracing and cutting along the scribed line, you can ensure a tight fit that seamlessly follows the contours of the wall.
Remember to take necessary safety precautions and use appropriate tools when working with moldings and cutting materials. Suppose you need more clarification about performing the scribing yourself. In that case, it’s advisable to seek the assistance of a professional carpenter or installer who can ensure an expert finish for your wall molding.
Can you glue scribe molding?
Yes, it is possible to glue scribe molding during the installation process. Gluing scribe molding can be an effective method for securing it and ensuring a secure and long-lasting attachment. Here’s a guide on how to glue scribe molding:
- Prepare the Surfaces: Before applying glue, ensure that the surface where the scribe molding will be attached and the back of the molding are fair and free from dust, debris, or other contaminants. This will help promote a strong bond.
- Choose the Right Glue: Select a suitable adhesive for attaching the scribe molding. Various options are available depending on the materials involved, such as wood or composite molding and the surface to it will be attached. Common choices include construction adhesive, wood glue, or strong bonding adhesives recommended for trim installations.
- Apply the Glue: Apply a thin, even layer of glue along the backside of the scribe molding, ensuring complete coverage. Use a brush or a small adhesive applicator to spread the glue evenly. Be mindful not to apply excessive glue that could squeeze out when the molding is pressed against the surface.
- Press the Molding in Place: Carefully position the scribe molding against the desired surface, aligning it correctly. Press firmly and hold it momentarily to allow the glue to set and create a strong bond. If necessary, use clamps or tape to secure the molding temporarily until the adhesive dries completely.
- Clean Excess Glue: If any glue squeezes out during the installation, use a damp cloth or sponge to clean it off immediately. Then, removing excess glue while wet is more manageable than waiting to dry and harden.
- Allow Sufficient Drying Time: Follow the manufacturer’s instructions regarding the specific adhesive’s recommended drying or curing time. Avoid putting any pressure or stress on the molding until the glue fully matures to ensure a strong and secure bond.
Gluing scribe molding can be convenient and reliable for attaching to various surfaces. However, choosing the appropriate adhesive and following the manufacturer’s instructions for application and drying times is essential to ensure optimal results.
If the scribe molding needs to be removed or replaced in the future, gluing it may make the process more challenging compared to other attachment methods like nailing or screwing.
How do you scribe a wall for a trim?
Scribing a wall for trim is a technique used to achieve a precise fit between the trim and an uneven or irregular wall surface. It allows for a seamless and professional finish. Here’s a step-by-step guide on how to scribe a wall for trim:
- Prepare the Trim: Select the trim you intend to install on the wall. Ensure that the trim is of the appropriate size, design, and material for your project.
- Measure the Wall: Use a tape measure to determine the wall length where the trim will be installed. Take accurate measurements and note any irregularities or variations in the wall surface.
- Position the Trim: Hold the trim against the wall in the desired location, ensuring it is level and aligned correctly. If necessary, use a level or a straight edge to ensure accuracy.
- Identify the Scribing Area: Identify the trim section that needs to be scribed. Now this is the area that will be cut or shaped to match the contour of the wall.
- Use a Scribe Tool: A scribe tool, such as a compass or contour gauge, transfers the shape of the wall onto the trim. Adjust the scribe tool to match the depth of the gap within the wall and the trim.
- Trace the Wall Contour: Hold the scribe tool firmly against the wall, with the wall side of the tool pressed against the uneven surface. Slide the scribe tool along the wall, maintaining even pressure, to trace the contour of the wall onto the trim.
- Cut along the Scribed Line: Use a coping saw, jigsaw, or appropriate cutting tool to carefully cut along the scribed line on the trim. Take your time and follow the traced contour as accurately as possible.
- Check the Fit: After cutting, hold the trim against the wall to check the fit. It should now follow the contour of the wall, filling any gaps and creating a seamless appearance. If adjustments are needed, use sandpaper or a file to refine the cut until the perfect fit.
- Secure the Trim: Once the scribing is complete and the fit is satisfactory, secure the trim to the wall using appropriate nails, screws, or adhesive. Ensure that the trim is level and properly aligned.
Scribing a wall for trim requires patience and precision to achieve a professional result. By accurately tracing and cutting along the scribed line, you can ensure a tight fit that seamlessly follows the contours of the wall.
If the trim needs to be removed or replaced in the future, scribing it may make the process more challenging compared to other attachment methods like nailing or screwing.
What is the trim that goes halfway up the wall?
The trim that goes halfway up the wall is commonly known as chair rail molding or chair rail trim. It is a horizontal trim installed at a height of approximately 32 to 36 inches from the floor. However, the specific height can vary based on personal preference & the architectural style of the space. Chair rail molding typically runs parallel to the baseboard and serves a functional and decorative purpose. Here are some critical details about chair rail molding:
- Functional Purpose: Chair rail molding was initially designed to save walls from the backs of chairs, preventing damage such as scuffs and dents. It acts as a barrier between the chairs and the wall and is a practical feature in high-traffic areas or rooms where furniture is frequently moved.
- Visual Appeal: Besides its protective function, chair rail molding adds visual interest and aesthetic appeal to a room. It serves as a decorative element that can enhance the overall design and style of the space. Chair rail molding often acts as a dividing line between different wall treatments, such as paint or wallpaper, allowing creative design opportunities.
- Placement: Chair rail molding is typically installed at a consistent height throughout a room, following a horizontal line. It is commonly positioned at the approximate height of the backrest of a standard dining chair. However, the exact placement can be adjusted based on the desired visual effect and the room proportions.
- Design Options: Chair rail molding comes in various materials, including wood, composite, and synthetic. It is available in different profiles and styles, allowing for customization to match the room’s overall aesthetic. Standard profiles include simple, straight lines and more intricate designs with curves or decorative details.
- Installation: Chair rail molding is typically installed using nails or adhesive, secured to the wall at the desired height. Ensuring that the molding is level and properly aligned is essential to achieve a seamless and professional appearance. The chair rail molding can be painted or stained if desired to complement the room’s color scheme.
Chair rail molding adds a touch of elegance and sophistication to a space while providing functional benefits. It can help define different areas within a room and protect the walls from everyday wear and tear. Whether used in dining rooms, hallways, or living areas, chair rail molding is a versatile trim option that enhances the overall aesthetic and charm of the interior.
Scribe Molding vs Other Types of Moldings
While scribe molding is designed to bridge gaps between cabinets and adjacent surfaces, it is essential to understand the differences between scribe molding and other commonly used moldings, such as quarter round and shoe molding:
Scribe Molding vs. Quarter Round:
- Scribe molding is primarily used for cabinetry and addresses irregularities between cabinets and walls.
- On the other hand, quarter-round molding is predominantly used to cover gaps between flooring and baseboards, focusing on aesthetic purposes rather than accommodating irregularities.
Scribe Molding vs Shoe Molding:
- Scribe molding serves the purpose of bridging gaps between cabinets and adjacent surfaces, achieving a seamless integration.
- Similar to quarter-round molding, shoe molding primarily covers gaps between flooring and baseboards for aesthetic enhancement.
Scribe Molding: An Essential Addition to Your Cabinet Project
The benefits of incorporating scribe molding into your cabinet installation projects are plentiful. Let’s explore the advantages of using scribe molding:
Seamless Integration: Scribe molding ensures seamless integration between cabinets and adjacent surfaces. It creates a unified and visually appealing look by concealing gaps and imperfections, enhancing the overall aesthetics of your cabinetry.
Customized Fit: By scribing and cutting the molding to match the contours of irregular surfaces, scribe molding provides a customized fit. This tailored approach allows for a precise and professional finish, even in challenging installation scenarios.
Concealing Imperfections: During cabinet installation, it is common to encounter uneven surfaces or gaps. Scribe molding is a practical solution to conceal these imperfections, resulting in a polished and flawless appearance.
Protection and Durability: Scribe molding is a protective barrier, preventing moisture, dust, and debris from entering the gaps between cabinets and adjacent surfaces. By reducing exposure to potential damage, scribe molding enhances the durability and longevity of your cabinets.
Enhanced Aesthetics: The addition of scribe molding elevates the overall aesthetics of your cabinetry. It adds a finishing touch that brings sophistication and elegance to your space, enhancing its appeal and value.
Conclusion
Scribe molding is an invaluable component of cabinet installations, providing functional and aesthetic benefits. With its ability to seamlessly bridge gaps, conceal imperfections, and create a unified look, scribe molding enhances the beauty and functionality of your cabinets.
By following the installation steps outlined above and paying attention to detail, you can achieve a professional and seamless integration of scribe molding into your cabinetry projects. The flexibility and versatility of scribe molding make it a valuable asset, allowing you to create customized and tailored finishes that elevate the overall design aesthetic.
Incorporating scribe molding into your cabinet installations adds a touch of elegance and ensures a cohesive and polished result. Embrace the beauty and functionality of scribe molding, and enjoy its transformation into your living spaces.

