Generally, the big question arises- How to use a divot tool? Of course, most golfers know what a divot tool does. But how you use a golf divot is a different matter. If you are not using a divots tool, it causes much damage to the grass on the golf pitch.
In this article, we understand how to use a divot tool expert tips and techniques step by step. Sounds fair enough; let’s drive on point.
Table of Contents
How To Use a Divot Tool In Golf?
The primary question is how to use a divot tool in golf. Right, but don’t worry about it. We are giving you some fundamental 4 step instructions regarding how to use a divot tool. These 4 steps will bring out the best possible outcome for fixing a pitch mark. And the 4 steps are:
01. Pay attention to the pitch mark. Not every pitch mark is the same kind or group. So, handle it right. First, you need to know about that mark. Then, before you do anything else, look closely at the mark.
Then, make a thought map about how to deal with that mark. Visit the pro shop for guidance and necessary golf accessories.
02. insert the divot tool. When you observe a pitch mark, you will notice that just at the point where the ball hit the soil. The little hole also affects its surroundings.
Like, the front area’s soil of the hole reaches a bit higher than the standard level due to the generated pressure by the ball hitting the ground. You must find the higher part and insert the divot repair tool at about 45 degrees with the ground.
03. Push the soil forward. As soon as you insert the divot tool, push the soil firmly toward the hole. It’s like taking some soil from around to fix the hole. Now do the same, pushing around the pitch mark to correctly fill the hole.
Remember you have to push the soil forward, not to pull back. Putting it back will cause severe damage to the soil.
04. After putting soil in the hole, remove your putter and firmly pat it over the repaired place to balance its height with the pitch.
These four fundamental step instructions regarding how to use a divot tool are helpful for any golf player.
What Is A Divot Tool In Golf?
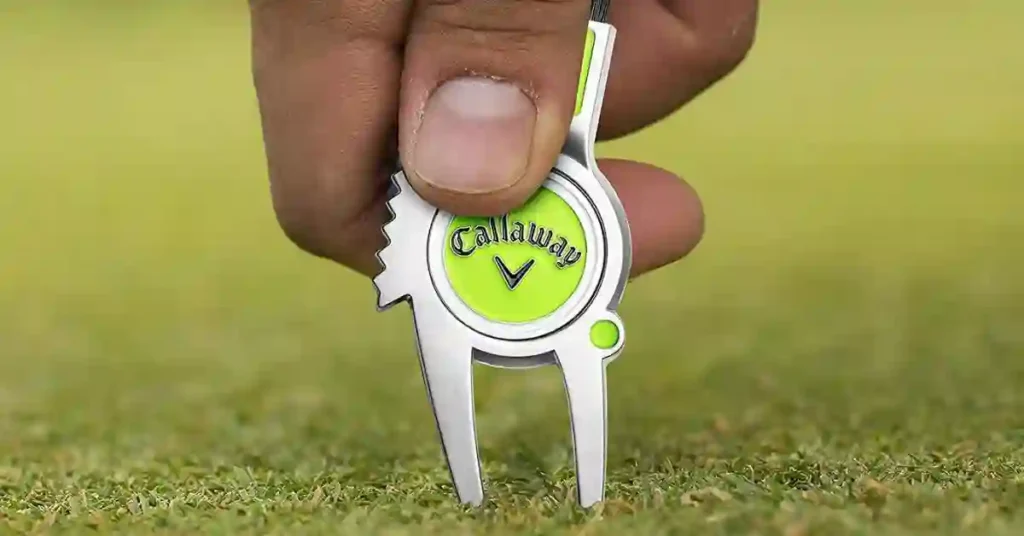
First thing first, What is a golf divot tool in golf, right? The divot tool in golf is tiny & handy equipment. It has a small grip and some point plastic or metal built edges. It looks like a fork. Many types of divot are available in the market, like pin, soli, & twisted divot tools.
The divot golf accessories are an essential tool all golfers should have in their kit.
Functionally, all are similar. Golf courses use these according to their preferences and the best divot tools.
What is a Golf divot tool used for?
Now, what is a golf divot tool for? The answer is simple; it’s for fixing the pitch marks on the golf ball course.
When the golf ball hits the green pitch with force or the club hits the ground before hitting the ball, the pitch takes some damage. The divot tool is handy here; it allows you to pick some soil from the sides of the pitch mark and repair it. In addition, it helps the golf course maintain standard conditions.
That is why this very tool is essential for every golfer and answers all the questions regarding what a divot tool is used for in golf.
Pro Tip Series: Divot Repair
Right now, we will discuss the proper technique for repairing ball marks on the golf course. First and most significant, it is crucial to address ball marks immediately. If a ball mark is left unfixed within the first hour, its chances of survival drop to 50%.
So, whenever you encounter a ball mark, please immediately fix it. Could you also repair one or two from the previous group before you?
Now, let’s talk about the tools we recommend. I have two options to show you:
01. Single-prong
02. Double-prong divot repair tool.
When you fix a ball mark, it’s essential to find the high side of the mark. Then, insert the prong into the ground and gently pinch it down. Now, we explain what happens if you go the other way.
You’re now going the wrong way, causing what we call “snow cones” to pop up the grass, causing root and overall damage. It is essential to push the tool down instead of lifting the mark.
Once you do this, you can either step on it or use your putter to pat it. Now, would you like to add something about the long-term effects of proper ball mark repair?
Absolutely. I’ve seen many cases where people have snow-coned the ball marks, only to find the area dead the next day. This occurs because the roots are severely damaged. Lifting and replacing the dirt might create a smooth surface, but it’s an illusion.
The grass will eventually die. The best practice is to follow (the snow cones) method, which ensures the grass remains alive and well. When our crew fixes ball marks on the golf course, we roll them with a pipe to smooth them out.
However, patting them down with your foot or putter will do a great job. A good fixed ball mark will heal in about 24 hours.
The Best Way To Repair A Pitch Mark
Seeing a poorly repaired pitch mark that leaves a visible scar on the green is disheartening. But, unfortunately, whoever attempted that repair went about it the wrong way.
So let’s understand the process: when a ball lands on the green, it impacts the surface, causing grass and debris to gather at the back of the pitch mark.
Unfortunately, some golfers make the mistake of hastily pulling up the soil underneath the pitch mark and smoothing it with their putter, leaving an unsightly scar.
So, how long does it carry for a pitch mark to fully recover? If a pitch mark was created recently, say yesterday or the day before, it may require up to two or three weeks for complete healing.
Now, let’s focus on the proper technique for repairing a pitch mark. We have another pitch mark ahead of us, which we’ll use to demonstrate the correct method for a quicker and more aesthetically pleasing recovery.
Remember, the material within the pitch mark tends to accumulate at the back.
by daily life tools
Using a pitch mark repair fork, gently pull the material from the back towards the front of the mark. Then, firmly tap it down with your putter. This method will heal the pitch mark within two or three days. By tomorrow’s mowing, it will be virtually invisible.
There you have it! The next time you create a pitch mark on the green, follow these steps diligently for a perfect repair.
Why You Don’t Take Divot and Does it matter?
Creating a divot after your ball strike is crucial for optimal gameplay. If you’re not making a divot, you’re unnecessarily making the game harder.
Striking the ball without a divot requires exceptional skill, which means your swing bottom is either at or just before the ball. This makes it challenging to measure the height of your swing bottom consistently.
Ideally, the bottom of your swing should be in front of the ball, with downward pressure. To achieve this, your weight should be forward, and the club should lean forward as well.
This lets you strike the ball first and then apply pressure into the ground, creating a divot.
Failure to move your weight forward or having the club lean backward will result in the swing bottom behind the ball, leading to scooping and inconsistent contact. Additionally, maintaining proper posture throughout the swing is essential.
Improving your strike requires a combination of technical adjustments and skill development. Practicing chip shots, enhancing club shaft control, and investing time in exercises tailored for impact dynamics will refine your swing and create positive mental representations.
Over time, your brain will automatically generate the correct shapes and movements, allowing you to strike the ball more effectively, without conscious effort.
To truly enhance your golf performance, explore the exercises provided in the app to improve your control and proficiency in creating divots.
Control Divot Depth
Let’s talk about posture and pitching. Just like in full swings, maintain a straight back and tilt forward from the hips without rounding the upper body. Keep the knees slightly flexed. For optimal ball contact, aim for a descending blow.
Swing down to the low point instead of trying to lift the club. To avoid hitting too thin or behind the ball, stand tall with arms hanging down and the club lightly resting on the ground.
This allows for a shallow descending blow. Find the correct posture height to gauge ground contact for better ball striking.
Conclusion
Using a divot tool is crucial for repairing pitch marks on the golf course. The tool should be inserted at a 45-degree angle into the higher part of the mark, and the soil should be pushed forward to fill the hole. Properly repairing ball marks immediately helps maintain the course’s standard conditions.
Making a divot when striking the ball is essential for optimal gameplay, as it allows for consistent contact and downward pressure. Posture, technique, and practice are vital to controlling divot depth and improving overall golf performance.
FAQs
How do you fix a divot with a tee?
Answer: The tee or the ball holder can also be used as a divot tool. Because it has a pointy edge. So just by inserting and pushing the soil inwards, a pitch mark, with the tee, a divot or pitch mark can easily be repaired.
How do you use the free repair tool?
Answer: as mentioned before, you have to take your divot tool, insert it into the higher crater of the hole, and push the soil inwards. Two simple steps, insert and push forward and level things up by tapping over it with the putter.
What is a golf ball marker divot tool?
Answer: The golf ball marker or the tee, having a pointy edge, can also be used as a divot tool. With the help of the pointy edge of the tee, You can easily penetrate the soil and fix a pitch mark.