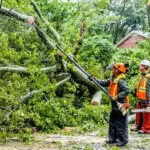
Beginner carpenter? This article will guide you to the 57 Carpenter Tools List With Pictures and Uses: PDF Download. It’s perfect for new carpenters in the USA. We focus on a simple carpenter tools list for beginners. You’ll find pictures with uses for each tool and you can download the PDF.
Plus, a handy PDF download is included. Our goal? To introduce basic carpentry tools with easy explanations. Get ready to build your skills with this beginner’s guide to carpentry tools. Let’s dive into the essentials every starter needs!
Table of Contents
58 Carpenter Tools List With Pictures and Uses
Discover the must-have tools every beginner carpenter needs to kickstart their projects.
1. Claw Hammer
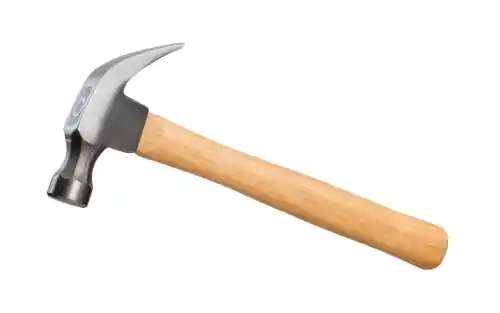
What It Is
A claw hammer is a handy tool that bangs nails into wood and yanks them out when needed. It’s a must-have for anyone starting with carpentry.
Why It’s Important
This tool shines for simple jobs like making frames or patching up boards. I’ve used it to fix a wobbly shelf, and it’s a game-changer for beginners who want quick wins.
Main Uses
It drives nails into wood fast. It also pulls out bent or old nails with ease. Two jobs and one tool are pretty cool, right?
Key Features
Pick one with a rubber grip it feels good in your hand. A 20 oz. weight works best; it’s not too heavy but gets the job done.
How to Use It
Grab the handle near the bottom. Swing it with your wrist, not your whole arm. That way, you hit the nail straight and don’t tire out fast.
2. Tape Measure
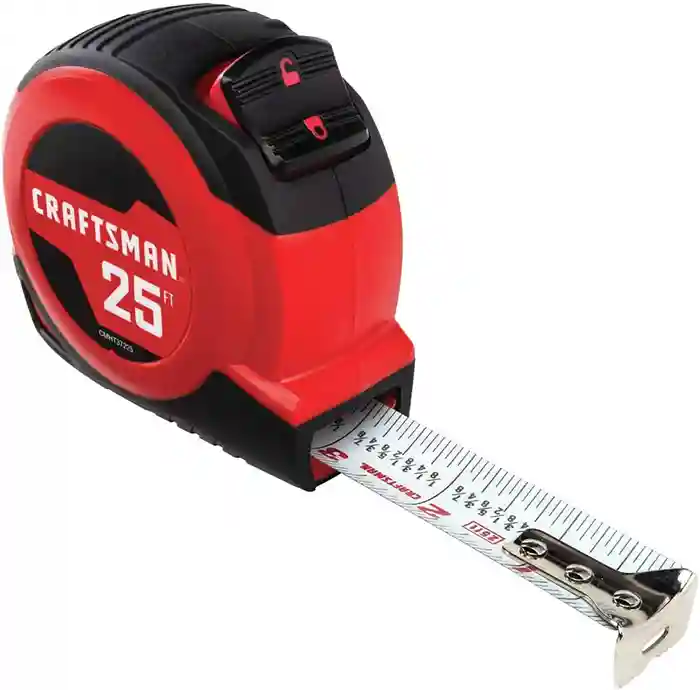
What It Is
A tape measure is a tool that tells you how long or wide something is. It’s a bendy strip with numbers that pull out and snap back.
Why It’s Important
Every beginner needs it for carpentry projects. Without it, your cuts might be off. I once skipped measuring a shelf—yep, it didn’t fit!
Main Uses
It measures wood before you cut. It also checks if things are even. Simple, but it saves headaches.
Key Features
Get a 25-foot one that locks tight. A loose hook can mess up your numbers, so check that it stays firm.
How to Use It
Pull the tape out. Hook it on one end, stretch it, and read the marks. Lock it to hold your spot.
3. Level
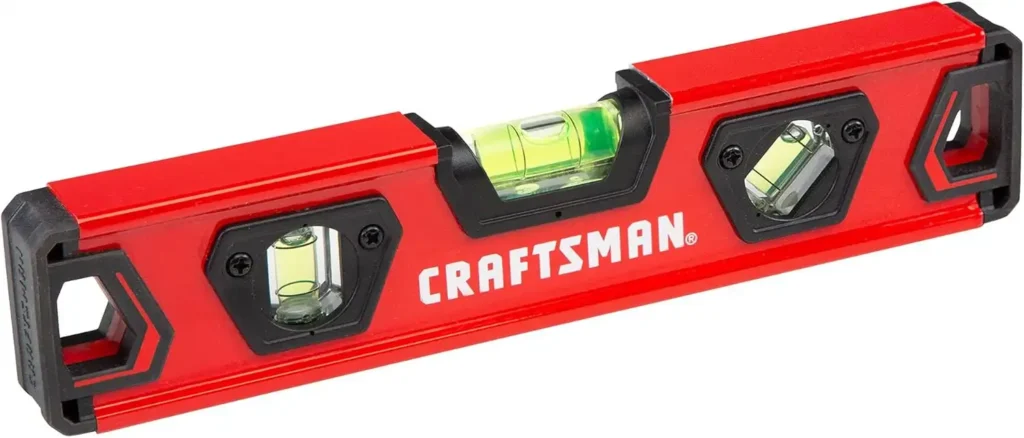
What It Is
A level is a tool that shows if something is flat or straight. It has a little bubble in liquid that moves to tell you.
Why It’s Important
Beginners need it to keep projects even. A crooked shelf looks bad—I learned that the hard way on my first try!
Main Uses
It checks if surfaces are flat side-to-side. It also makes sure things stand straight up and down.
Key Features
Grab a 48-inch one for most jobs. A small 8-inch torpedo level fits tight spots. Make sure the bubble stays clear.
How to Use It
Set it on your wood. Watch the bubble—if it sits between the lines, you’re good. Adjust until it does.
4. Torpedo Level
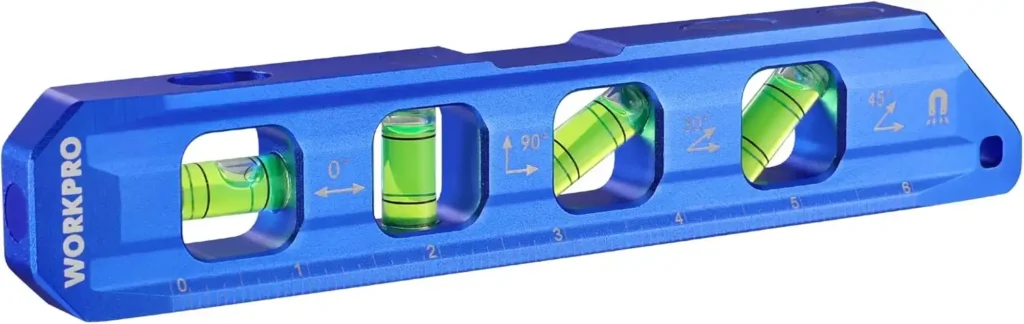
What It Is
A torpedo level is a small tool that checks if things are flat or straight. It’s tiny, with a bubble inside to show you.
Why It’s Important
Beginners love it for tight spots. I used one to fix a little shelf it kept everything neat where a big level wouldn’t fit.
Main Uses
It makes sure small surfaces are flat. It also checks if things stand straight in narrow places.
Key Features
Get an 8-inch one it’s easy to carry. Look for a strong frame and a clear bubble that’s easy to see.
How to Use It
Place it on your wood. Look at the bubble. If it’s between the lines, you’re set. Tilt until it fits right.
5. Sliding Bevel (T-Bevel)
What It Is
A sliding bevel, or T-Bevel, is a tool that copies angles. It has a handle and a blade you can move and lock.
Why It’s Important
Beginners need it to mark angles right. I used one for a slanted shelf once it saved me from guessing wrong!
Main Uses
It sets an angle to trace on wood. It also copies angles from one spot to another fast.
Key Features
Pick one with a tight lock. A metal blade lasts longer than plastic bent plastic throws off your lines.
How to Use It
Slide the blade to match an angle. Tighten the lock. Hold it on your wood and mark the line.
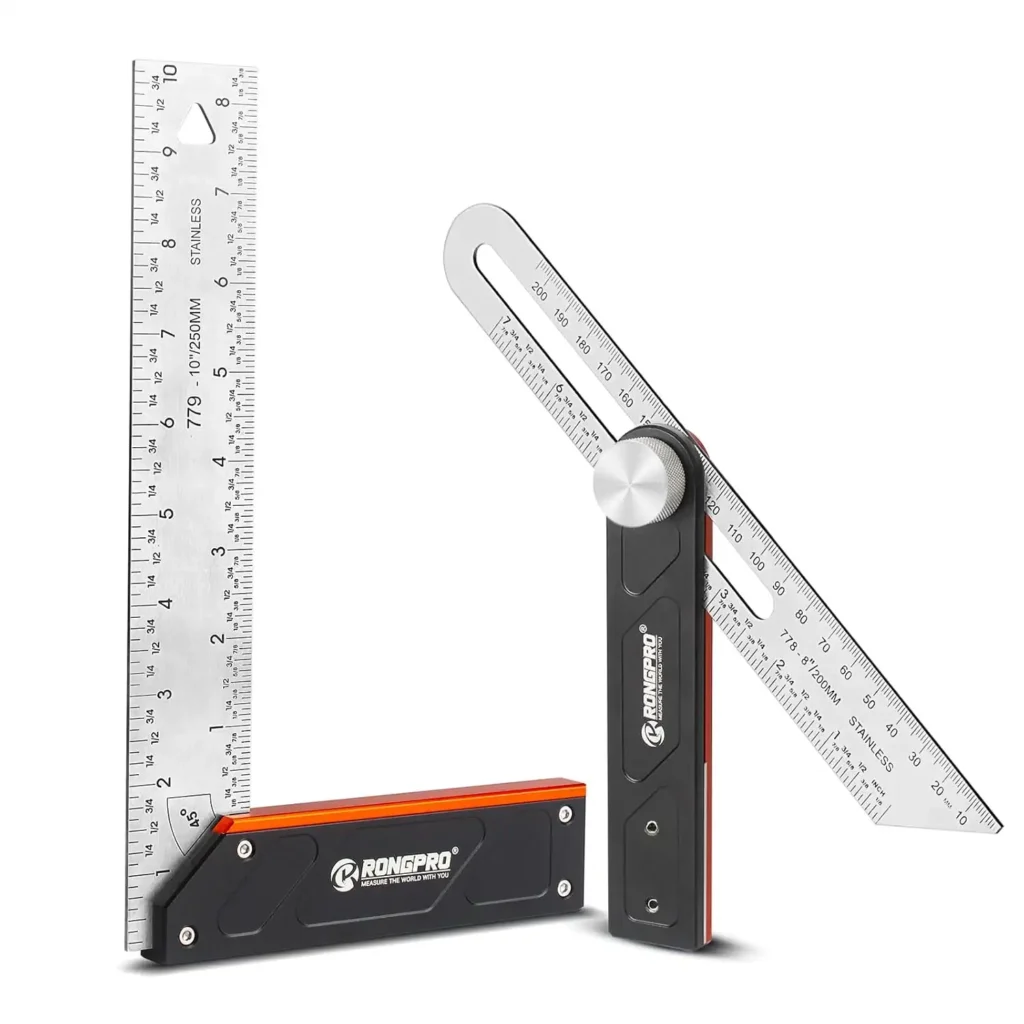
6. Layout Square (Combination Square)
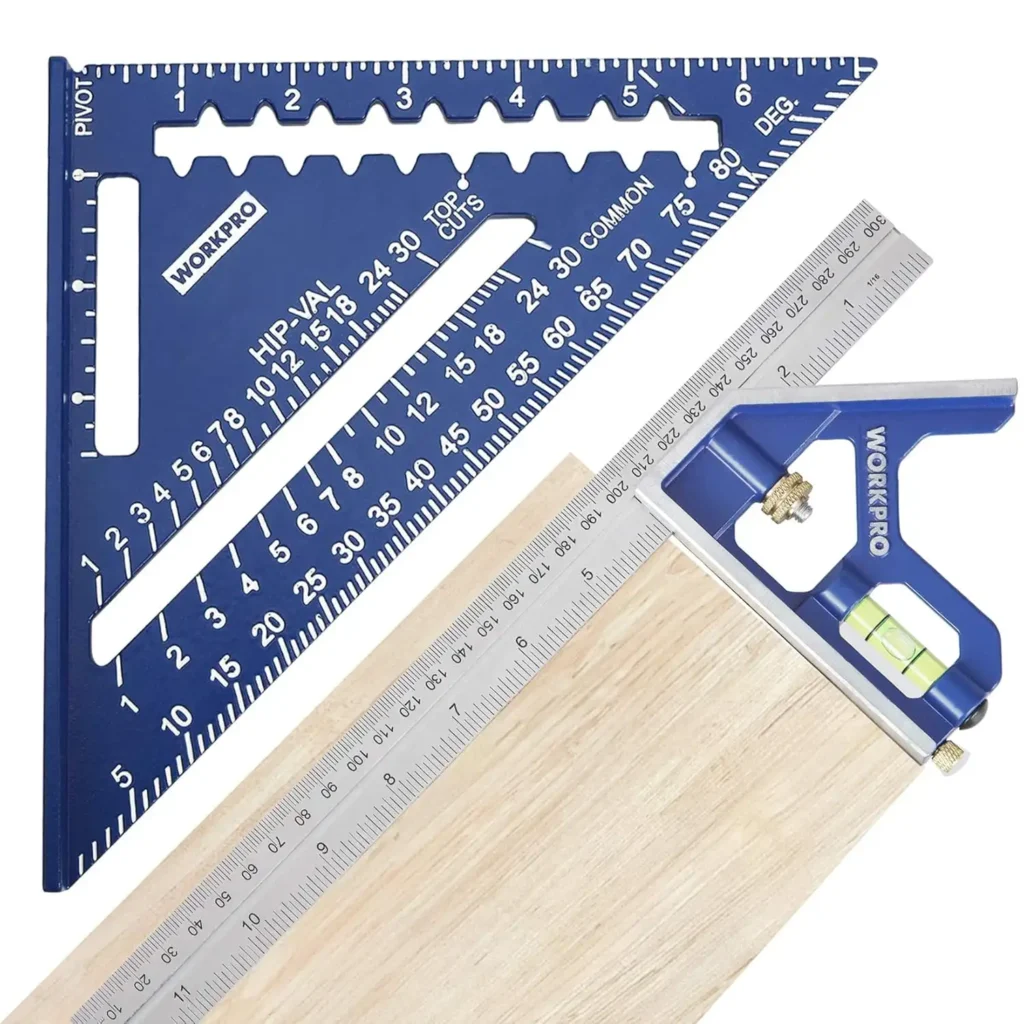
What It Is
A layout square, or combination square, is a tool for marking straight lines and angles. It’s got a ruler and a head that slides.
Why It’s Important
Beginners need it for square cuts. I messed up a box once crooked lines! This tool keeps your work neat.
Main Uses
It draws 90-degree lines on wood. It also marks other angles for cuts like 45 degrees.
Key Features
Get a 6-inch one for small jobs. A metal head stays true plastic can wear out fast and ruin your marks.
How to Use It
Slide the head to your spot. Lock it. Line it up with the wood’s edge and draw your line.
7. Speed Square
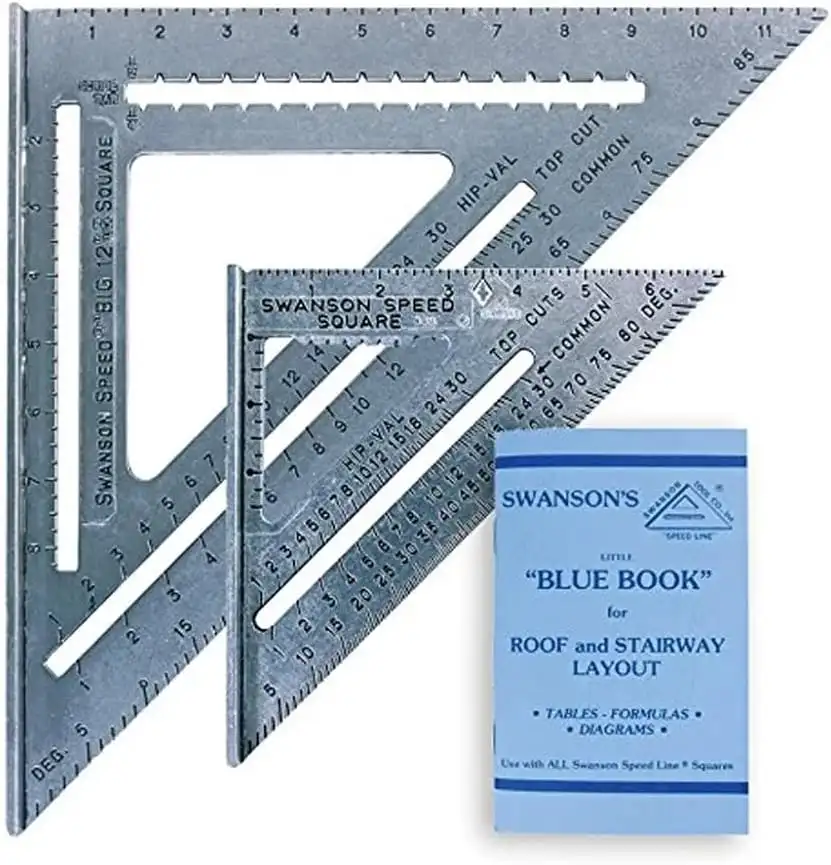
What It Is
A speed square is a triangle tool that marks lines and angles fast. It’s small and fits in your hand.
Why It’s Important
Beginners need it for quick, straight cuts. I used one to build a birdhouse it made angles so easy!
Main Uses
It draws 90-degree lines for square cuts. It also marks other angles like 45 degrees for slanted edges.
Key Features
Get a metal one it lasts longer. A 7-inch size works great for most beginner carpentry jobs.
How to Use It
Hold it against the wood’s edge. Line up the angle you want. Draw your mark with a pencil.
8. Caliper
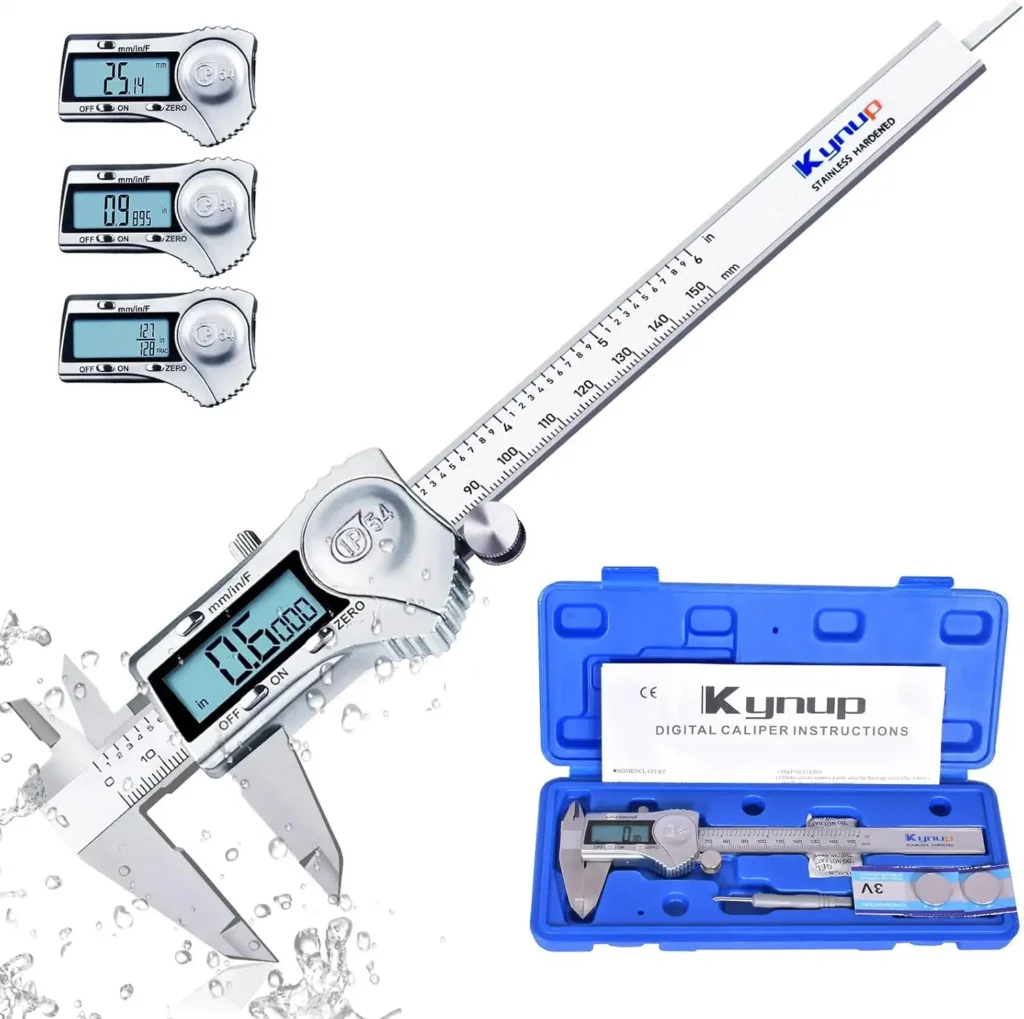
What It Is
A caliper is a tool that measures tiny distances. It looks like a double “F” with jaws that slide.
Why It’s Important
Beginners use it to get exact sizes. I checked a board’s width once saved me from a bad cut!
Main Uses
It measures outside stuff, like wood width. It also checks inside spaces, like holes or slots.
Key Features
Pick a metal one it’s tough and lasts. A digital caliper shows numbers clearly, no guessing is needed.
How to Use It
Open the jaws. Fit them around your wood. Tighten the screw and read the size.
9. Compass
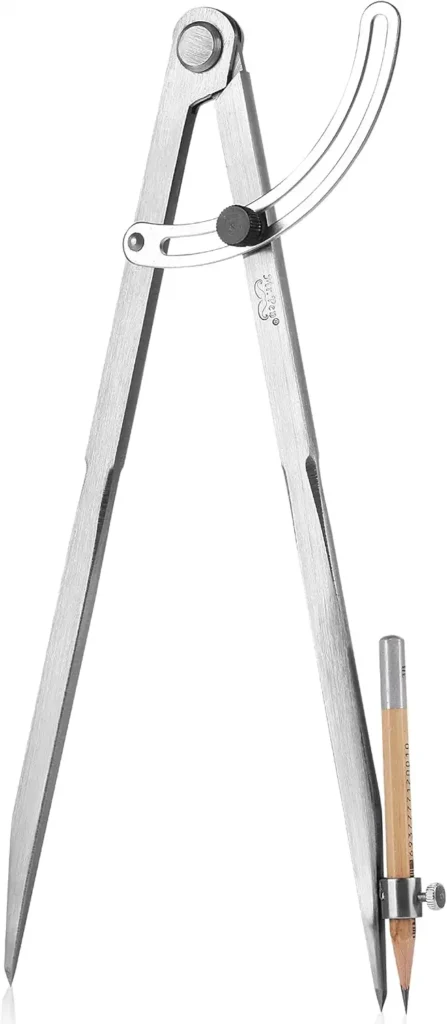
What It Is
A compass is a tool that draws circles and curves on wood. It’s got two legs one sharp, one with a pencil.
Why It’s Important
Beginners need it for round shapes. I made a cool clock once it helped me get the circle just right!
Main Uses
It marks perfect circles for cutting. It also draws smooth arcs for fun designs.
Key Features
Get a metal one it stays strong. A wing nut locks it tight so your size doesn’t slip.
How to Use It
Stick the sharp leg in the wood. Set the pencil leg to your size. Spin it to draw your circle.
10. Scribe/Dividers
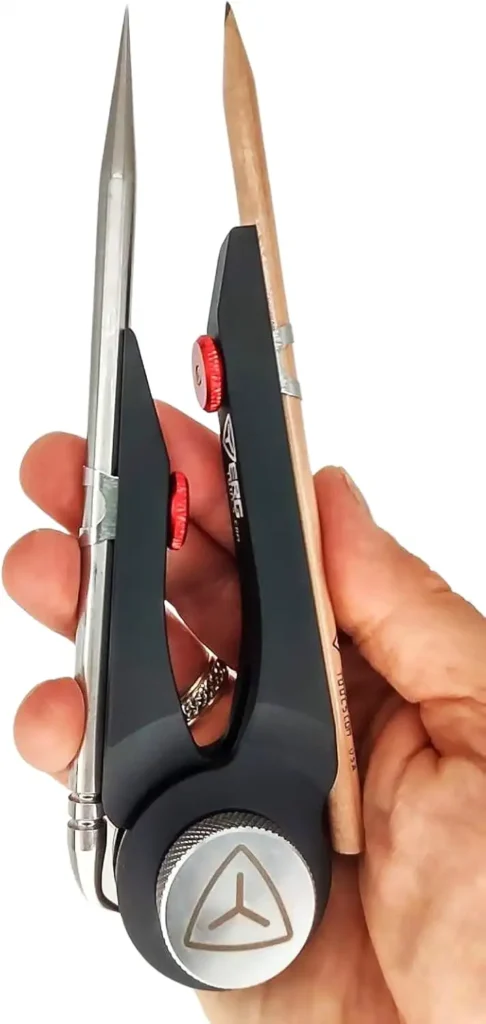
Scribe/Dividers
What It Is
A scribe, or divider, is a tool with two sharp legs that mark lines or spaces. It looks like a compass but scratches instead.
Why It’s Important
Beginners need it to copy sizes exactly. I used it to match a shelf gap once worked like a charm!
Main Uses
It scratches lines on wood for cuts. It also sets even spaces between marks.
Key Features
Pick a metal one it stays sharp. A tight screw keeps the legs from moving when you set it.
How to Use It
Spread the legs to your size. Press one leg on the wood. Drag the other to mark your line.
11. Chalk Line (with Blue Chalk)
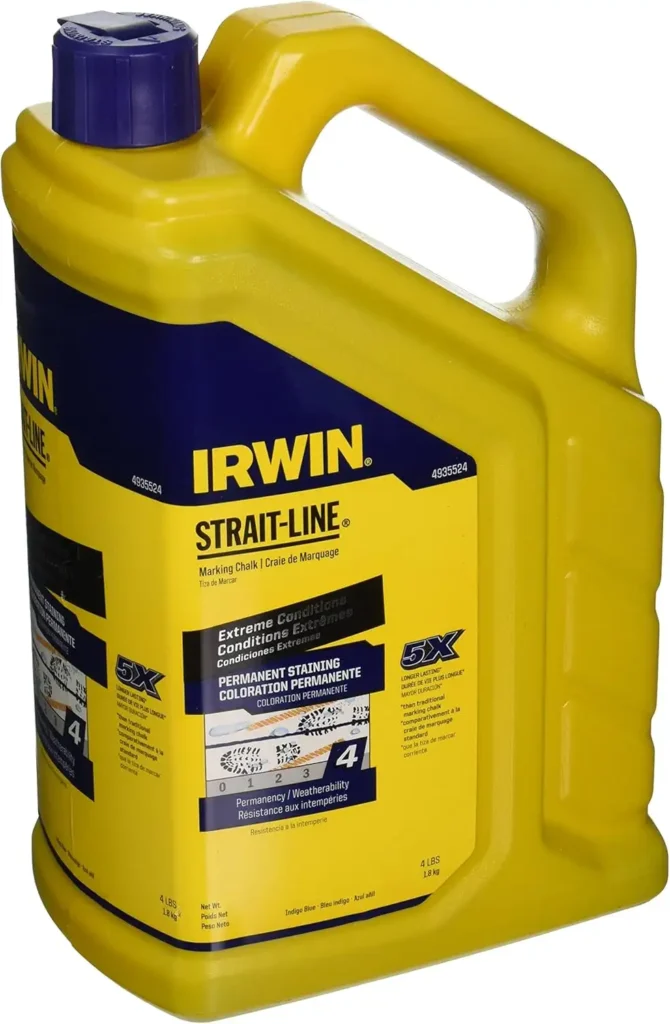
What It Is
A chalk line with blue chalk is a tool that makes long, straight lines. It’s a string in a box full of chalk powder.
Why It’s Important
Beginners need it for big projects. I marked a floor once it kept my cuts super straight!
Main Uses
It snaps a line on wood or floors for cutting. It marks long guides fast.
Key Features
Get one with a strong string. A rewind crank makes it quick to roll back up after use.
How to Use It
Pull the string out. Hook one end, stretch it tight, and snap it. Blue chalk shows your line.
12. Utility Knife
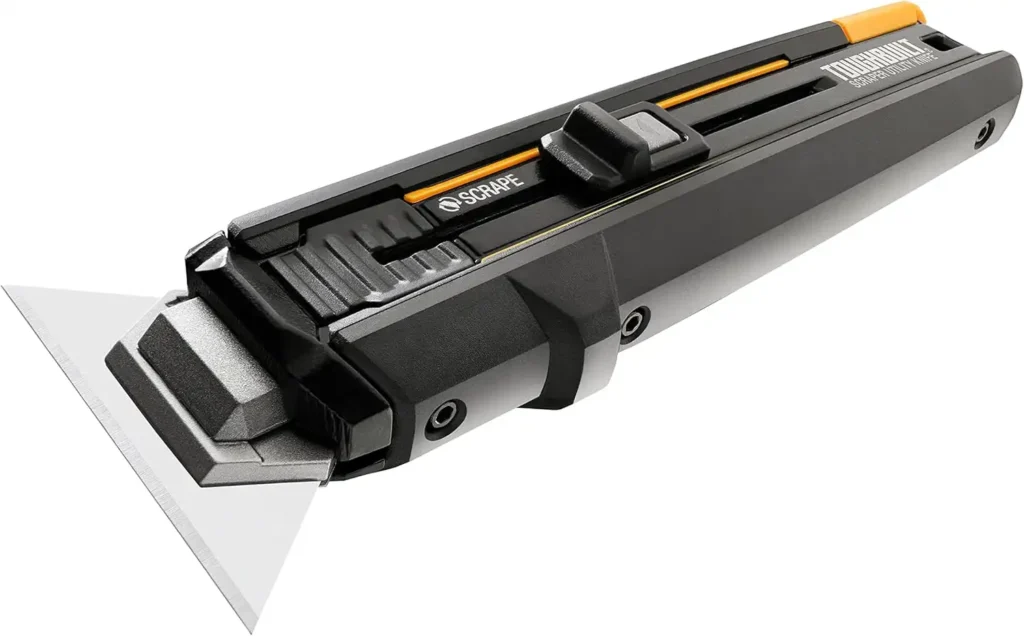
What It Is
A utility knife is a tool with a sharp blade that cuts stuff. It’s small and folds up safely.
Why It’s Important
Beginners need it for little jobs. I trimmed a board edge once it made the fit perfect!
Main Uses
It cuts wood or marks lines. It also cleans up rough spots fast.
Key Features
Get one with swap-out blades. A grip that hides the blade keeps your fingers safe.
How to Use It
Pull the blade out. Hold it firm and cut along your line. Fold it back when done.
13. Hand Saw
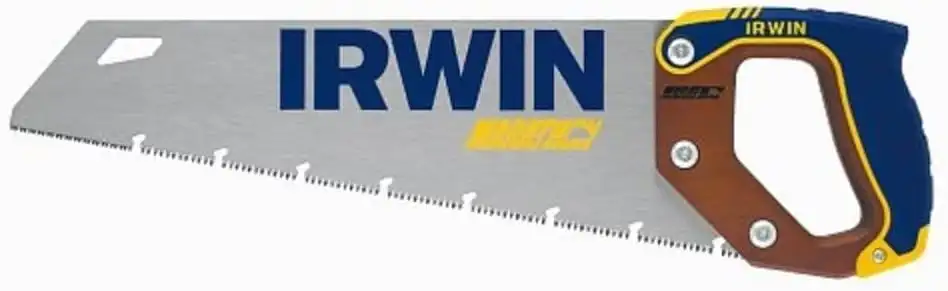
What It Is
A hand saw is a tool with a long, toothy blade for cutting wood. You push it back and forth by hand.
Why It’s Important
Beginners need it for simple cuts when power tools aren’t around. I cut boards for a box once it’s old-school but works great!
Main Uses
It slices wood into smaller pieces. It also trims edges to fit just right.
Key Features
Look for a sharp blade with lots of teeth about 8 per inch cuts smoothly. A comfy handle helps your hand stay happy.
How to Use It
Hold the handle tight. Start with short pushes, then go longer. Keep it straight so your cut doesn’t wiggle off track.
14. Pull Saw
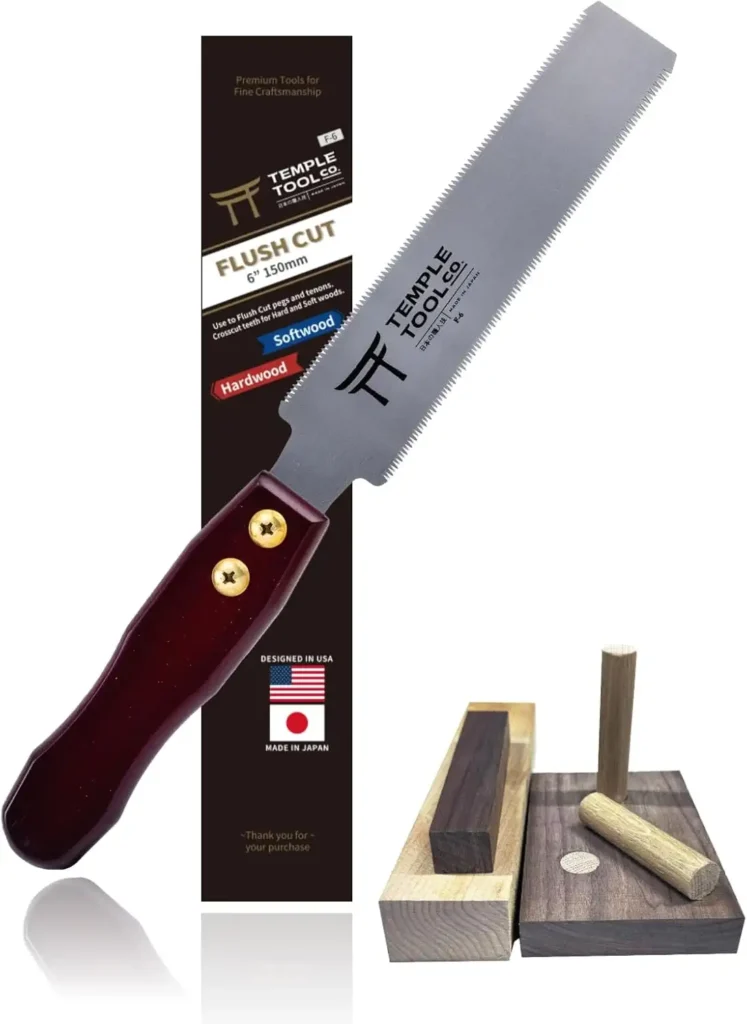
What It Is
A pull saw is a thin tool with a sharp blade that cuts wood. You pull it to slice, not push.
Why It’s Important
Beginners like it for clean, careful cuts. I trimmed a shelf with one it’s so easy to control!
Main Uses
It cuts wood into small pieces. It also makes fine lines for pretty edges.
Key Features
Get one with a thin blade about 10 teeth per inch works smoothly. A soft grip keeps your hand comfy.
How to Use It
Hold the handle firm. Pull it toward you to start cutting. Go slow and steady so the blade stays straight.
15. Chisel
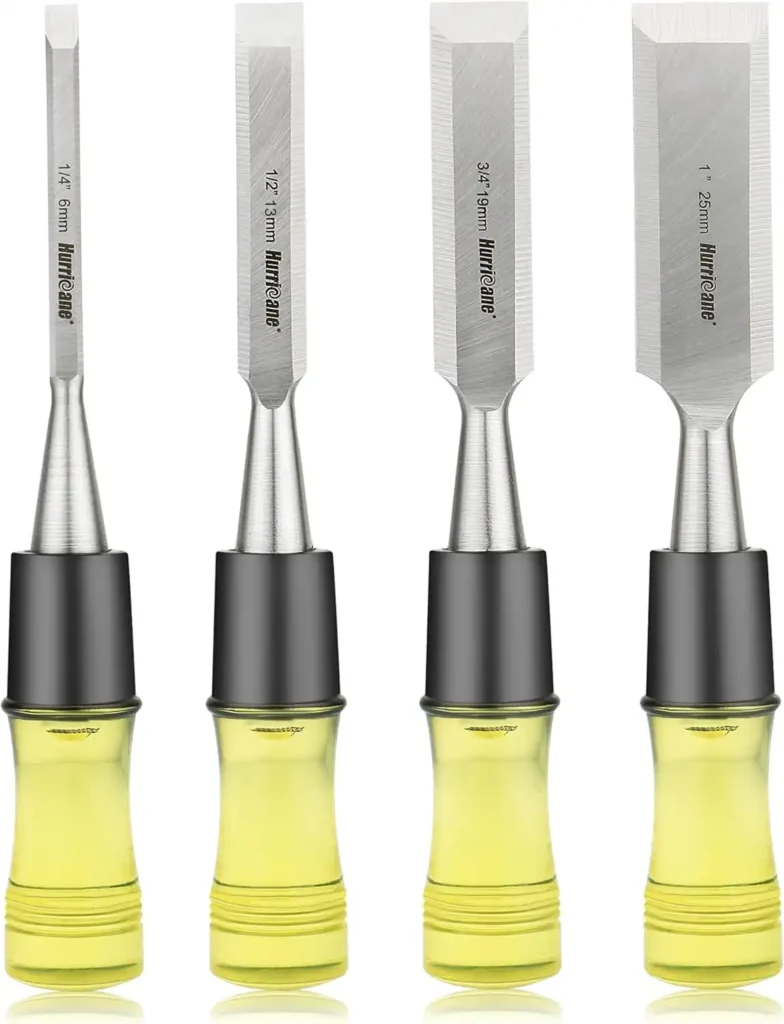
What It Is
A chisel is a tool with a flat, sharp edge for carving wood. It’s got a handle you hold or hit.
Why It’s Important
Beginners need it to shape wood nicely. I cleaned up a rough joint once it made my box look way better!
Main Uses
It cuts wood into shapes. It also smooths out bumpy spots after sawing.
Key Features
Get a strong one ¼-inch to 1-inch sizes that work for most jobs. A wood handle with a metal cap lasts longer when you tap it.
How to Use It
Hold the handle. Push the edge into the wood or tap it with a hammer. Go slow to keep it neat.
16. Hand Plane
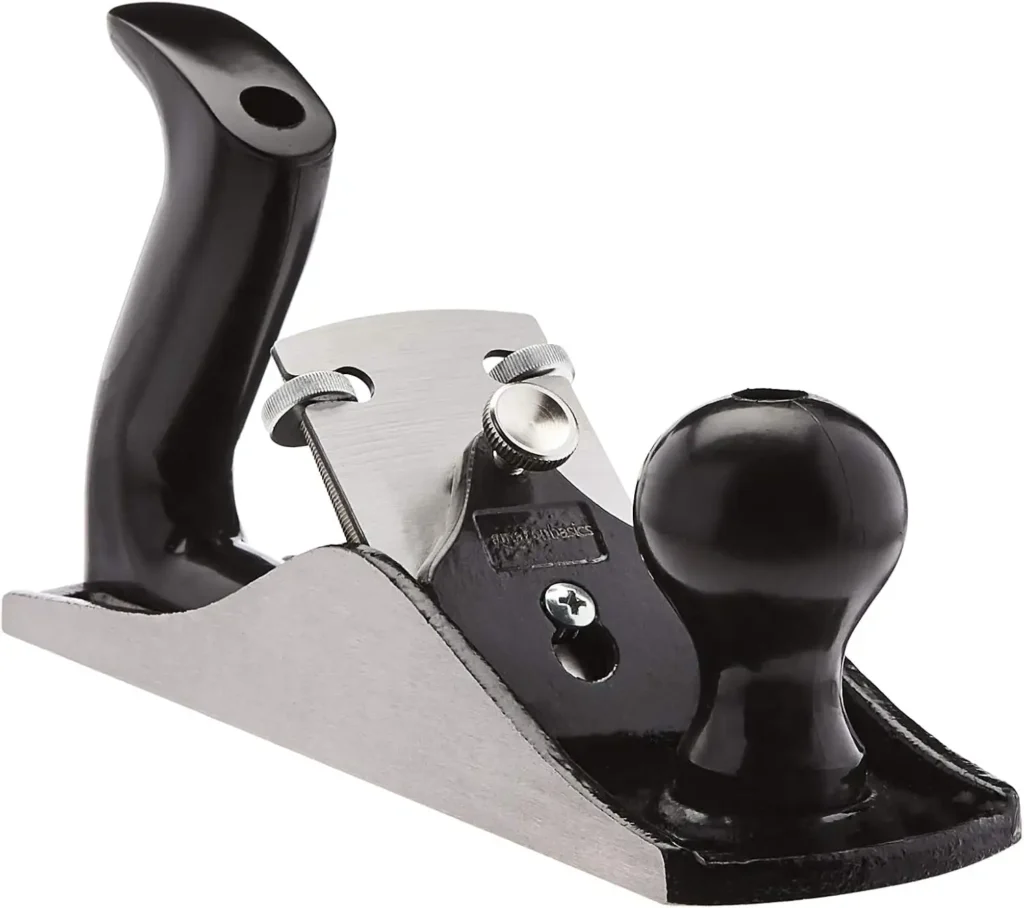
What It Is
A hand plane is a tool that smooths wood with a sharp blade. It’s like a big razor you push.
Why It’s Important
Beginners use it to make wood flat and nice. I shaved a rough board once it felt so smooth after!
Main Uses
It flattens bumpy wood. It also rounds edges to look good.
Key Features
Pick one with a sharp blade you can adjust. A solid body metal or wood feels steady in your hands.
How to Use It
Hold the handles. Push it over the wood, front to back. Keep the blade low so it cuts thin and even.
17. Screwdriver
What It Is
A screwdriver is a tool that turns screws into wood. It has a handle and a pointy tip.
Why It’s Important
Beginners need it to put things together tight. I fixed a loose chair with one it’s super handy!
Main Uses
It drives screws into wood. It also takes screws out if you mess up.
Key Features
Get a strong one with a flat or star tip. A soft grip makes it easy to hold.
How to Use It
Push the tip into the screw. Turn it right to tighten or left to loosen. Keep it steady.
18. Nail Set
What It Is
A nail set is a small tool that pushes nail heads into wood. It’s like a pointy stick.
Why It’s Important
Beginners use it for a clean finish. It hid nails on my shelf and looked so neat!
Main Uses
It sinks nails below the surface. It helps wood look smooth before painting.
Key Features
Pick one with a curved tip it grabs nails well. A small size fits your hand.
How to Use It
Put the tip on the nail. Tap it with a hammer. Stop when the nail’s below the top.
19. Twist Drill Set
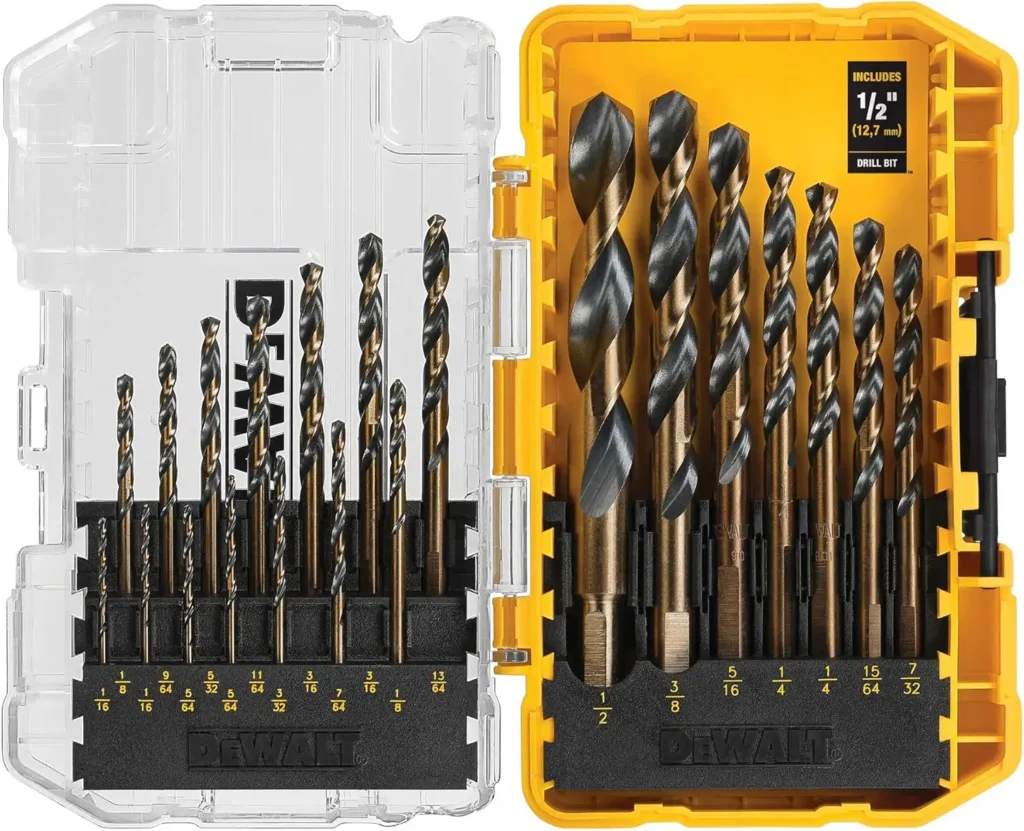
What It Is
A twist drill set is a bunch of little bits you twist by hand to make holes.
Why It’s Important
Beginners need it for tiny holes. I drilled a toy box once perfect fit!
Main Uses
It makes small holes in wood. It’s good for spots power drills can’t reach.
Key Features
Get a set of different sizes. Metal bits last longer than cheap ones.
How to Use It
Pick a bit. Hold it on the wood. Twist it by hand until the hole’s deep enough.
20. Drill Driver Set
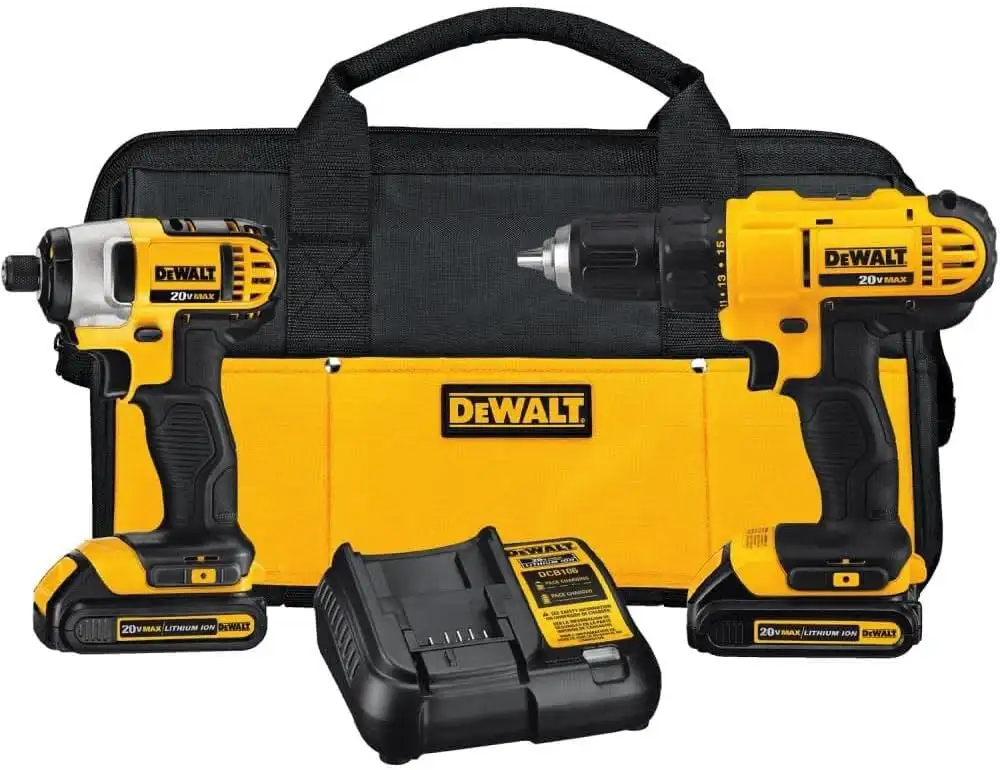
What It Is
A drill driver set is a group of hand tools that turn screws. They’re like mini screwdrivers.
Why It’s Important
Beginners use it for tight spots. I fixed a drawer with one saved the day!
Main Uses
It drives screws into wood. It also pulls screws out fast.
Key Features
Look for a set with flat and star tips. A short handle works in small places.
How to Use It
Fit the tip in the screw. Twist it right to tighten. Go left to take it out.
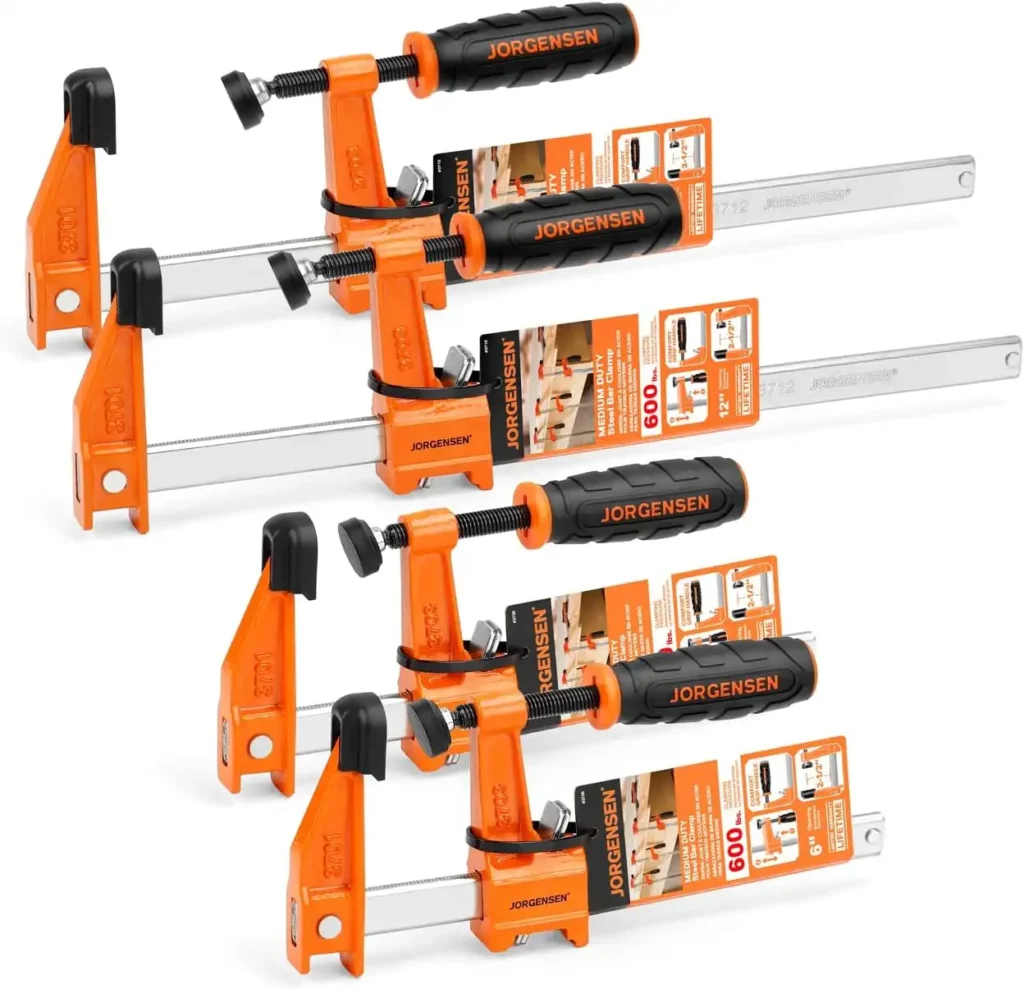
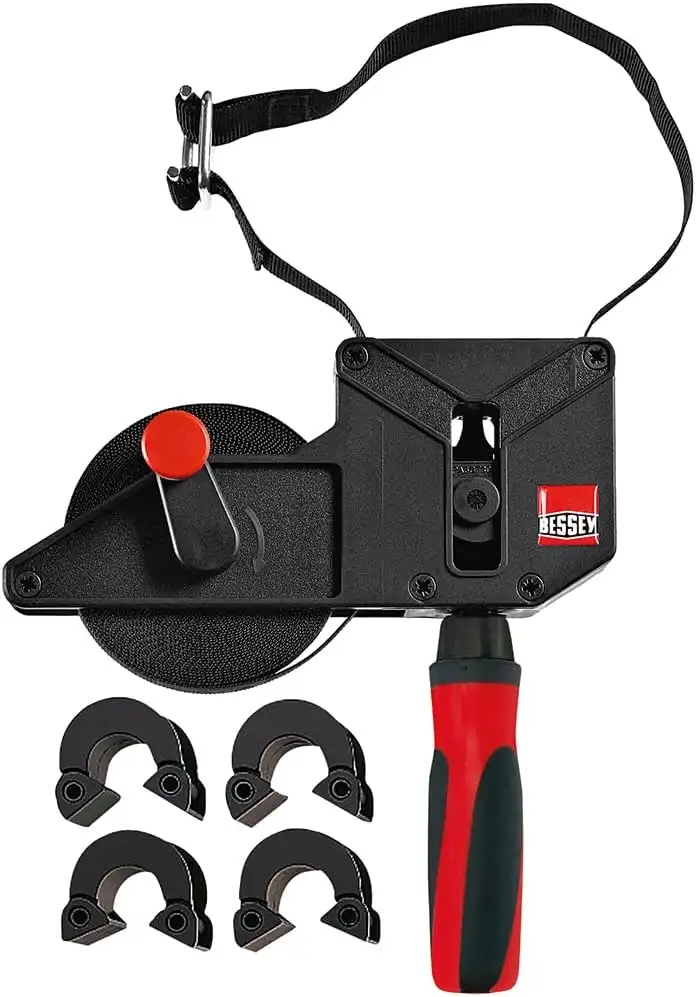
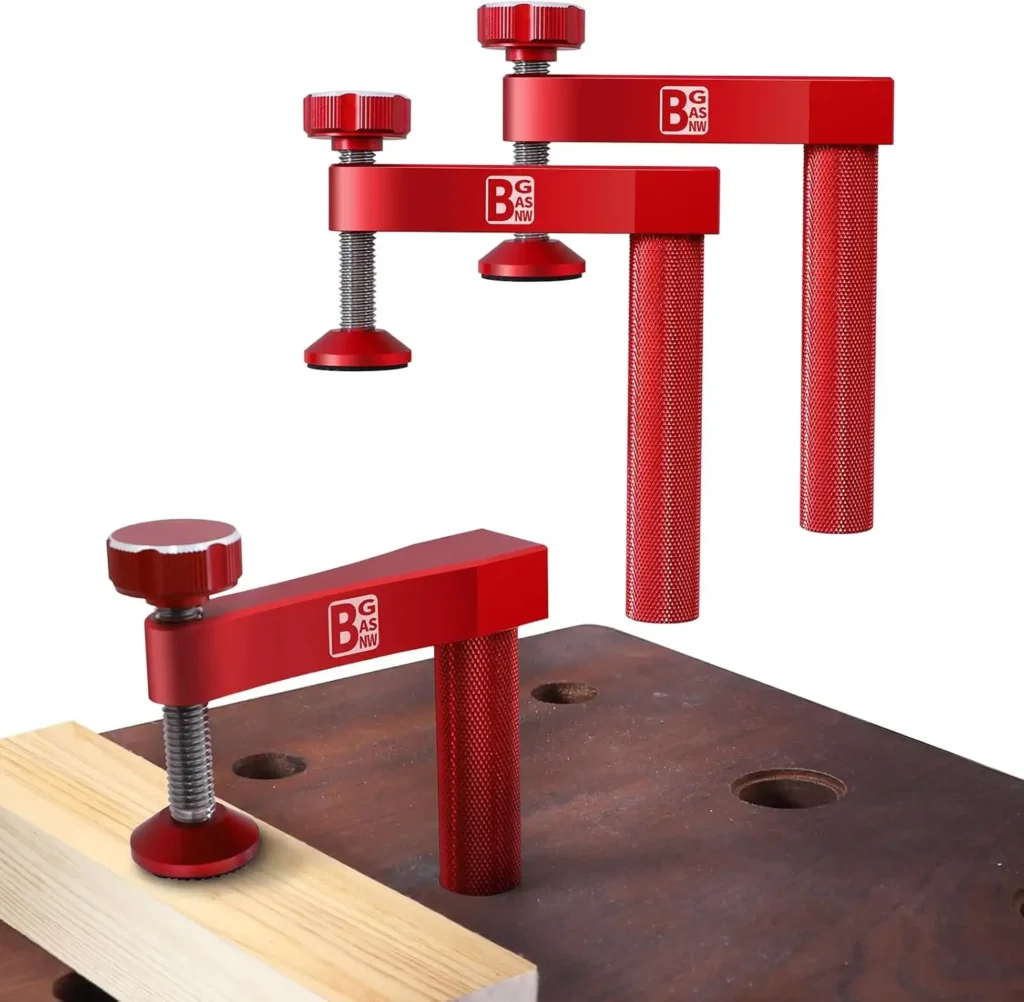
21. Clamp
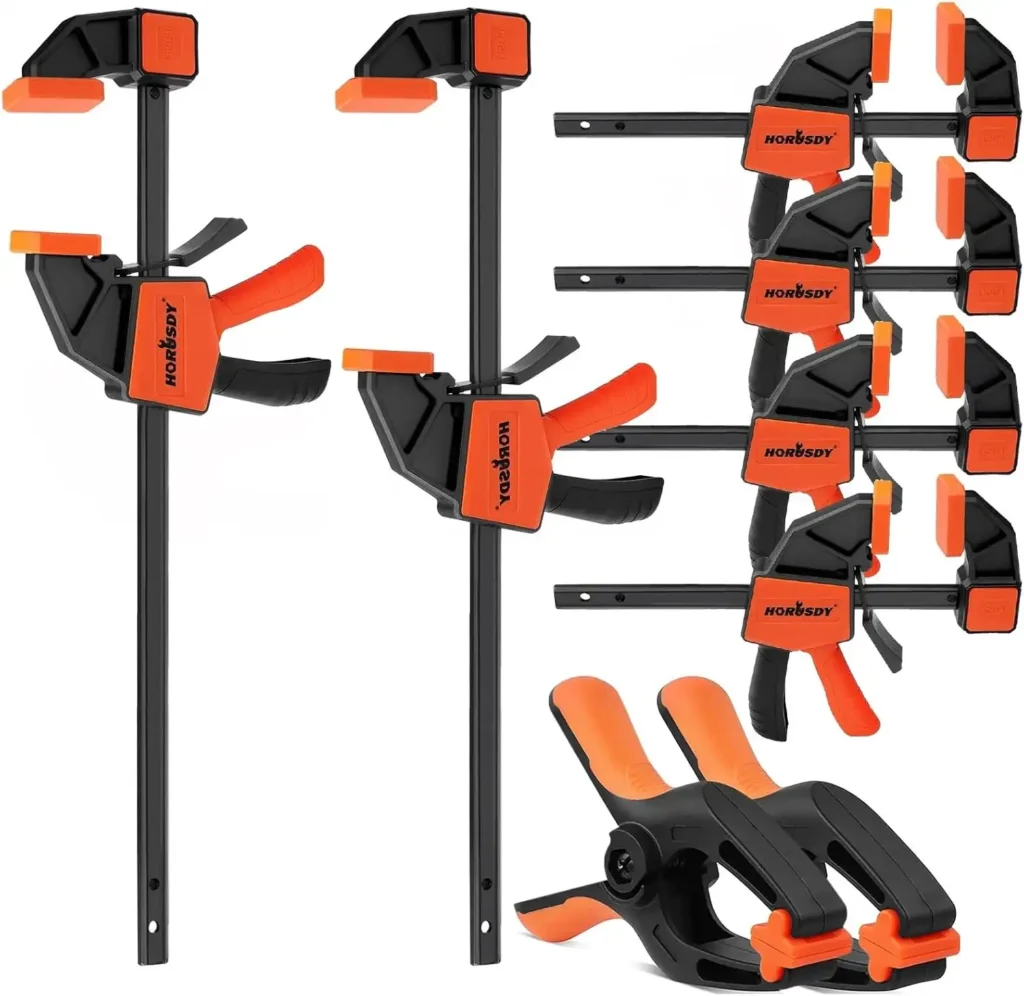
What It Is
A clamp is a tool that holds wood tight. It’s like a big hand that squeezes.
Why It’s Important
Beginners need it to glue stuff right. I held a frame together it stayed perfect!
Main Uses
It keeps wood still while the glue dries. It also holds pieces for cutting.
Key Features
Get a quick-grip one it’s fast. A big size grabs wider boards well.
How to Use It
Open the clamp. Put it on your wood. Squeeze or turn it until it’s tight.
22. Pipe Clamp
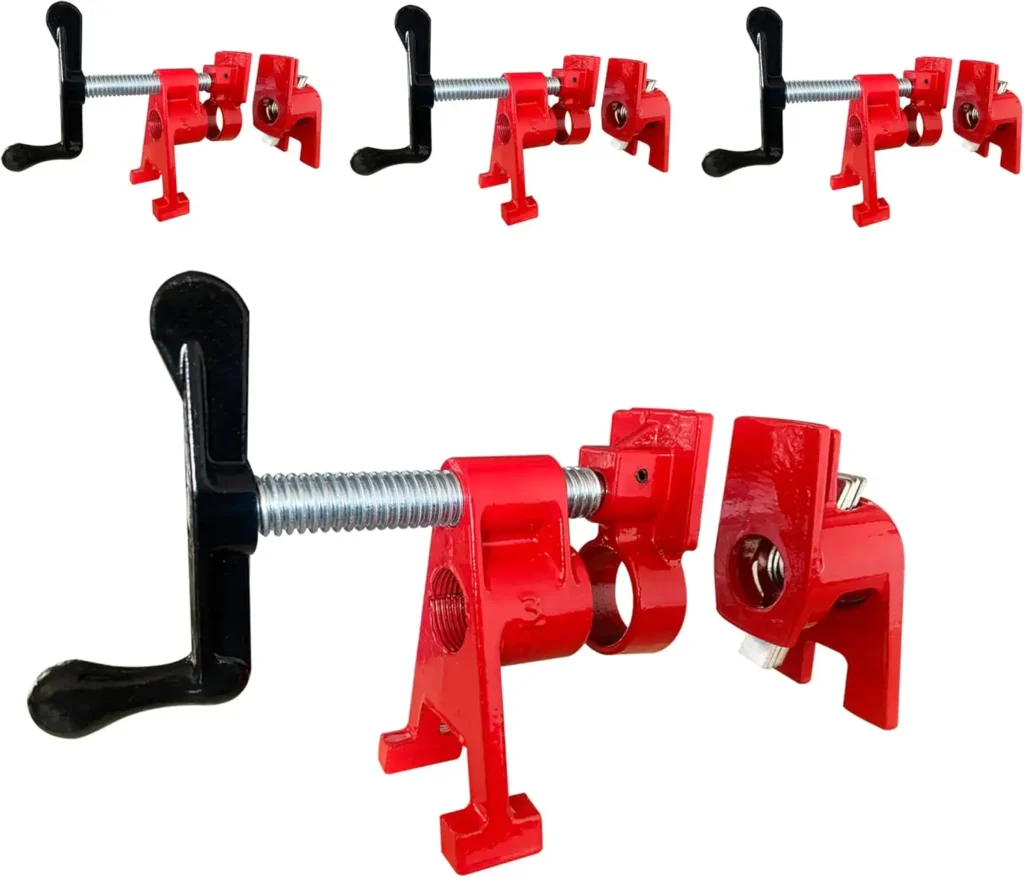
What It Is
A pipe clamp is a tool that holds big wood pieces tight. It uses a long pipe to squeeze.
Why It’s Important
Beginners need it for longboards. I glued a table once it kept everything straight!
Main Uses
It holds wood while glue dries. It also keeps big pieces still for cutting.
Key Features
Get one with a sturdy pipe fitting. A wide jaw grabs more wood at once.
How to Use It
Slide the clamp on the pipe. Put it on your wood and turn the handle until it’s snug.
23. C-Clamp
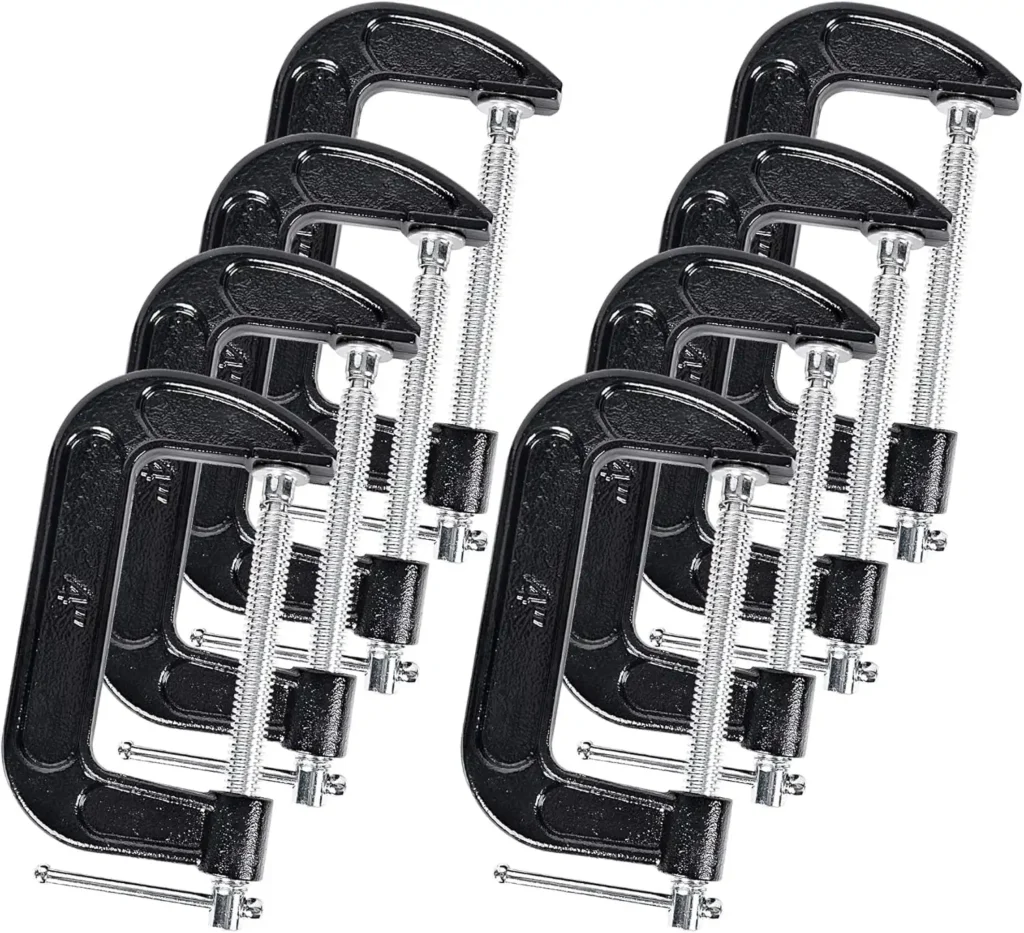
What It Is
A C-clamp is a small tool shaped like a “C” that locks wood tight.
Why It’s Important
Beginners use it for little jobs. I fixed a chair leg with one super easy!
Main Uses
It holds small wood pieces. It also presses stuff together tight.
Key Features
Pick a strong metal one. A 4-inch size works for most small tasks.
How to Use It
Open the “C.” Set it on your wood. Twist the screw to squeeze it shut.
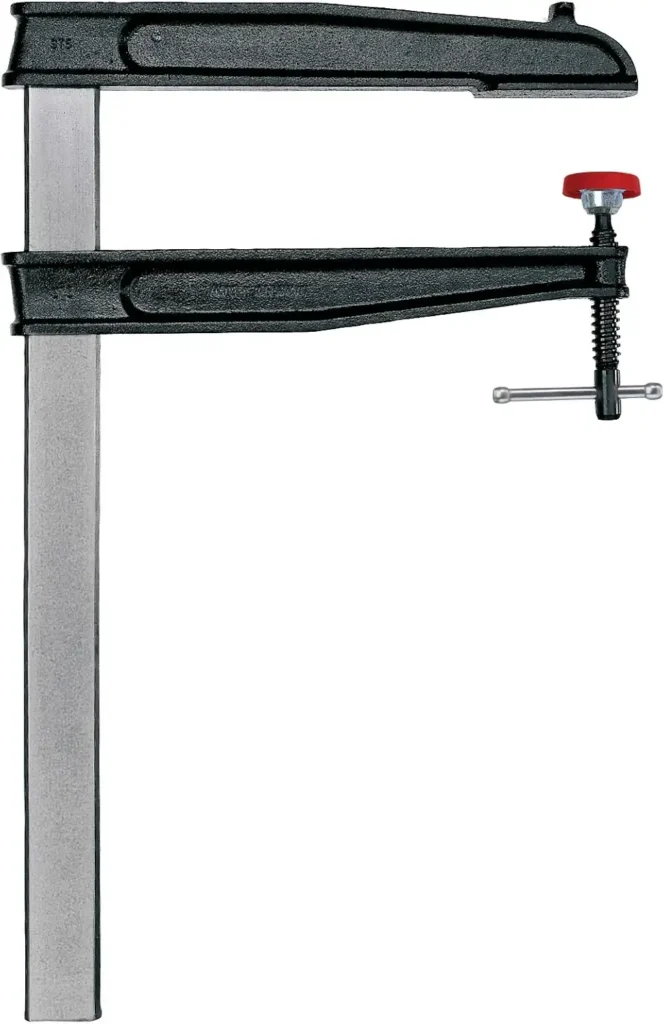
24. F-Clamp
What It Is
An F-clamp is a tool with an “F” shape that grips wood firmly.
Why It’s Important
Beginners like it for quick holds. I used one on a shelf it stayed put!
Main Uses
It keeps wood steady for gluing. It also holds pieces during cuts.
Key Features
Get one with a fast slide bar. A 12-inch reach is good for most jobs.
How to Use It
Slide the bar to fit. Place it on wood. Tighten the handle to lock it.
25. K-Clamp

What It Is
A K-clamp is a tool that reaches deep to hold wood tight. It’s long and skinny.
Why It’s Important
Beginners need it for middle spots. I clamped a big box it reached perfectly!
Main Uses
It grabs wood far inside. It holds big pieces steady.
Key Features
Look for a long arm 18 inches is great. A strong frame keeps it steady.
How to Use It
Stretch it out. Set it on your wood. Turn the knob until it’s tight.
26. Deep Bar Clamp
What It Is
A deep bar clamp is a tool with a long bar that squeezes wood hard.
Why It’s Important
Beginners use it for wide stuff. I held a door frame it worked awesome!
Main Uses
It locks big wood for gluing. It also keeps things still for sawing.
Key Features
Get one with a deep reach 24 inches is solid. A quick grip saves time.
How to Use It
Open the bar wide. Put it on your wood. Squeeze or twist it tight.
27. Quick-Grip Clamp
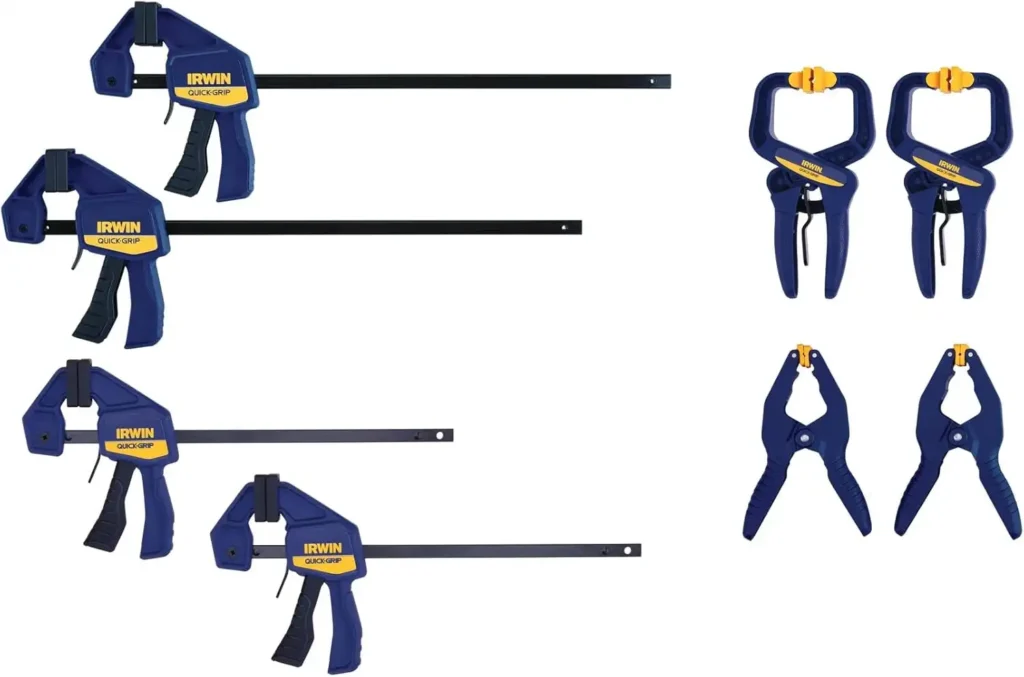
What It Is
A quick-grip clamp is a tool that holds wood fast with one hand. It’s got a trigger you squeeze.
Why It’s Important
Beginners love it for speedy jobs. I clamped a shelf in seconds it’s so simple to use!
Main Uses
It keeps wood tight while the glue sets. It also holds pieces for cutting quickly.
Key Features
Get one with a 12-inch reach. A soft pad on the jaws stops marks on your wood.
How to Use It
Slide it open. Put it on your wood. Squeeze the trigger until it grips tight. Release it with the button.
28. Edge Clamp
What It Is
An edge clamp is a tool that sticks trim to wood edges. It’s small with a side grip.
Why It’s Important
Beginners need it for neat edges. I used one on a table made it look pro!
Main Uses
It holds trim while the glue dries. It also keeps edges straight.
Key Features
Pick a metal one it’s strong. A 3-inch jaw works for most trim sizes.
How to Use It
Set it on the edge. Turn the screw to press the trim. Tighten until it stays put.
29. Strap Clamp
What It Is
A strap clamp is a tool with a long band that wraps around wood. It pulls stuff together.
Why It’s Important
Beginners use it for odd shapes. I fixed a chair frame and it held it perfectly!
Main Uses
It squeezes big projects tight. It works on circles or weird angles.
Key Features
Get one with a tough strap 20 feet is good. A ratchet makes tightening easy.
How to Use It
Wrap the strap around your wood. Pull it snug with the ratchet. Lock it in place.
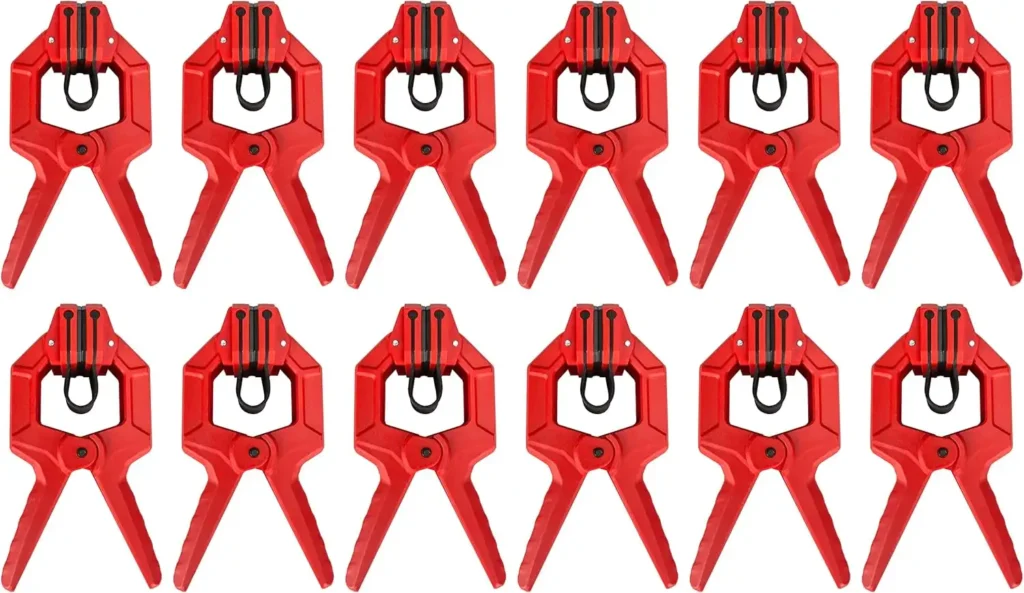
30. Spring Clamp
What It Is
A spring clamp is a tool that pinches wood like a clothespin. It’s quick and springy.
Why It’s Important
Beginners grab it for fast holds. I stuck a board down once to save my glue job!
Main Uses
It holds wood for a short time. It’s great for small fixes.
Key Features
Look for a 2-inch jaw it’s handy. Rubber tips keep your wood safe.
How to Use It
Squeeze the handles open. Put it on your wood. Let’s clamp it tight.
31. Hand Screw Clamp
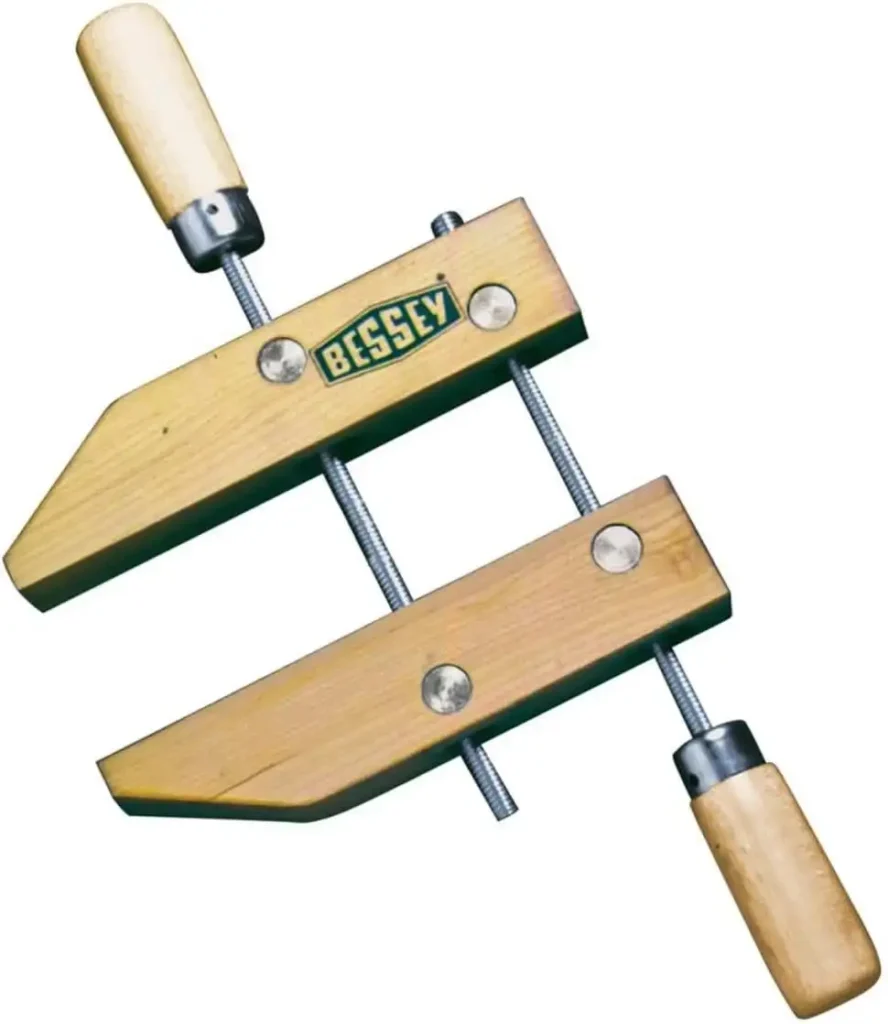
What It Is
A hand screw clamp is a tool with wood jaws and two screws. It squeezes even.
Why It’s Important
Beginners like it for slanted pieces. I held a box angle with it worked great!
Main Uses
It grips wood at funny angles. It also holds flat stuff tight.
Key Features
Get one with big jaws 10 inches is solid. Wood jaws don’t dent your project.
How to Use It
Turn both screws to open it. Set it on your wood. Twist them shut until it’s firm.
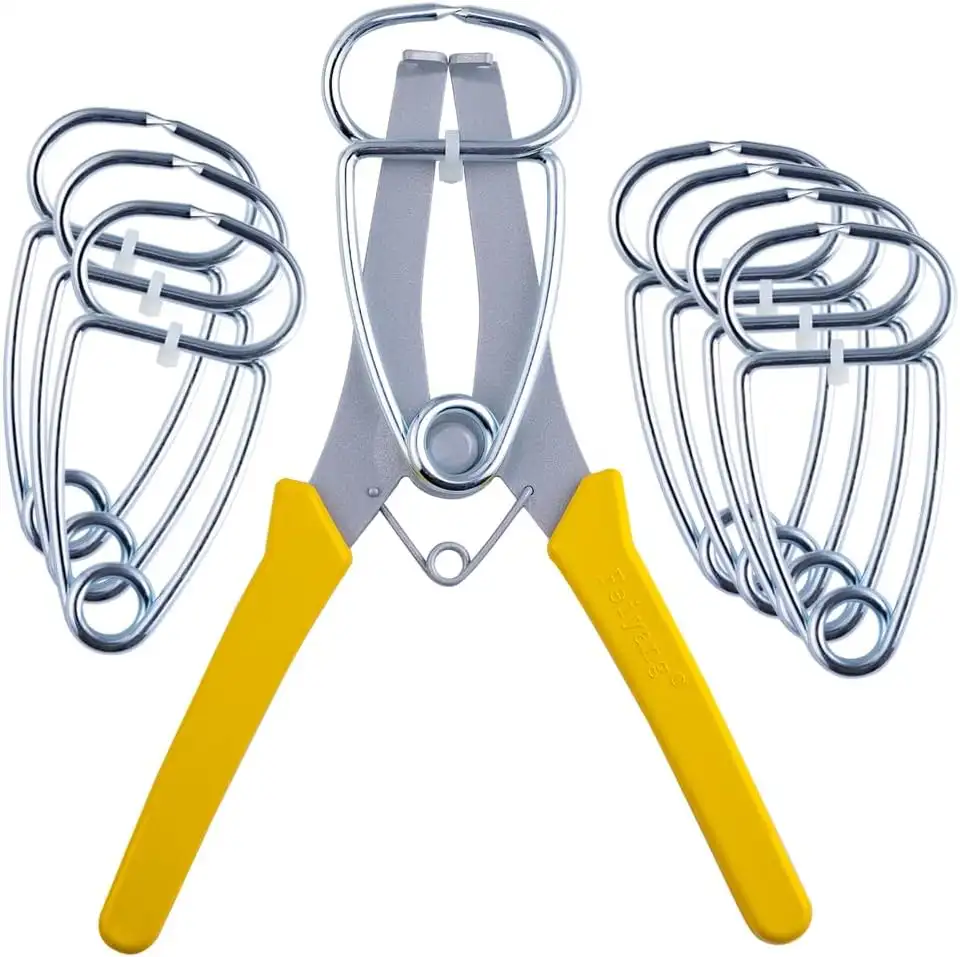
32. Assembly Square Clamp
What It Is
An assembly square clamp is a tool that keeps corners square. It grips wood at a 90-degree angle.
Why It’s Important
Beginners need it for neat boxes. I built a frame once it stayed perfect with this!
Main Uses
It holds wood corners tight. It helps glue set right.
Key Features
Get one with a strong grip. A 4-inch size fits most small jobs.
How to Use It
Set it on your corner. Tighten it down. Keep it there until the glue dries.
33. Bench Clamp (Bench Dog)
What It Is
A bench clamp, or bench dog, is a peg that hooks wood to your workbench.
Why It’s Important
Beginners use it to hold stuff steady. I clamped a board it didn’t budge!
Main Uses
It keeps wood still for sawing. It also holds big pieces flat.
Key Features
Pick a metal one it’s tough. A ¾-inch peg fits most benches.
How to Use It
Push it into a bench hole. Slide your wood against it. Tighten it up.
34. Jig
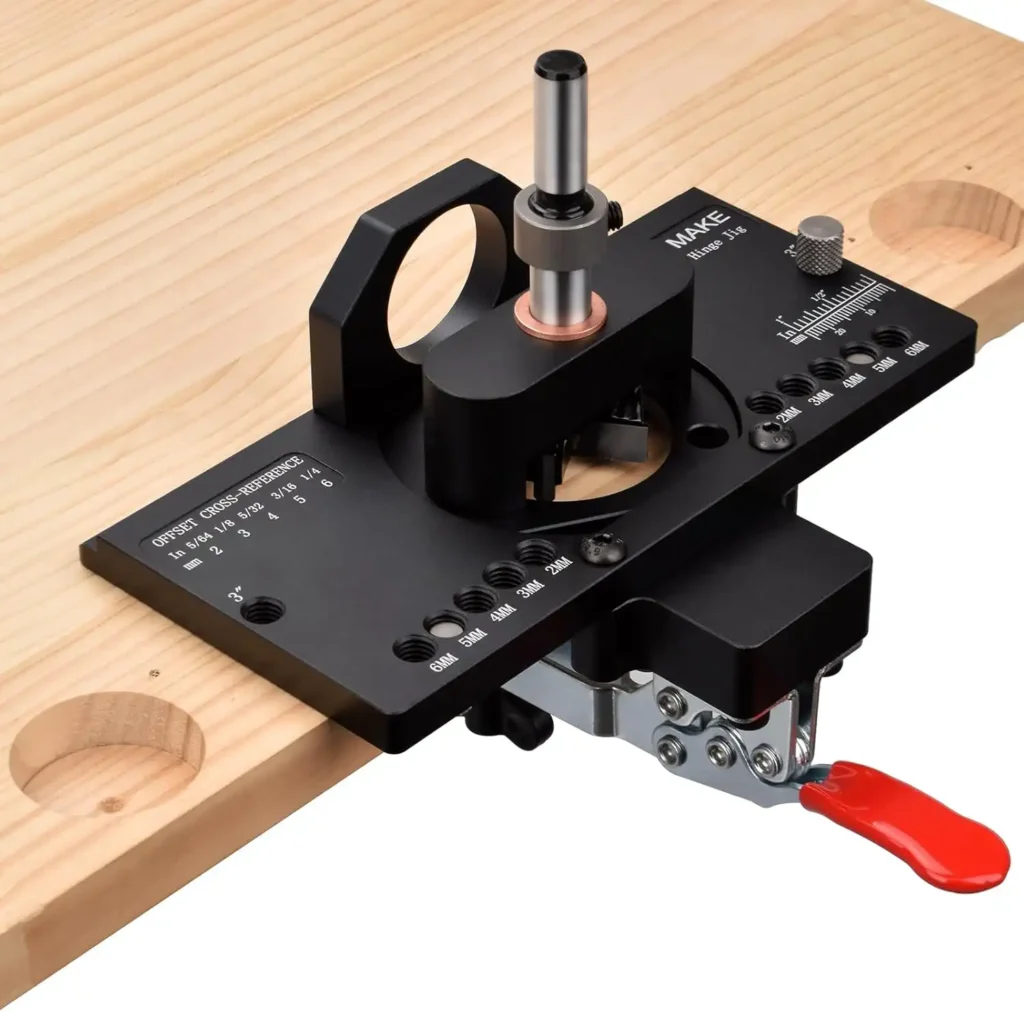
What It Is
A jig is a tool that guides your cuts or drills. It’s like a helper you make or buy.
Why It’s Important
Beginners need it for same-size cuts. I made a circle cut once super easy!
Main Uses
It steers tools for straight lines. It repeats and cuts perfectly every time.
Key Features
Get a simple one for starters. Wood or metal both work fine.
How to Use It
Set it on your wood. Line up your tool. Follow it to cut or drill.
35. Feather Board
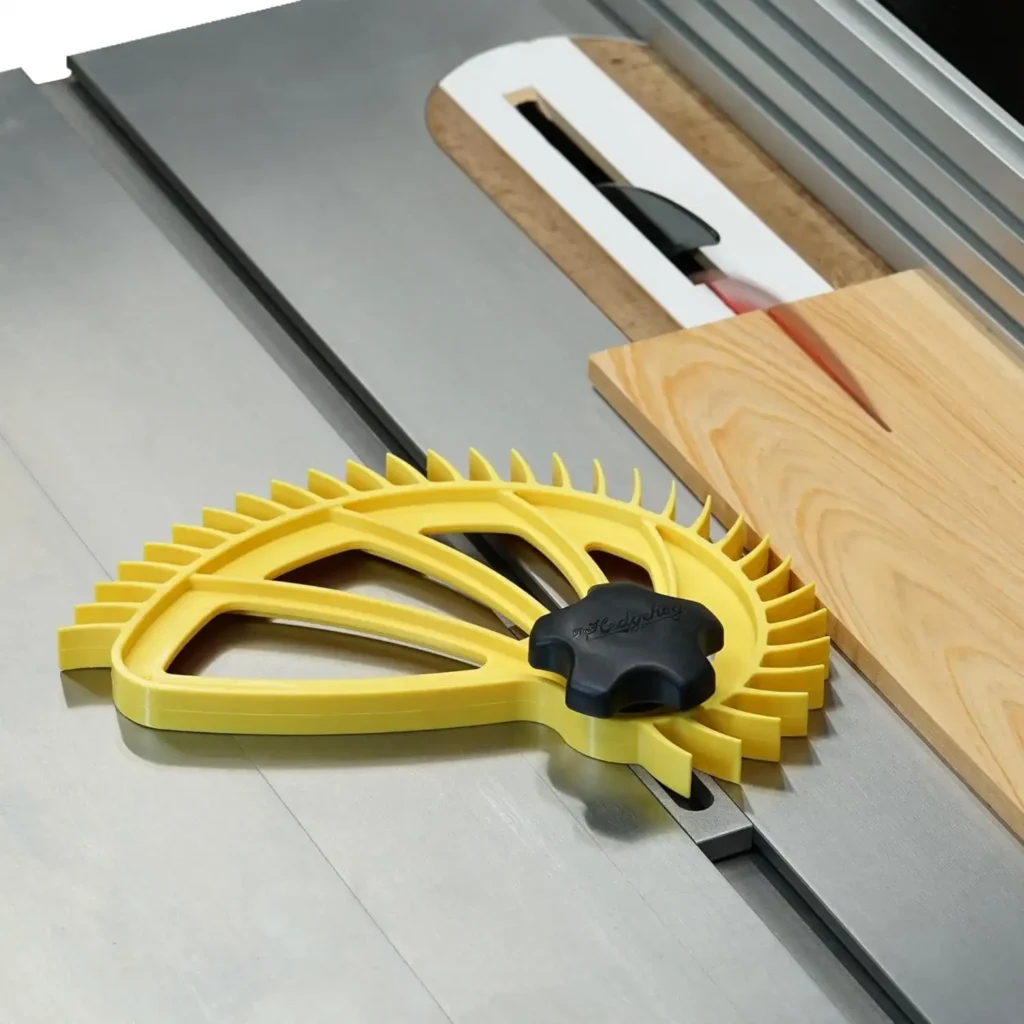
What It Is
A feather board is a tool with fingers that press wood against a saw fence.
Why It’s Important
Beginners like it for smooth cuts. I used one my board stayed straight!
Main Uses
It holds wood tight while sawing. It stops wiggles for clean lines.
Key Features
Look for a plastic or wooden one. Adjustable fingers fit your setup.
How to Use It
Stick it by your saw. Push the wood through. It keeps everything snug.
36. Moisture Meter
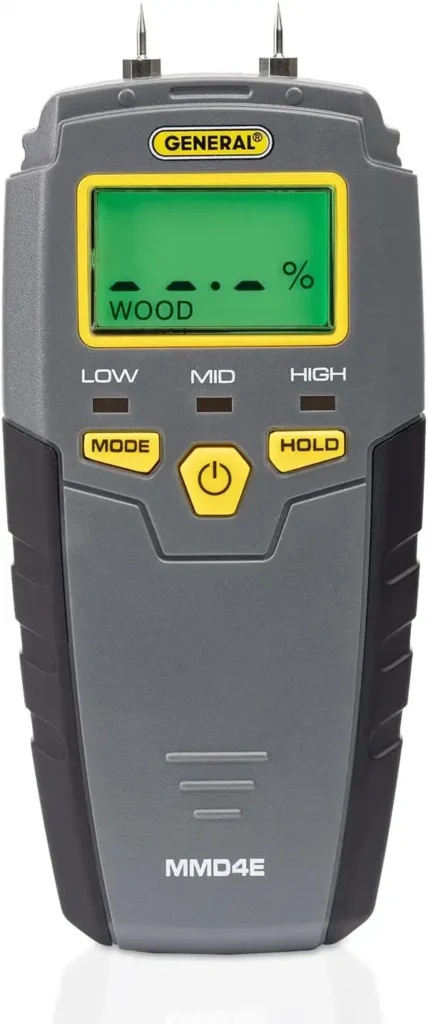
What It Is
A moisture meter is a tool that checks if the wood is wet. It’s got pins or a flat pad.
Why It’s Important
Beginners need it to avoid warps. I tested a plank once—saved my project!
Main Uses
It tells you the wood’s water level. It stops bad bends later.
Key Features
Get a pinless one no holes. A clear display shows numbers fast.
How to Use It
Press it on the wood. Read the screen. Dry wood is best for work.
37. Metal Detector

What It Is
A metal detector is a tool that finds nails or screws in wood. It beeps when it spots metal.
Why It’s Important
Beginners use it to save blades. I found a hidden nail that once kept my saw safe!
Main Uses
It checks wood for metal bits. It protects your tools from breaks.
Key Features
Pick a small one it’s easy to hold. A loud beep helps you hear it.
How to Use It
Run it over your wood. Listen for beeps. Mark where it finds stuff.
38. Scratch Awl
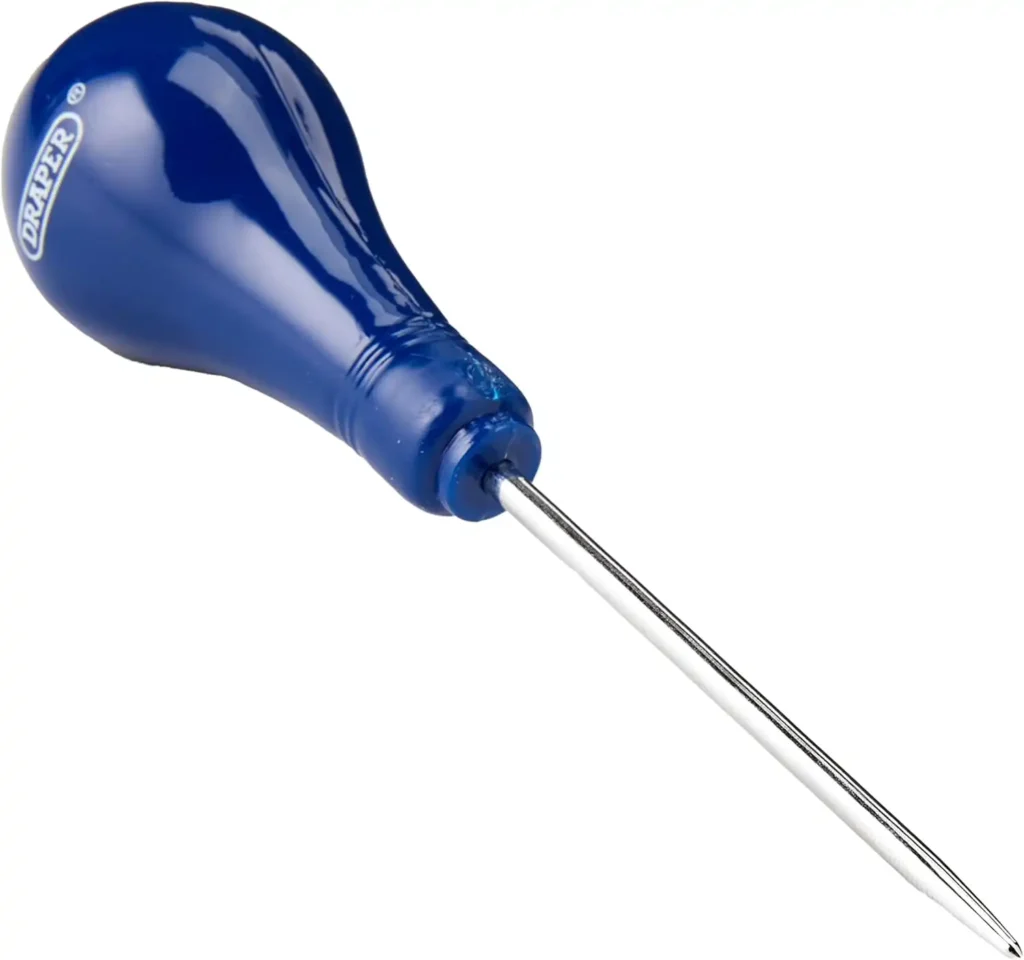
What It Is
A scratch awl is a pointy tool that marks wood with a sharp tip. It’s small, like a pencil with a metal end instead of lead.
Why It’s Important
Beginners need it to make exact spots for drilling or cutting. I used one to mark a hole for a shelf once it was spot on!
Without it, your marks might be messy, and your project could look off. It’s a little tool that helps big-time when you’re starting.
Main Uses
It scratches lines on wood to show where to drill. It also marks spots for cuts so you don’t guess wrong. You can even use it to poke tiny holes if you need a starter mark.
Key Features
Get a sharp metal tip that cuts into wood easily. A wood handle feels nice and won’t slip. Look for one that’s not too heavy so your hand doesn’t get tired.
How to Use It
Hold it like a pencil. Press the tip into the wood where you want your mark. Drag it slowly to make a straight line. Push harder if you need a deeper scratch. Keep it steady so your line stays neat.
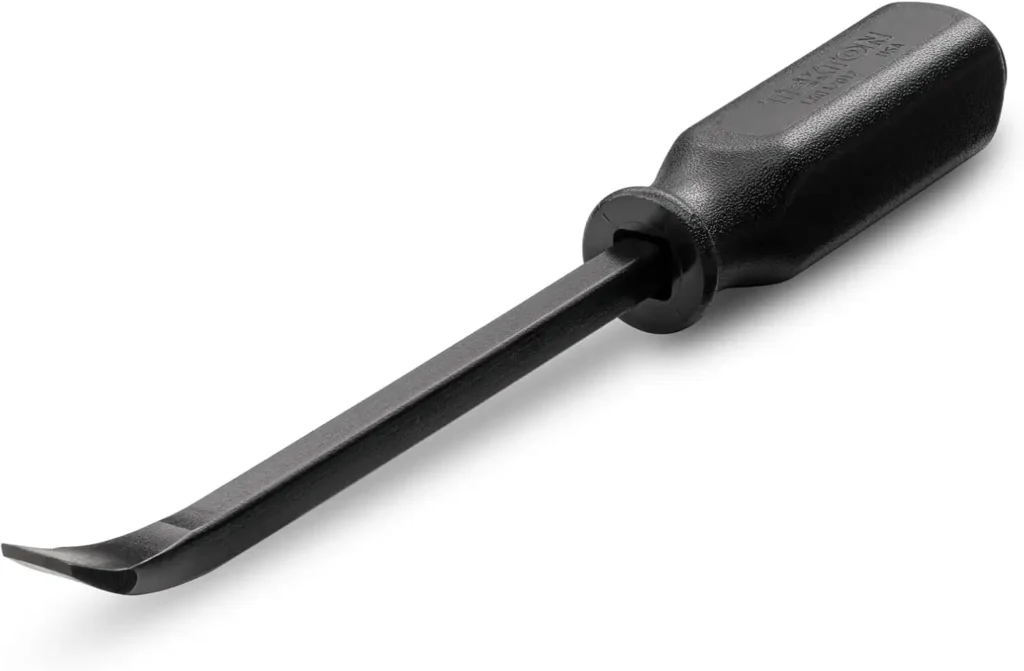
39. Cat’s Paw/Nail Puller
What It Is
A cat’s paw, or nail puller, is a tool that yanks nails out of wood. It’s got a curved end that digs in like a claw.
Why It’s Important
Beginners use it to fix mistakes when nails go wrong. I pulled a bent nail from a board once it saved my project!
It’s great because you don’t want old nails sticking out or ruining your wood. This tool makes cleanup fast and keeps your work looking good.
Main Uses
It pulls nails out of wood quickly. It also digs under nail heads to lift them. You can use it on big or small nails, whatever messes you up.
Key Features
Pick one with a curved end it grabs nails better. Steel makes it strong so it won’t bend. A comfy handle helps you pull without hurting your hand.
How to Use It
Stick the curved end under the nail head. Push it down to dig in. Pull the handle back to lift the nail out. If it’s stuck, wiggle it a bit. Keep pulling until the nail pops free.
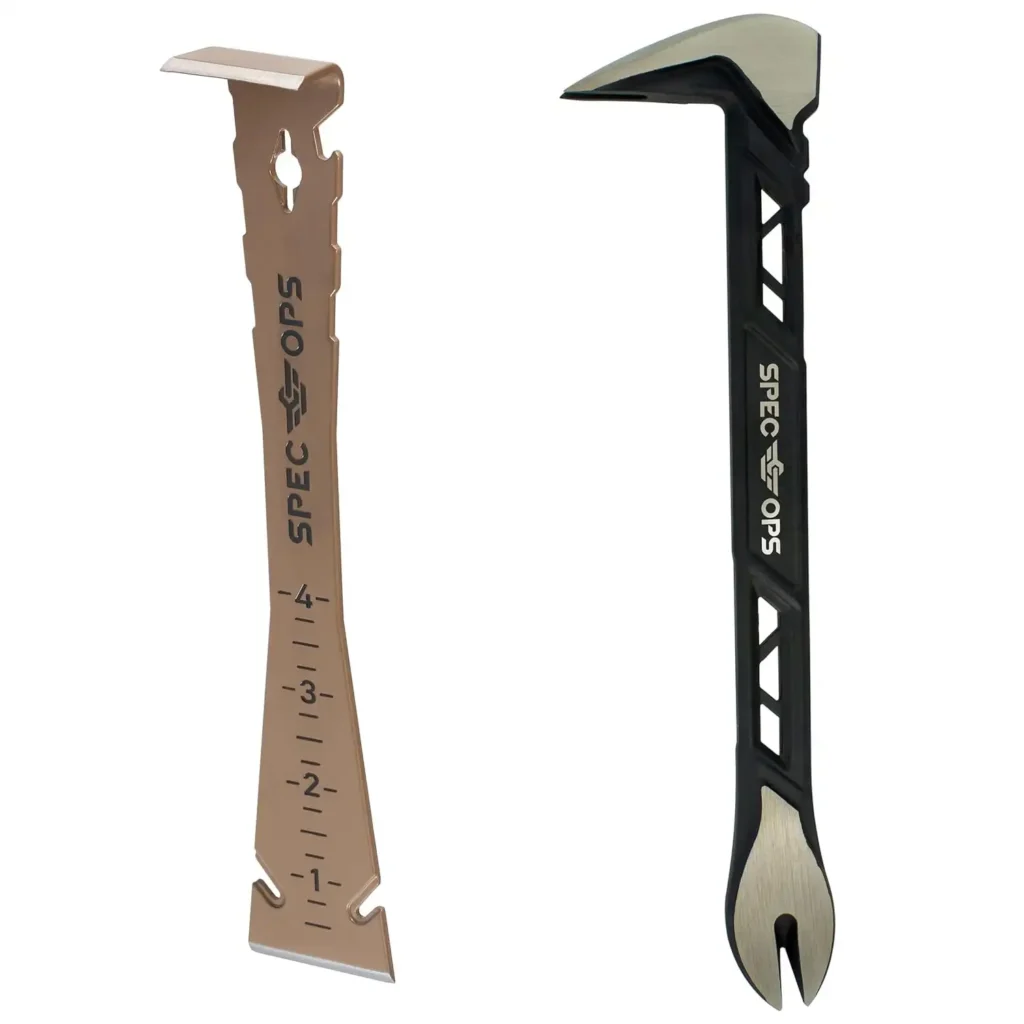
40. Small Wonder Bar/Trim Bar
What It Is
A small wonder bar, or trim bar, is a flat tool that pries trim off wood. It’s short and thin, perfect for little jobs.
Why It’s Important
Beginners need it to take off trim without breaking stuff. I popped some trim off a table once it came up clean! It’s awesome for fixing things gently, so you don’t mess up your wood or walls when you’re learning.
Main Uses
It lifts trim without cracking it. It also pulls small pieces apart easily. You can use it to loosen boards or fix mistakes without a big fuss.
Key Features
Get a flat, thin edge it slides under trim well. A 7-inch size fits most small tasks. Steel keeps it tough for lots of prying.
How to Use It
Slide the flat end under the trim. Push the handle down to lift it a little. Move it along the edge and keep prying. If it sticks, wiggle it gently. Pull until the trim comes off neat.
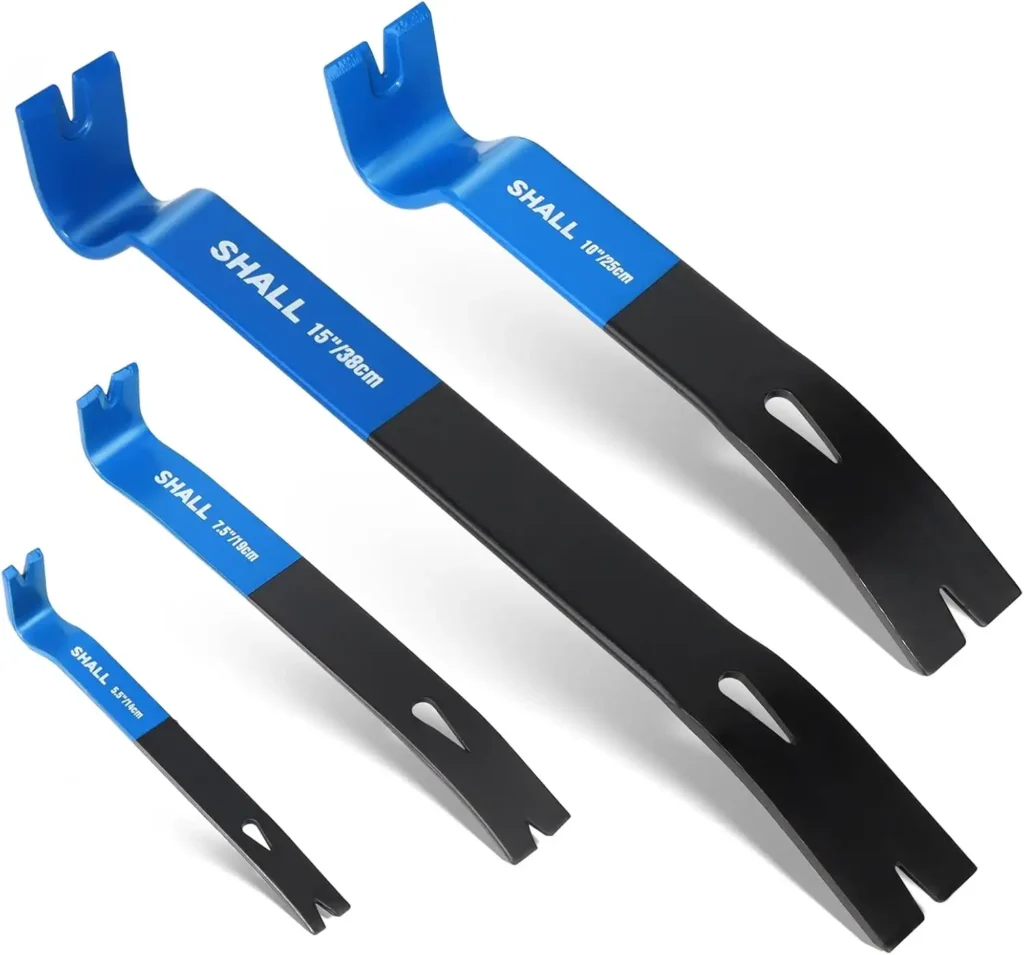
41. Flat Bar Pry Bar (12” to 16”)
What It Is
A flat bar pry bar is a long tool that lifts big wood or heavy stuff. It’s flat and strong, like a big lever.
Why It’s Important
Beginners use it for tough jobs like moving planks. I pried a stuck board once it came up easy! It’s great when you need extra power to fix or build big things without struggling.
Main Uses
It pries wood apart when it’s stuck tight. It lifts heavy pieces off the ground. You can also use it to pull nails or shift things around.
Key Features
Look for a strong bar 12 to 16 inches is perfect. A wide, flat end grabs better. A solid handle lets you push hard without bending.
How to Use It
Stick the flat end under your wood. Push the handle down to lift it a bit. Pull up slowly to pry it loose. Move it around if it’s big. Keep going until it’s free.
42. Slip-Joint Plier (6”)
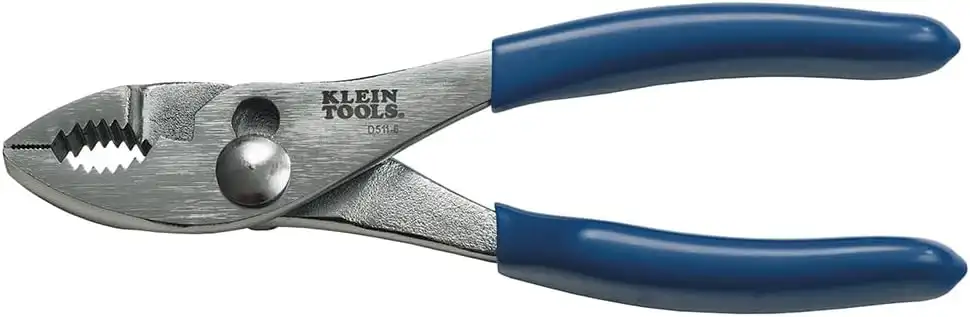
What It Is
A slip-joint plier is a tool that grabs and bends small things. It’s got jaws that slide to fit different sizes.
Why It’s Important
Beginners need it for little fixes like wires or bolts. I bent a wire for a project once—worked like magic! It’s handy when you’re starting and need to tweak tiny stuff.
Main Uses
It holds small pieces tight. It bends soft metal or wire easily. You can also use it to pull tiny nails if you’re careful.
Key Features
Get a 6-inch one it’s just right. A rubber grip keeps it comfy. Strong jaws won’t slip when you squeeze.
How to Use It
Slide the jaws to fit your piece. Open them wide. Put them around what you’re grabbing. Squeeze the handles tight. Twist or pull to bend or hold.
43. Electrician’s Pliers (8”)
What It Is
Electrician’s pliers are a tool that cuts and twists wire. They’re long with pointy jaws and a cutter.
Why It’s Important
Beginners use it for shop fixes like cords. I cut a wire for a light once saved me a trip! It’s great for little wiring jobs when you’re building stuff.
Main Uses
It snips were clean. It twists wire ends together tight. You can also use it to pull small pins.
Key Features
Pick an 8-inch size it’s easy to hold. Sharp tips cut well. A tough handle lasts a long time.
How to Use It
Put the wire between the jaws. Squeeze hard to cut it. For twisting, wrap the wire and turn the pliers. Keep it steady so it’s neat.
44. Saw Horse
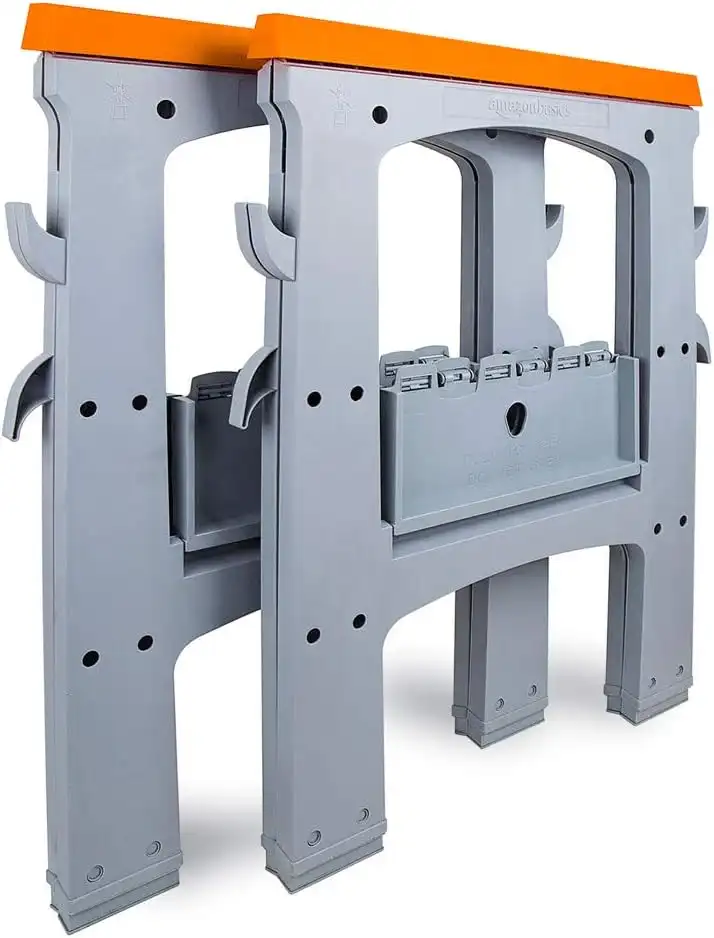
What It Is
A sawhorse is a stand that holds wood up high. It’s got four legs and a flat top.
Why It’s Important
Beginners need it to cut wood steadily. I saw a board on one it didn’t wobble! It’s like an extra pair of hands when you’re starting.
Main Uses
It props up wood for sawing. It makes cutting big pieces easy. You can stack them to save space too.
Key Features
Get a foldable one it’s easy to store. Strong legs hold 500 lbs. A wide top keeps the wood flat.
How to Use It
Set it up on the ground. Lay your wood across the top. Make sure it’s steady. Saw your line slowly and safely.
45. Workbench
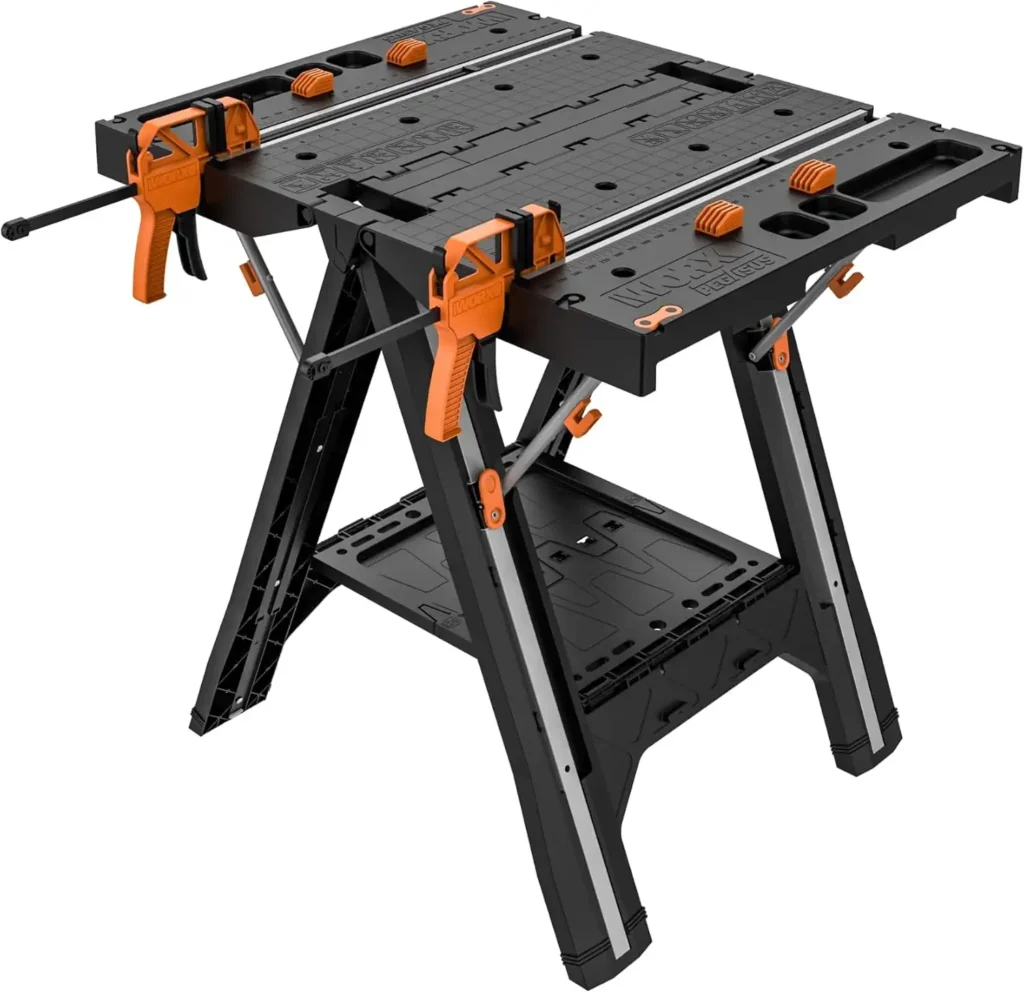
What It Is
A workbench is a big table for carpentry work. It’s flat and tough for all your tools.
Why It’s Important
Beginners need a steady spot to build. I made a box on mine everything stayed put! It’s your home base for cutting, hammering, and more.
Main Uses
It holds tools and wood while you work. It keeps stuff flat for sawing. You can add clamps to it too.
Key Features
Look for a flat top big is best. Wheels make it movable. A shelf underneath holds extra stuff.
How to Use It
Set your wood on top. Keep your tools close. Work steadily with both hands. Roll it if you need to move it.
46. Tool Belt with Hammer Holder
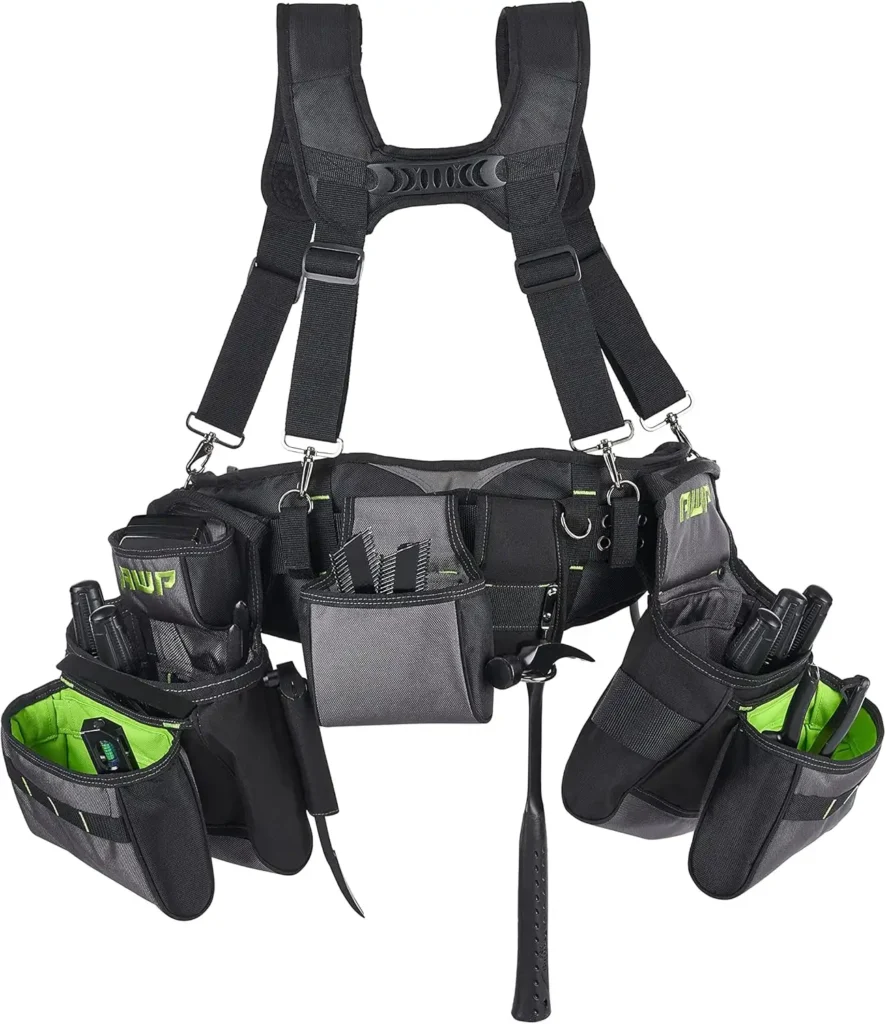
What It Is
A tool belt with a hammer holder is a belt that carries tools on your hips. It’s got loops and pockets.
Why It’s Important
Beginners move fast with it no running for tools. I kept my hammer close once saved time! It’s great for keeping stuff handy.
Main Uses
It carries tools like hammers and screws. It keeps your hands free while you work. You can walk around easily.
Key Features
Get one with a hammer loop it’s super useful. Pockets hold small bits. A wide belt stays comfy.
How to Use It
Put it around your waist. Clip your hammer in the loop. Stuff pockets with tools. Wear it tight so it doesn’t slip.
47. Paint Brushes (2)
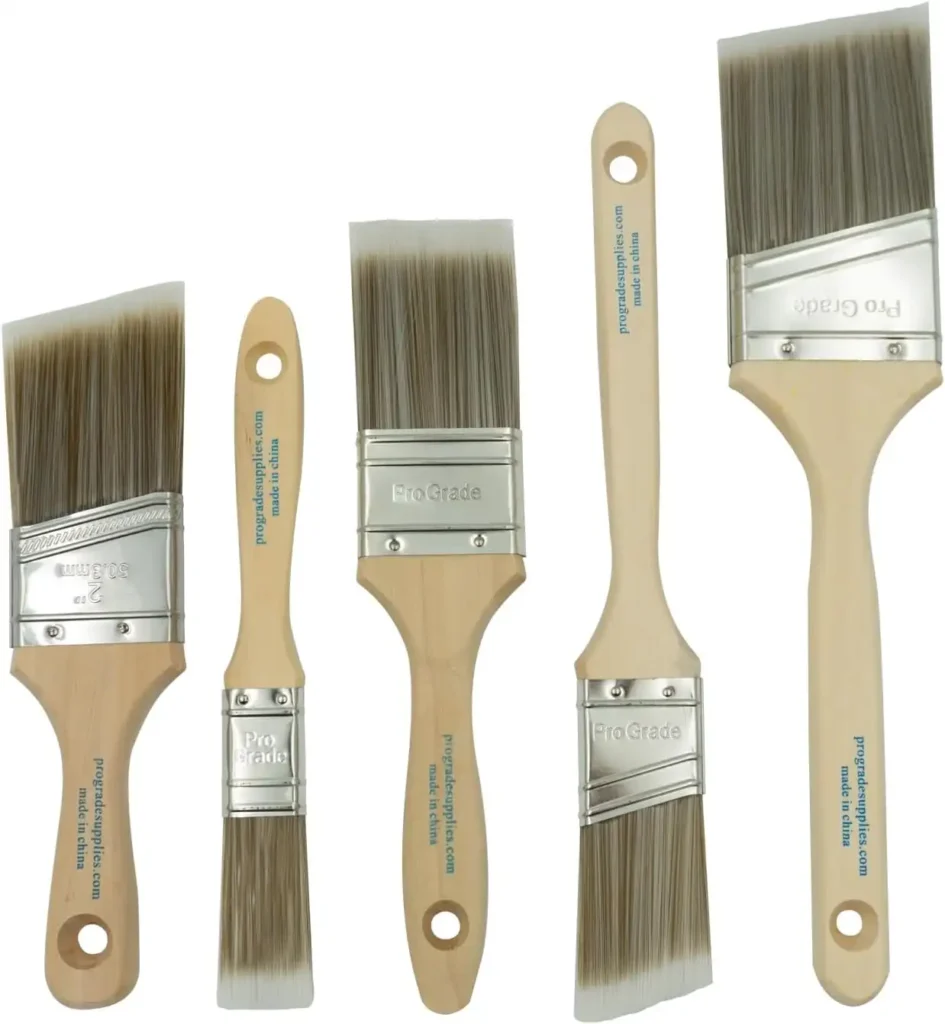
What It Is
Paint brushes are tools that spread paint or finish on wood. You need two sizes for different jobs.
Why It’s Important
Beginners need them to make projects pretty. I painted a shelf with one looked awesome! They’re easy to use and add colorfast.
Main Uses
They coat wood smooth with paint. They add the finish to keep it safe. You can paint big or small spots.
Key Features
Pick 1-inch and 2-inch sizes they cover everything. Soft bristles spread paint even. A wood handle feels good.
How to Use It
Dip the brush in the paint. Wipe off extra. Brush it on the wood in long strokes. Go slow for a nice look.
48. Circular Saw
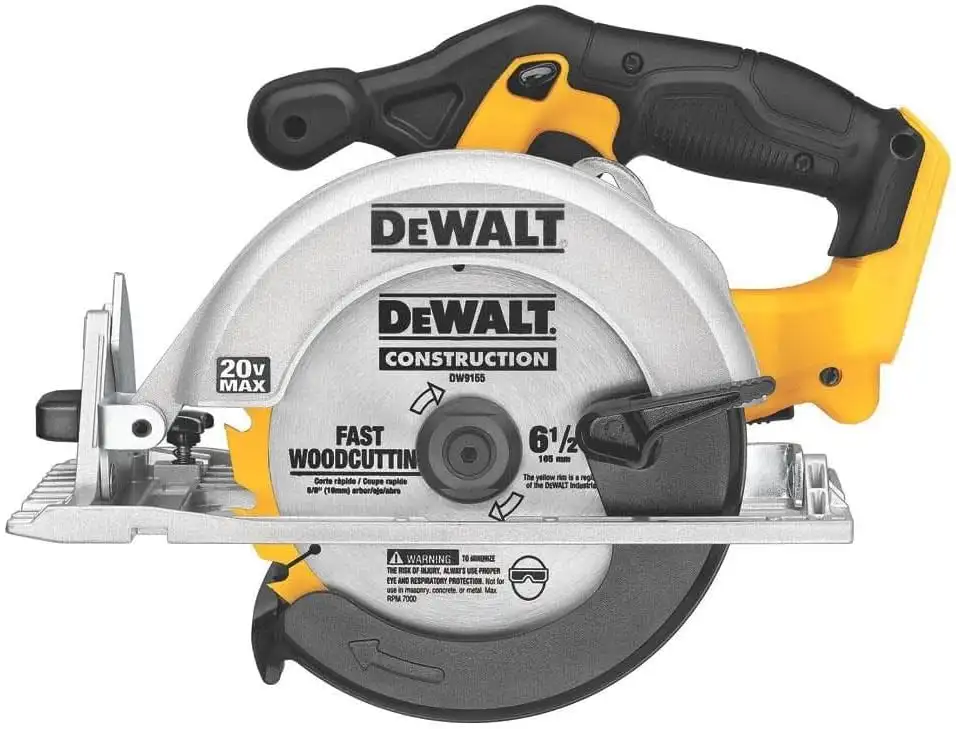
What It Is
A circular saw is a power tool with a round blade that cuts wood. It’s loud but fast.
Why It’s Important
Beginners cut big stuff quickly with it. I sliced plywood for a box once done in minutes! It’s a must for speedy jobs.
Main Uses
It cuts straight lines in wood. It trims big boards down to size. You can use it on thick stuff too.
Key Features
Get a 7-inch blade it’s strong enough. A corded one has more power. A guard keeps you safe.
How to Use It
Line up your cut. Hold it with both hands. Pull the trigger and push slowly. Keep the blade straight.
49. Power Drill
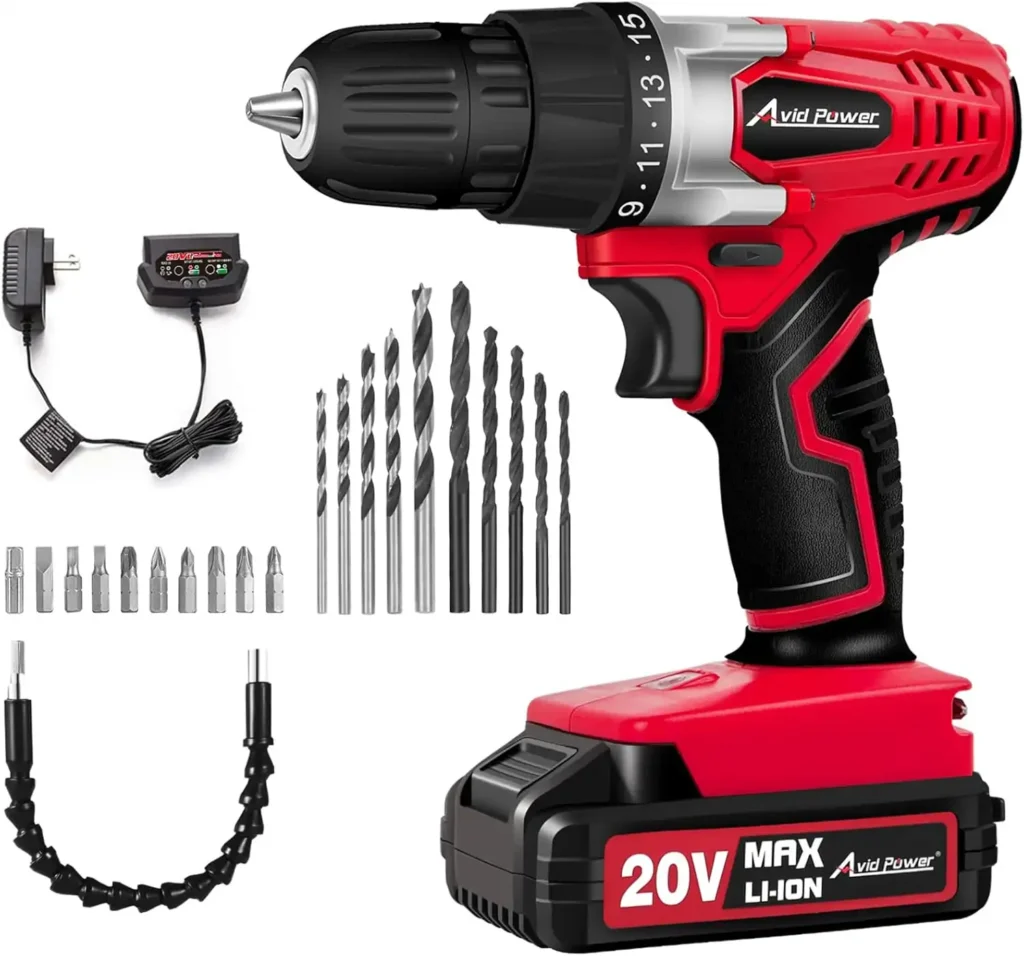
What It Is
A power drill is a tool that makes holes and drives screws. It’s got a spinning bit.
Why It’s Important
Beginners need it for fast work. I drilled holes for a shelf once super quick! It saves time on every project.
Main Uses
It drills holes in wood. It screws stuff together tight. You can switch bits for different jobs.
Key Features
Pick a 3/8-inch chuck it fits most bits. A corded one is strong. A speed switch helps control it.
How to Use It
Put the bit in the chuck. Line it up on your wood. Press the trigger and push it in slowly.
50. Miter Saw
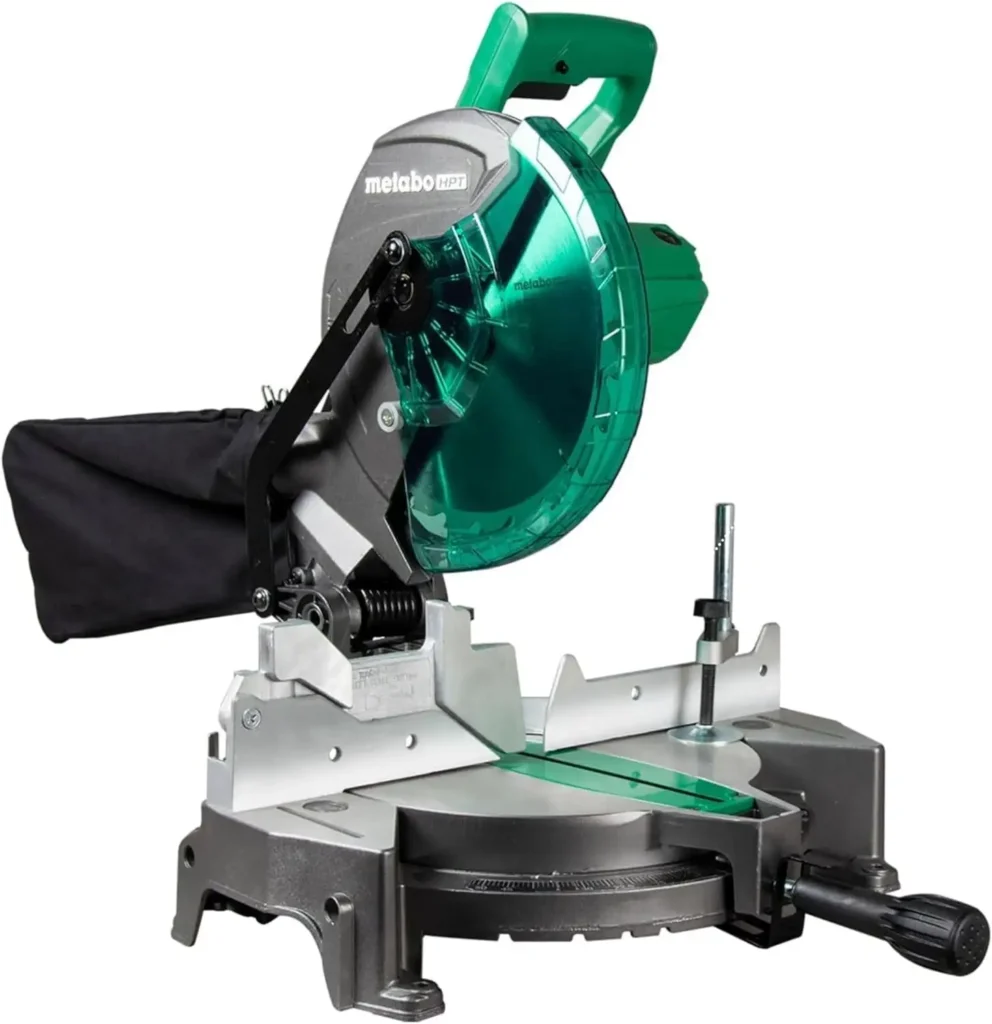
What It Is
A miter saw is a power tool that cuts wood at angles. It’s big with a drop-down blade.
Why It’s Important
Beginners make neat corners with it. I cut trim for a frame once fit perfectly! It’s great for angled cuts.
Main Uses
It slices wood at angles like 45 degrees. It cuts small boards for frames. You can adjust it easily.
Key Features
Get a 10-inch blade it’s good for most. Clear angle marks help you set it. A dust bag catches mess.
How to Use It
Set your angle on the dial. Put wood under the blade. Pull it down slowly to cut it clean.
51. Carpenter Pencil
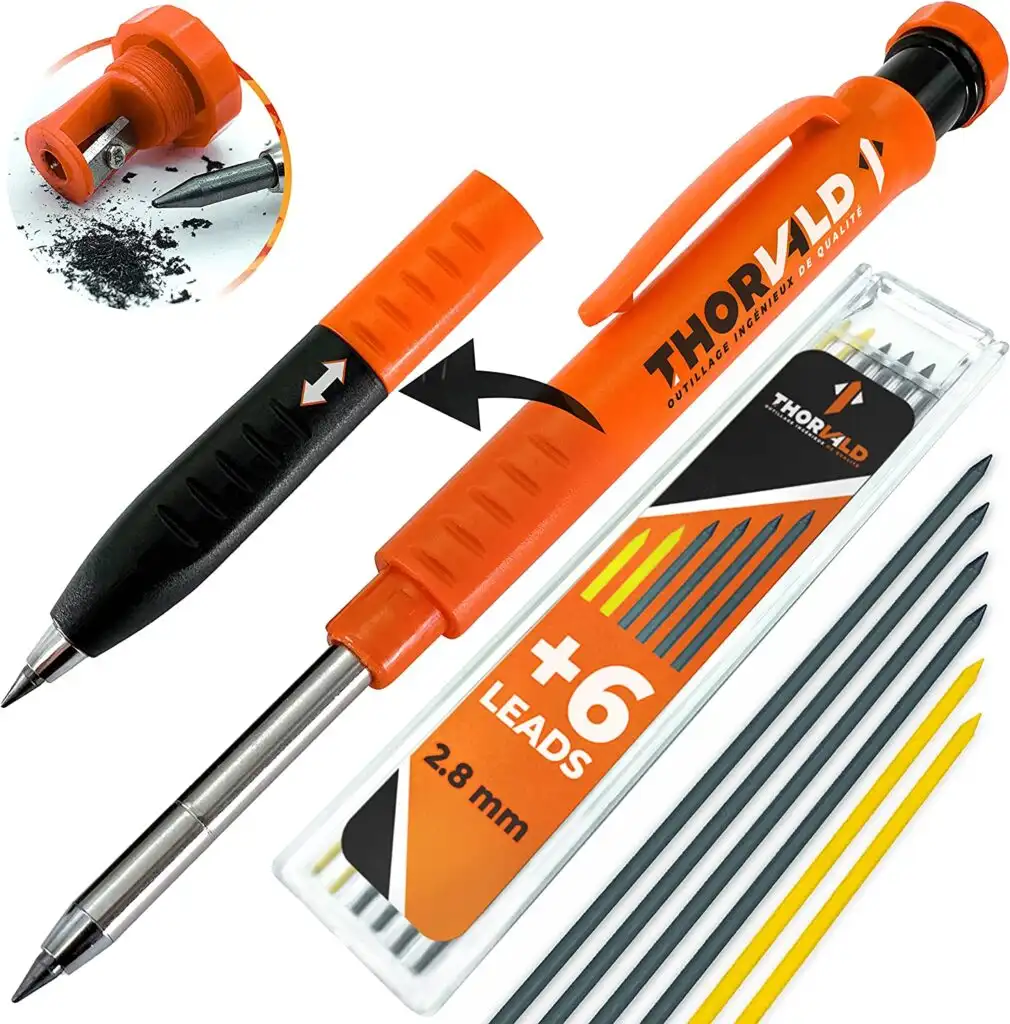
What It Is
A carpenter pencil is a flat pencil made for marking wood. It’s thicker than regular ones.
Why It’s Important
Beginners need it to mark cuts clear. I drew a line on a board once the cut was perfect! It’s a simple helper.
Main Uses
It marks wood for sawing. It draws lines that stay dark. You can use it on rough wood too.
Key Features
Pick a thick one it won’t break easily. Hard lead keeps it sharp. A flat side stops rolling.
How to Use It
Sharpen it with a knife. Hold it firm. Draw your line slowly and darkly on the wood.
52. Mallet
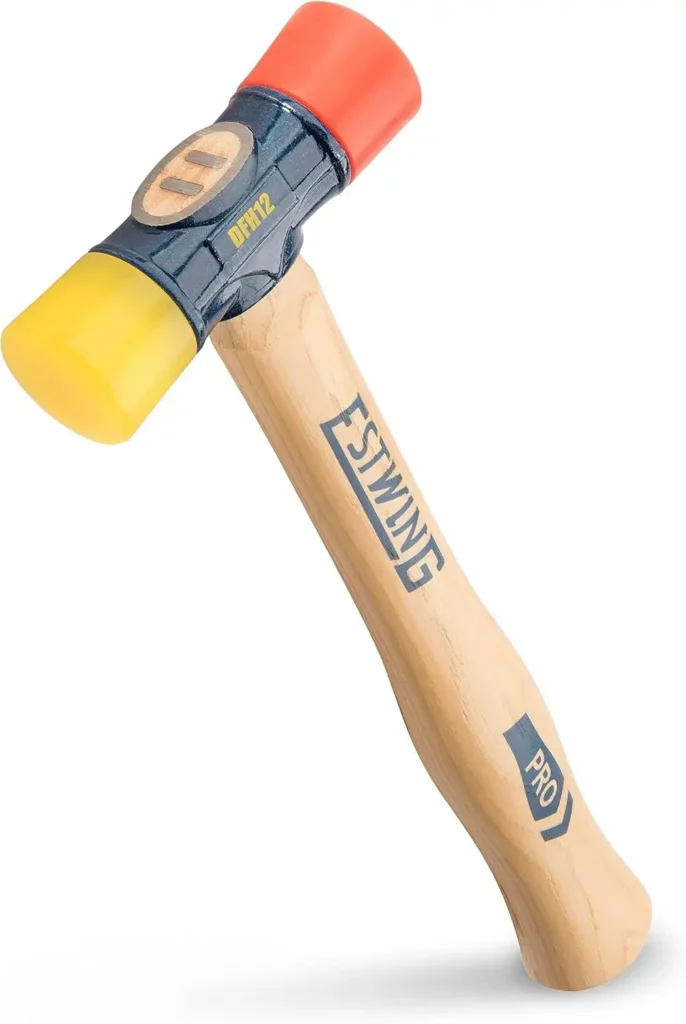
What It Is
A mallet is a hammer with a big, soft head for tapping stuff. It’s not metal like regular hammers.
Why It’s Important
Beginners tap tools with it gently. I hit a chisel once the wood stayed smooth! It’s great for soft bangs.
Main Uses
It bangs chisels into the wood. It taps pieces together without dents. You can use it on big joints.
Key Features
Get a wooden one it’s light. A 16 oz. size swings easily. A wide head hits well.
How to Use It
Hold the handle tight. Swing it to tap your chisel or wood. Hit soft so it doesn’t mark.
53. Coping Saw

What It Is
A coping saw is a tool with a thin blade for cutting curves. It’s got a frame to hold it.
Why It’s Important
Beginners shape wood with it. I cut a curvy edge once looked so cool! It’s perfect for fun designs.
Main Uses
It cuts bendy lines in wood. It trims small pieces into shapes. You can make holes with it too.
Key Features
Look for a thin blade that bends well. A tight frame keeps it steady. Extra blades are handy.
How to Use It
Put the blade in the frame. Draw your line. Saw along it and slowly turned it for curves.
54. Block Plane
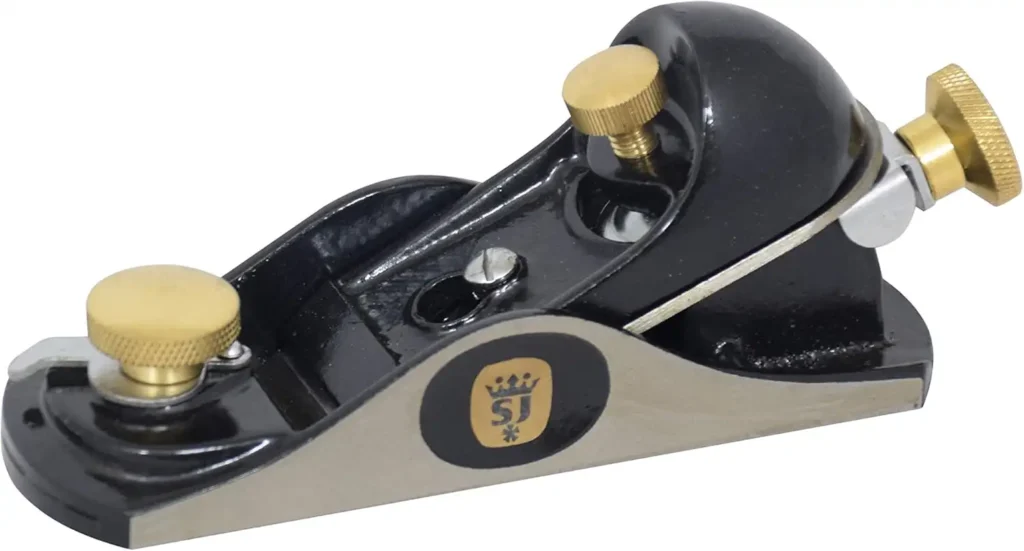
What It Is
A block plane is a small tool that smooths wood with a blade. It fits in one hand.
Why It’s Important
Beginners fix edges with it easy. I smoothed a corner once felt so nice! It’s great for little touch-ups.
Main Uses
It flattens small wood spots. It rounds edges smoothly. You can shave thin bits off too.
Key Features
Get a sharp blade it cuts clean. A small size fits your hand. Metal holds up well.
How to Use It
Hold it tight. Push it over the wood slowly. Keep it flat for an even cut. Check it often.
55. Marking Tools
What It Is
Marking tools are things like pencils or awls that draw on wood. They show where to work.
Why It’s Important
Beginners need them for straight cuts. I marked a board once and saved my sawing! They’re super simple helpers.
Main Uses
They show spots for cutting or drilling. They keep lines dark and clear. You can mark big or small.
Key Features
Pick a pencil or awl—both work. Sharp tips make clean marks. A tough one lasts longer.
How to Use It
Hold it like a pencil. Draw your mark slowly and firmly. Make it dark so you see it easily.
56. Jigsaw (Sabre Saw)
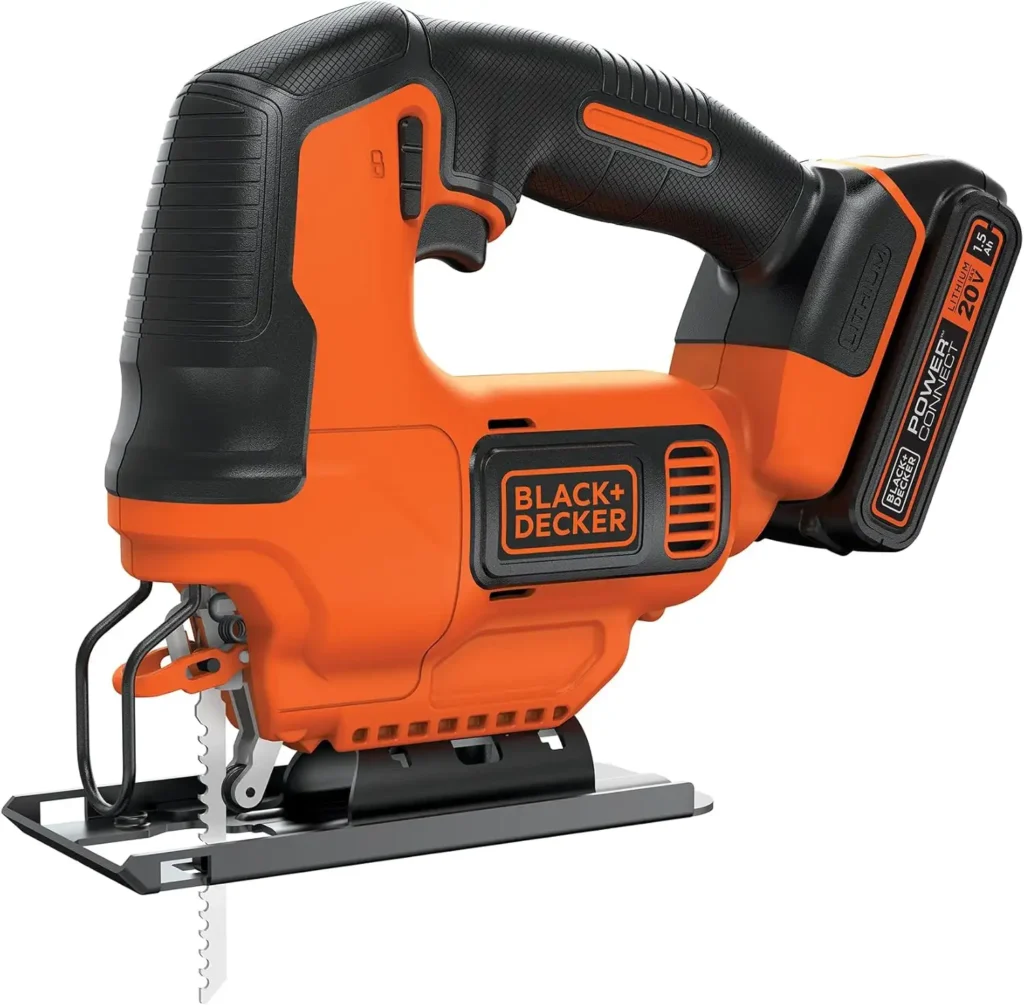
What It Is
A jigsaw, or saber saw, is a power tool that cuts curves with a skinny blade. It’s loud but fun.
Why It’s Important
Beginners shape wood fast with it. I cut a circle for a clock once turned out great! It’s awesome for cool stuff.
Main Uses
It cuts wavy lines in wood. It trims odd shapes easily. You can make holes or patterns too.
Key Features
Get a corded one it’s strong. A thin blade bends for curves. A speed dial helps control it.
How to Use It
Set the blade in tight. Draw your line. Hold it firm, press the trigger, and push along slowly.
57. Carpenter Pencil Sharpener
What It Is
A carpenter pencil sharpener is a small tool that sharpens flat carpenter pencils. It’s got a slot for the wide tip.
Why It’s Important
Beginners need it to keep pencils sharp for clear marks. I sharpened one once my lines got way better! Dull pencils make messy cuts.
Main Uses
It sharpens carpenter pencils fast. It keeps the lead pointy for good drawing on wood.
Key Features
Get one with a big slot—it fits flat pencils. A strong blade cuts clean and quick.
How to Use It
Stick the pencil in the slot. Twist it a few times. Pull it out and check the point. Sharpen more if it’s not sharp enough.
58. Carpentry Calculators
- Stair Calculator
- Roof Pitch Calculator
- Arch Calculator
- Cubic Yard Calculator
Check Carpentry Calculators.
Conclusion
You’ve explored the 58 Carpenter Tools List With Pictures and Uses a perfect wrap-up for beginner carpenters. This guide covered essential tools like hammers and saws with pictures and easy tips to boost your skills.
Grab the PDF download to keep this carpenter tools list handy for your next project. From basic builds to future crafts, you’re now equipped with the knowledge to succeed. Start creating with confidence using these must-have tools tailored for newbies in the USA!
FAQ: Carpenter Tools for Beginners
What tools does every carpenter need?
Every carpenter needs basic tools to start building. You’ll want a claw hammer to bang nails in and pull them out. A tape measure helps you check sizes. A level keeps things straight. A hand saw cuts wood easily.
A screwdriver tightens screws. I started with these they got me through my first shelf! Add a pencil and a clamp too. These tools make carpentry fun and simple for beginners.
Which 5 tools are most common to carpentry?
Five tools pop up a lot in carpentry. A claw hammer is super common it’s great for nails. A tape measure is everywhere to measure wood. A level shows if stuff is flat. A hand saw cuts boards fast. A chisel shapes wood neatly. These are the big five I see all the time they’re the best tools for new carpenters like you!
What are the uses of carpentry tools?
Carpentry tools help you build stuff. A hammer drives nails into wood. A saw cuts pieces to fit. A tape measure makes sure the sizes are right. A level checks if things aren’t wobbly. A screwdriver puts screws in tight. I used a chisel to smooth a box once tools make projects work! They cut, hold, and fix wood for all your ideas.
What should be in a carpenter’s toolbox?
Your toolbox needs the basics. Put in a claw hammer it’s a must. Add a tape measure for checking lengths. A level keeps stuff even. Toss in a hand saw for cutting. A screwdriver is good for screws. I keep a pencil in mine marks are key! A clamp holds wood still. These fit in a beginner carpentry tools list and get you ready to build.
5 Most Common Carpentry Materials
1. Natural Solid Wood
2. Engineered Wood Products
3. Decorative Wood Veneers and Laminates
5. Timber and Lumber Supplies
6. Specialty and Reclaimed Wood