Are these projects suitable for complete beginners with no woodworking experience?
Yes! The featured 40 outdoor woodworking projects are designed for beginners, with simple plans and step-by-step instructions. Many outfoot projects, like benches, birdhouses, and planter boxes, require only basic skills and tools, making them accessible to those new to woodworking.
You don’t need to be a professional woodworker or own fancy tools to try these outdoor woodworking projects. Each project in our 40 outdoor woodworking projects list with pictures & basic steps. Get inspired on popular DIY sites like Pinterest and Instructables, where millions in the USA share ideas.
Table of Contents
What are the Best Types of Wood for Outdoor Projects
| Wood Type | Rot/Decay Resistance | Insect Resistance | Cost | Availability | Workability |
| Cedar | High | High | Moderate | Widely available | Easy |
| Redwood | High | High | High | Limited | Easy |
| Teak | Very High | Very High | Very High | Limited | Moderate |
| White Oak | High | Moderate | Moderate | Widely available | Moderate |
| Cypress | High | High | Moderate | Regional | Easy |
| Pressure-Treated Pine | Moderate-High | High | Low | Widely available | Easy |
| Mahogany | High | High | High | Limited | Moderate |
| Spanish Cedar | High | High | High | Limited | Moderate |
40 Outdoor Woodworking Projects for Beginners
Basic Tools Required for these outdoor woodworking projects
Here are the Tools:
| Hand Saw |
| Circular Saw |
| Cordless Drill |
| Sander |
| Measuring Tape |
| Speed Square |
| Hammer |
| Safety Glasses |
| Carpenter Pencil |
| Wood Clamps |
| Miter Saw |
| Jigsaw |
| Router |
| Table Saw |
| Belt Sander |
1. Simple Wooden Bench
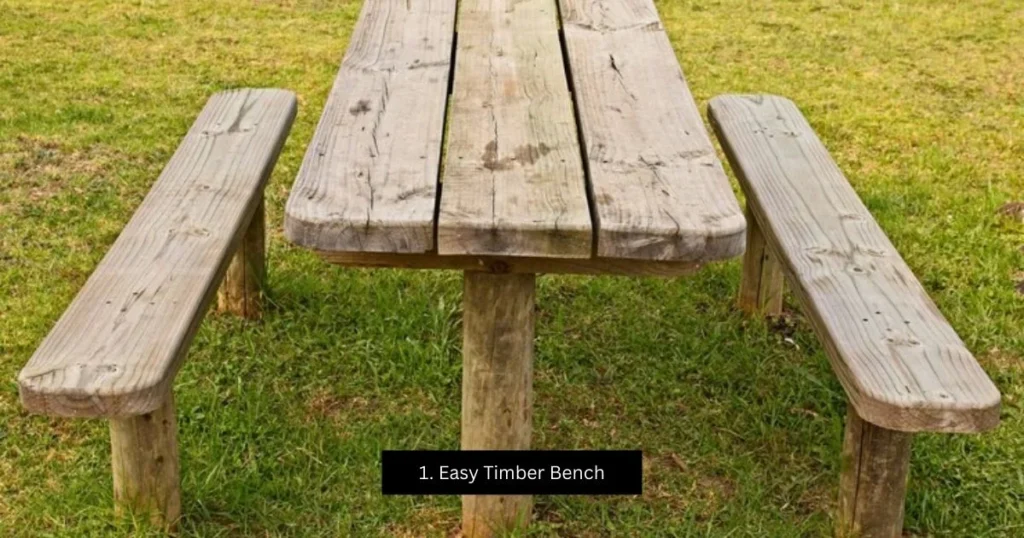
You can build this timber bench in a few hours with basic power tool skills. Staining adds a couple more hours for a polished finish.
Basic Steps:
- Cut Timber: Measure and cut wood to size for legs, seat, and supports.
- Assemble Frame: Drill and screw pieces together to form the bench structure.
- Sand and Stain: Smooth surfaces with sandpaper, then apply outdoor stain.
Read full Article: Build a Simple Wooden Bench for Under $100: 10 Easy Steps
2. Modern Style Birdhouse
Build this sleek birdhouse in a few hours on a Saturday. Learn easy ways to cut and fit tricky angles while making it.
Basic Steps:
- Cut Wood Pieces: Measure and cut wood for the birdhouse walls and roof.
- Join Pieces: Glue and nail the pieces to form the birdhouse shape.
- Sand and Paint: Smooth the surface and add a simple paint finish.
3. Raised Planter
This simple Raised Planter is great for beginners in the USA. Build it for veggies or flowers. Place it in your yard, patio, or porch with ease.
Basic Steps:
- Cut Wood: Measure and cut boards for the planter sides and base.
- Build Box: Screw the boards together to make a sturdy box.
- Add Finish: Sand the wood and apply a safe outdoor sealant.
4. Mixed-Medium Garden Trellis
Vines and roses look amazing on this Mixed-Medium Garden Trellis, which is perfect for beginners in the USA. The wood gets a cool gray look, and the copper turns green over time. Build this Trellis to add charm to your garden.
Basic Steps:
- Cut Wood and Copper: Measure and cut wood slats and copper pipes to size.
- Assemble Frame: Nail wood slats to form a grid, then attach copper pipes.
- Set in the Garden: Place the trellis in the soil and guide plants to climb.
5. Garden Closet
No space for a big shed? The Simple Garden Closet attaches to your house for tool storage. It’s part of our 40 outdoor woodworking projects, perfect for beginners in the USA. This easy project helps you learn basic building skills.
Basic Steps:
- Measure and Cut Wood: Cut wood pieces for the frame and walls.
- Build the Frame: Screw the frame to your house wall.
- Add Walls and Door: Nail on wood panels and attach a simple door.
6. Patio Garden Pond and Planter
Create a Patio Garden Pond and Planter to hold water plants and regular plants. This wooden pond uses a stretchy, UV-resistant rubber lining that lasts for years with little care. Perfect for beginner woodworkers in the USA, this project is simple and fun.
Basic Steps:
- Cut Wood: Measure and cut wood for the pond box and planter base.
- Build Box: Nail or screw wood pieces to form the pond and planter shape.
- Add Lining: Paint on rubber lining and let it dry before adding plants.
7. Cornhole Boards for Beginners
Make your cornhole boards, a fun backyard game, with this easy DIY cornhole boards for beginners in the USA project. It’s cheap, simple, and has foldable legs for tailgating or camping. Perfect for new woodworkers!
Basic Steps:
- Cut Wood: Measure and cut plywood and boards for the frame and top.
- Build Frame: Screw the frame together and attach the plywood top.
- Add Legs and Paint: Attach foldable legs and paint the boards.
8. Pedestal Picnic Table
Want a stylish picnic table for your outdoor woodworking projects? This pedestal picnic table looks great for adult dinners or kid-friendly barbecues. Its classic Craftsman style is always in, and no one gets stuck by a table leg. Perfect for beginners in the USA to build in a weekend.
Basic Steps:
- Cut Wood Pieces: Measure and cut boards for the tabletop and pedestal base.
- Assemble Base: Screw the pedestal parts together to make a sturdy stand.
- Attach Top: Fix the tabletop boards to the base and sand them smooth.
9. Stripped-Down Window Planter
Looking for a simple woodworking project? This Stripped-Down Window Planter is perfect! Its design uses easy curves and circles, making it great for beginners.
It also stays strong longer because it resists rot better than regular window boxes. Woodworkers in creative cities like Portland, Seattle, and Asheville will enjoy adding this to their outdoor spaces.
Basic Steps:
- Cut Wood Pieces: Measure and cut the wood for the planter’s front, back, bottom, and sides.
- Assemble Planter: Join the pieces with screws or nails to form the box shape.
- Finish and Mount: Sand the surfaces, apply a weatherproof finish, and attach mounting brackets.
10. Planter Trellis Combo
Build a Planter Trellis Combo to make a pretty privacy screen. This easy project uses bamboo for a planter and trellis. Finish it in a weekend for about $100.
Basic Steps:
- Cut Bamboo and Wood: Measure and cut bamboo for the trellis and wood for the planter box.
- Build Planter Box: Assemble the wood pieces into a box with screws.
- Attach Trellis: Fasten bamboo to the planter to create the trellis
11. Stone-Top Patio Table
This Stone-Top Patio Table is a favorite in Seattle, where small backyards love its compact size. Build it in three hours with basic tools and a miter saw. It holds drinks, books, or snacks.
Costs start at $30, depending on your tile top choose slate, granite, or marble. You’ll need to drive screws well. Perfect for beginners wanting a quick, sturdy project.
Basic Steps:
- Cut Wood: Measure and cut cedar boards for the frame and legs using a miter saw.
- Build Frame: Screw the frame together, using a counter-sink for smooth screw heads.
- Add Tile Top: Attach your chosen tile (slate, granite, or marble) to the tabletop with adhesive.
12. Classic Wooden Cart
This lightweight wooden cart is perfect for gardeners who want to carry tools, plants, and mulch in one trip. It’s easy to move and strong.
In Seattle, almost every gardener uses this cart for yard work. Beginners can build it with simple tools and step-by-step plans in a weekend. It’s a fun, useful project to start woodworking.
Basic Steps:
- Cut Wood Pieces: Measure and cut boards for the frame, sides, and wheels.
- Assemble Cart: Screw the pieces together to form the cart’s body.
- Add Wheels: Attach wheels and sand the cart for a smooth finish.
13. Tiered Plant Stand
Show off your plants with this easy tiered plant stand. Made from seven 8-foot 1×2 boards, it’s sturdy and great for decks or indoors.
In Portland, this plant stand is a favorite for small patios. Beginners can build it in a morning using basic tools. It’s a simple way to make your garden look nice.
Basic Steps:
- Cut Boards: Cut 1×2 boards to size for shelves and legs.
- Build Frame: Nail or screw boards to create the tiered structure.
- Finish Surface: Sand and paint or stain for outdoor use.
14. Garden Arbor
This timber garden arbor is a cozy spot to relax or chat with friends. It’s a popular backyard feature in Asheville, where nearly every home has one for quiet retreats. Beginners can build it with basic tools and clear plans. It takes a weekend but adds beauty to any yard.
Basic Steps:
- Cut Timber: Measure and cut wood for posts and crossbeams.
- Assemble Structure: Join pieces with screws to form the arbor frame.
- Stain Wood: Apply outdoor stain to protect it from the weather.
15. Perfect Patio Chairs
These lightweight patio chairs are comfy with wide arms for drinks or snacks. In Grand Rapids, they’re a hit for outdoor gatherings.
Beginners need basic tools and a little experience to build them in a few days. Plans teach skills like using a speed square. Pine costs about $60; cedar is $90.
Basic Steps:
- Cut Wood: Cut boards for legs, seat, and arms.
- Assemble Chair: Screw pieces together, ensuring legs are straight.
- Add Cushions: Sand, stain, and attach cushions for comfort.
16. DIY Butterfly House
This butterfly house is a quick, fun project for beginners! It keeps butterflies safe in dark, cozy spots during winter or from predators. Build it for under $20 with simple tools. In Asheville, North Carolina, almost every garden has one, adding charm to backyards. It’s perfect for learning basic cuts and assembly while helping nature.
Basic Steps:
- Cut Wood Pieces: Measure and cut cedar boards for walls and roof.
- Assemble Box: Nail pieces together to form a small house shape.
- Add Slots: Cut narrow entry slots for butterflies to enter.
17. Island Deck
The island deck is an easy ground-level platform you can build in a day. It’s great for small yards and needs only basic tools.
In Seattle, Washington, this deck is super popular; many homes have one for outdoor relaxing. It’s a big project for beginners but teaches measuring and screwing skills. Finish it before sunset with a helper
Basic Steps:
- Mark Area: Outline the deck size on the ground.
- Cut Boards: Saw wood to fit the frame and surface.
- Screw Together: Attach boards with screws to build the deck.
18. Porch Trellis
A porch trellis adds beauty and privacy to your home for about $100. Use cedar for durability. In New York, New York, this planter trellis combo is a hit nearly every brownstone has one!
It’s great for beginners with router experience. The elegant oval cutout makes it stand out. Learn cutting and joining skills with this project.
Basic Steps:
- Cut Cedar Strips: Measure and cut cedar for the lattice frame.
- Shape Oval: Use a router to create an oval cutout.
- Assemble Trellis: Join strips with nails for a flat surface.
19. Backyard Boardwalk
A wooden boardwalk is a simple, budget-friendly path for wet or sloped yards. It’s easier than stone paths and needs no heavy digging.
In Portland, Oregon, almost every backyard has one for muddy areas. Beginners can build it with basic tools, learning to cut and secure boards. It’s a practical project that boosts your yard’s look.
Basic Steps:
- Plan Path: Mark where the boardwalk will go.
- Cut Planks: Saw wood boards to the path’s length.
- Lay and Secure: Place boards and screw them into supports.
20. Adirondack Chair and Love Seat
This Adirondack chair and love seat set is comfy and stylish. Build it with pressure-treated pine for $20–$100. In Grand Rapids, Michigan, it’s a backyard favorite every home seems to have one!
Customize the back shape and color. Beginners learn cutting curves and assembling. It’s a cozy addition to any outdoor space.
Basic Steps:
- Cut Wood: Saw pine boards for the seat, back, and arms.
- Shape Curves: Use a jigsaw to curve the backrest.
- Assemble Set: Screw pieces together and add paint or stain.
21. Umbrella Table for Patio Shade
Build an Umbrella Table for Patio Shade
This umbrella table is perfect for relaxing in New York, where patios often feature shaded seating. It keeps drinks steady even in windy weather.
Made from plywood and cedar, it’s beginner-friendly. You’ll need moderate skills like using pocket screws and a miter saw. Finish it in a weekend for $50–$200, depending on wood. Enjoy cool drinks in style!
Basic Steps to Build an Umbrella Table:
- Cut Wood Pieces: Measure and cut plywood and cedar for the base and top.
- Assemble Base: Use pocket screws to join the base parts securely.
- Attach Top: Screw the top boards to the base and sand smooth.
22. DIY Outdoor Wooden Bench
Simple DIY Outdoor Wooden Bench Plans
In Seattle, this wooden bench is a backyard favorite for extra seating. It’s super easy to build in a few hours with basic tools. Perfect for outdoor parties, it costs $30–$100 using cedar or pine. Beginners can handle this project with a saw and drill. Add cushions for comfort and enjoy your yard!
Basic Steps to Build a Wooden Bench:
- Cut Boards: Cut wood for the seat and legs to size.
- Join Pieces: Screw the legs to the seat with a drill.
- Sand Surface: Smooth the bench with sandpaper for a clean finish.
23. DIY Garden Cart for Yard Work
Easy DIY Garden Cart for Beginners
Portland loves this two-wheel garden cart for hauling leaves and tools. It’s sturdier than a wheelbarrow and great for rough yards. Build it with simple tools like a saw and drill. Costs $50–$150, depending on wood. Beginners can finish it in a weekend. Make yard work easier!
Basic Steps to Build a Garden Cart:
- Cut Frame Pieces: Measure and cut wood for the frame and sides.
- Build Box: Nail or screw the sides together to form the cart.
- Add Wheels: Attach wheels to the base for easy rolling.
24. Elegant Garden Bench Design
How to Build an Elegant Garden Bench
Asheville’s gardens often feature this curved garden bench for its classy look. It’s stable and comfy, needing moderate skills like biscuit joints or a router. Costs $100–$500 based on wood like cedar. Beginners can build it in a weekend with a saw and drill.
Basic Steps to Build a Garden Bench:
- Cut Wood: Cut boards for the seat, legs, and curved supports.
- Join with Joints: Use biscuit joints or screws to connect pieces.
- Sand and Stain: Smooth the bench and apply outdoor stain.
25. Backyard Privacy Screen Plans
DIY Backyard Privacy Screen for Beginners
In Los Angeles, this privacy screen is a hit for cozy backyards. It’s easy to build with a foolproof post-positioning trick. Costs $100–$300 using cedar or pine. Beginners need a saw, drill, and level. Finish it in a weekend for a private oasis!
Basic Steps to Build a Privacy Screen:
- Set Posts: Dig holes and place posts using a level.
- Cut Panels: Cut wood slats for the screen panels.
- Attach Slats: Screw slats to posts for a sturdy screen.
26. Simple Folding Patio Chair
Build a Simple Folding Patio Chair
Miami’s patios shine with this folding chair, loved for its portability. It’s a beginner’s dream with a simple design and handle cutout. Costs $20–$100 using cedar or pine. Use a table saw and belt sander for best results. Build it in a day!
Basic Steps to Build a Folding Chair:
- Cut Wood: Cut pieces for the seat, back, and legs.
- Assemble Frame: Screw pieces together to form the chair.
- Sand Smooth: Sand surfaces for a comfortable finish.
27. Elegant Outdoor Table Guide
DIY Elegant Outdoor Table for Beginners
Chicago’s backyards often feature this stone-look table, built in a day. Use concrete for the top and wood for legs. Costs $50–$150. Beginners need a miter saw and basic tools. Seal it for indoor or outdoor use.
Basic Steps to Build an Outdoor Table:
- Mold Top: Pour concrete into a mold for the tabletop.
- Cut Legs: Cut wood for the leg supports.
- Assemble: Attach legs to the cured concrete top.
28. Garden Arbor with Swing
Easy Garden Arbor with Swing Plans
In Austin, this arbor with a swing is a backyard star for relaxing. It looks complex, but is simple with a saw and drill. Costs $100–$400 using cedar. Beginners can build it in a weekend. Enjoy a cozy retreat!
Basic Steps to Build a Garden Arbor:
- Cut Beams: Cut wood for posts and crossbeams.
- Build Frame: Screw posts and beams for the arbor structure.
- Add Swing: Attach a wooden swing with a strong rope.
29. Polished Stone-Top Table
Build a Polished Stone-Top Table
San Francisco loves this concrete table that looks like polished stone. It’s beginner-friendly, costing $50–$100. Add leaf prints or tiles for style. Needs a few days for the concrete to set. Use basic tools and a miter saw. Looks fancy, saves money!
Basic Steps to Build a Stone-Top Table:
- Pour Concrete: Mix and pour concrete into a mold for the top.
- Cut Base: Cut wood for the table base.
- Join Parts: Attach the base to the cured concrete top.
30. Self-Watering Planter for Gardens
DIY Self-Watering Planter for Beginners
Denver’s gardeners swear by this self-watering planter for veggies and flowers. It’s a lifesaver if you forget to water. Costs $50–$200 using cedar or pine. Beginners can build it with a saw and drill in a weekend. Grow with ease!
Basic Steps to Build a Self-Watering Planter:
- Cut Box: Cut wood for the planter box and reservoir base.
- Add Liner: Install a plastic liner for water storage.
- Assemble: Screw the box together and add soil.
31. DIY Patio Furniture Set with End Table
Build a cozy sofa and chair for your patio with this DIY patio furniture set. Adjust sizes to fit your space. Arms double as trays for outdoor dining. Use pressure-treated wood to prevent warping. Make or buy cushions. This weekend project costs $100-$500.
Basic Steps:
- Cut Wood: Measure and cut wood for sofa and chair frames.
- Assemble Frames: Screw pieces together to form seats and arms.
- Add Finish: Sand and apply outdoor sealant.
32. Three-Season Planter Box for Gardening
Create a sturdy three-season planter box with plastic liners to protect wood from moisture. Perfect for flowers or herbs, it lasts longer than other planters. Build it in a weekend for a neat garden.
Basic Steps:
- Cut Wood Pieces: Measure and cut wood for the box sides and base.
- Build Box: Nail pieces together to form the planter.
- Add Liners: Place plastic containers inside for planting.
33. Simple Backyard Campfire Bench
Make a strong campfire bench for your backyard or cabin. It’s easy to build with kids in a weekend. Set it by a fire pit or tree for cozy evenings.
Basic Steps:
- Cut Wood: Measure and cut wood for legs and seat.
- Assemble Bench: Screw legs to the seat board.
- Sand Surface: Smooth wood with sandpaper for comfort.
34. Easy Cedar Potting Bench for Gardening
Build a simple cedar potting bench to organize gardening tools. It makes planting fun and keeps things tidy. Finish this beginner-friendly project in a weekend with basic tools.
Basic Steps:
- Cut Cedar Boards: Measure and cut wood for the bench top and legs.
- Assemble Frame: Screw pieces together to form the bench.
- Add Shelves: Attach a lower shelf for storage.
35. Classic Adirondack Chair for Comfort
Craft a comfy classic Adirondack chair with simple tools like a circular saw and drill. No expert skills needed. Build it in a weekend for a relaxing outdoor seat.
Basic Steps:
- Cut Wood Pieces: Measure and cut wood for chair parts.
- Assemble Chair: Glue and screw pieces to form the frame.
- Sand and Seal: Smooth surfaces and apply outdoor finish.
36. Above-Ground Pond with Trellis
Build an easy above-ground pond with a trellis and fountain. No digging required, and it’s safer for kids. Complete it in a weekend and add fish for fun.
Basic Steps:
- Cut Wood for Walls: Measure and cut wood for pond walls.
- Build Pond Box: Assemble walls and add a liner.
- Add Trellis: Attach trellis and fountain for style.
37. Garden Tool Storage Cubby
Make a handy garden tool storage cubby to keep tools close. This simple project is perfect for beginners and can be built in a day for an organized garden.
Basic Steps:
- Cut Wood Panels: Measure and cut wood for cubby sides.
- Assemble Cubby: Nail pieces to form storage compartments.
- Mount Cubby: Attach to a wall or shed.
38. Raised Patio Planter for Easy Gardening
Build a raised patio planter to simplify gardening. Set potted plants inside for easy care. This beginner project takes a weekend and makes your patio look great.
Basic Steps:
- Cut Wood: Measure and cut wood for planter sides.
- Assemble Planter: Screw pieces to form a box.
- Place Pots: Set potted plants inside the planter.
39. Arbor with Benches and Planters
Create an arbor with built-in benches and planters for a cozy patio spot. Use pressure-treated wood and paint or stain it. Build it over a weekend for $250.
Basic Steps:
- Cut Wood: Measure and cut wood for the arbor and benches.
- Build Frame: Assemble the arbor and attach the benches.
- Add Planters: Attach planter boxes and apply finish.
40. Simple Wooden Garden Sign
DIY Wooden Garden Sign for Beginners
Make a charming wooden garden sign to label plants or welcome guests. It’s a quick, fun project perfect for beginners in the USA. Use cedar or pine for durability. Build it in a few hours with basic tools like a saw and drill. Costs $10-$30. In Asheville, these signs are a hit for personalizing gardens!
Basic Steps:
- Cut Wood: Measure and cut a cedar or pine board for the sign and stake.
- Shape Sign: Sand edges and carve or paint words like “Welcome” or “Herbs.”
- Attach Stake: Screw the sign to a stake and place it in the garden.
Common Mistakes to Avoid in Outdoor Woodworking
By avoiding these common mistakes, your outdoor woodworking projects will be more durable, attractive, and successful.
1. Using the Wrong Tools
2. Utilizing Low-Quality or Unsuitable Materials
3. Inaccurate Measurements
4. Neglecting Proper Finishing and Protection
5. Ignoring Wood Acclimation and Moisture Content
6. Over-Sanding or Using Harsh Cleaners
7. Allowing Dirt and Debris to Accumulate
8. Failing to Account for Wood Movement
How to Properly Finish Outdoor Woodworking Projects for Enhanced Durability
Summary Table: Outdoor Wood Finishes
| Finish Type | Durability | Maintenance | Appearance | Notes |
| Paint | High | Low | Opaque, any color | Best protection, hides wood grain |
| Film-Forming Finish | Moderate | Moderate | Clear/semi-clear | Shows grain, can peel if water enters |
| Penetrating Oil | Moderate | High | Natural, enhances | Needs frequent reapplication |
| Epoxy | Very High | Low | Clear/under paint | Best for end grain and cracks |
How to Properly Finish Outdoor Woodworking Projects for Enhanced Durability.
- Choose the Right Finish
- Paint: Durable, seals wood, hides grain.
- Film-Forming Finishes (e.g., Spar Varnish): Clear, protective, shows grain; reapply every 1–3 years.
- Penetrating Oils (e.g., Tung Oil): Soaks in, natural look; reapply every 1–2 years.
- Epoxy: Waterproof seal for end grain or vulnerable areas.
- Surface Preparation
- Sand wood smooth; remove dust and debris.
- Ensure wood is dry and clean.
- Application Tips
- Paint: Apply 2 coats with brush/roller; let dry fully.
- Film-Forming Finishes: Brush thin coats, sand between; let dry.
- Penetrating Oils: Apply generously, wipe excess; repeat.
- Epoxy: Tape area, pour epoxy, let cure; sand smooth.
- Special Considerations
- Seal end grain and ground-contact areas with epoxy, paint, or rubber.
- Use finishes with UV protection.
- Follow the manufacturer’s drying and reapplication instructions.
- Maintenance
- Inspect annually for wear or damage.
- Reapply as needed: paint/film-formers every few years, oils every 1–2 years.
Best Types of Finishes for Outdoor Wood Projects
Quick Comparison Table
| Finish Type | Protection Level | Appearance | Maintenance | Best Use Cases |
| Penetrating Oil | Moderate | Natural, enhances | Annual/Biannual | Furniture, decks, natural look projects |
| Film-Forming Varnish | High | Clear/Amber | Every 2–5 years | High-exposure, luxury outdoor furniture |
| Exterior Wood Sealer | Moderate | Clear, natural | Annual | Vertical surfaces, light exposure |
| Exterior Paint | Very High | Opaque, any color | 5+ years | Fences, sheds, and high-protection needs |
| Epoxy Sealer | Very High | Clear/under paint | Low | End grain, ground-contact areas |
FAQs for 40 Outdoor Woodworking Projects
1. What are the best types of wood for outdoor woodworking projects in the USA?
For outdoor stuff, go with woods like cedar, redwood, or treated lumber. They hold up great against rain and sun, making them awesome for things like benches or planter boxes.
2. What basic tools do I need to start outdoor woodworking projects?
You only need a few things to start: a saw, a drill, a sander, a tape measure, a square, and safety gear like goggles and earplugs. These will get you through most beginner projects, and you can grab more tools as you go.
3. How can I protect my outdoor woodworking projects from the elements?
Slap on some outdoor paint or oil to shield your projects from the weather. Keep adding it every so often to make them last and look nice.
4. What are some common mistakes beginners should avoid when starting outdoor woodworking?
Don’t mess up by measuring wrong, picking bad wood, forgetting safety, or skipping sanding. Check your work, use the right materials, and stay safe to nail it.
5. Can I teach myself woodworking, or should I take a class?
You can learn on your own with online videos and guides. But if you want to speed things up, a class or club can give you hands-on help and tips.
Conclusion
You don’t need expert skills or fancy tools to start woodworking with these 40 outdoor projects. From benches to birdhouses, planters to arbors, these beginner-friendly ideas help you create fun, useful items for your yard. Grab your saw, pick a project, and start building today to transform your outdoor space!