We’ll take you through the top 14 Different types of bricklaying tools, explain how to use them, and give some tips on deciding on one for your needs and application.
In this article, we’ll talk about these types of bricklaying tools and how to use them so that you can get acquainted with them and better understand your work!
Top bricklaying tools are the most commonly used and can be found in any bricklayer or masonry toolbox.
Various bricklaying tools help you finish your brick wall with precision and efficiency.
The bricklaying tools you will need to work on your next project depend on the type of brick you are working with.
So it’s essential to know precisely what kind of brick you use when planning your next building or construction project.
There are hundreds of brick and bricklaying tools, but these 14 different types of bricklaying tools are the most used in our industry, starting with how and where to find them.
Table of Contents
1. Brick Trowel
A brick trowel is a rectangular, usually plastic-driven machine that masons use to apply mortar or glue to the bricklaying guess.
It was initially designed as a spreading tool, although it can also be used as a finishing tool to smooth the surface after the mortar has hardened.
Therefore, the trowel should be distinct from a more common mortarboard, sometimes called a brick trowel.
Trolls are available in various shapes and sizes depending on the specific job you are working on.
When using the tool, a mortar box is needed to allow the bricks to dry while sitting.
If you have only one or two bricks spread, you can place them directly from a mortar box be sure to clean up the excess mortar before taking them into place.
Although any trowel will work for laying bricks, be careful when working with wet mortar as it is more easily attached to metal tools than rubber-handled tools or plastic items.
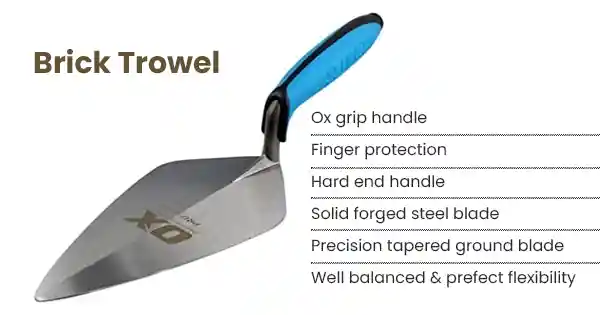
The brick trowel is the primary tool used when working with mortar.
The trowel allows you to spread the mortar evenly and create a smooth surface that will be easy to finish and look very appealing.
The size of a brick trowel ranges from 8 to 10, and the blades can either be made of wood or plastic.
They are thicker than regular trowels, which allows them to scoop up more mortar and press it into place.
An advantage of using a brick trowel is that it allows you to create an even coat across all of your bricks; however, they can take longer since you do not have enough pressure on them.
Trowels are the best choice for small jobs and smoothing mortar between bricks. The wide blade is best suited for working in corners of blocks or filling in gaps left by a rake or trowel.
Trowels are also ideal for applying adhesive materials such as thin-set mortar because the tool is designed to be held at an angle.
This allows you to apply a thin coat of adhesive while keeping the material off your shoes.
Choosing a suitable trowel will depend on the type of job you’re doing.
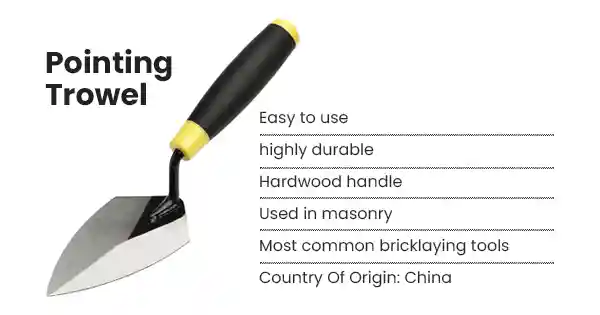
2. Pointing Trowel
A pointing trowel is one of the masonry’s most common bricklaying tools. Its edge can be sharpened to cut into mortar joints, making them very easy to clean.
If you want to use pointing trowels for more complex tasks, such as making cornices, choose a narrower-blade version with a pointed tip.
The handle should always be long enough to keep you away from your body to avoid injury when using the blade.
A pointing trowel is a small, flat tool used to place mortar on joints between bricks.
The trail is pointed towards the end to help push the mortar into the narrow space. Pointing trowels are usually used with a 10-in-1 tool or afloat.
It is also important to note that pointing travel has two main variations: one type has rounded edges, and the other has flat sides.
When you work with cement, plaster, or drywall mud, a pointing trowel is one of the best tools for leveling and smoothing.
A pointing trowel is also effective for creating decorative joints between wood trim and finish.
The pointed tip of the tool allows you to place the mortar in a tight spot; pulling back on the handle helps you achieve a smooth surface.
Unlike other bricklaying tools only used in small projects, pointing trowels can be used in large and small structures, such as buildings and walls.
However, when building a wall or smoothing cement poured too tightly to the substrate, a pointing trowel requires good coordination of the stiff wrist and hand-eye since it takes some expertise to keep it stable.
Pointing ensures the mortar joints are clean and tight and adhere well to each other.
The pointing trowel has a straight edge and a beveled edge, both steel or wood.
It is commonly used when a bricklayer is filled with mortar in an area, ensuring that the space between the rows of bricks remains clean.
A well-trained and experienced mason can set long and short points using a pointing trail.
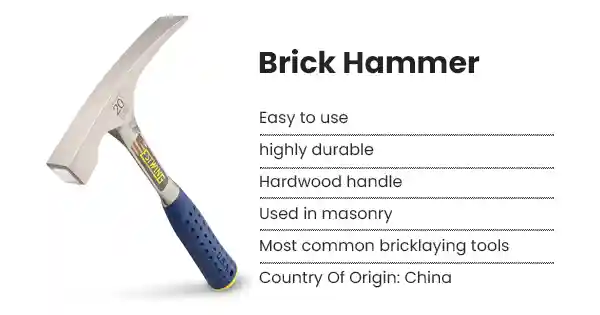
3. Brick Hammer
A brick hammer, or mason’s hammer, is an all-purpose tool to install and finish bricks. It can also break off old mortar and remove any loose material in the crevices between bricks.
The length (handle) should be short enough to make your job easier when laying bricks or breaking down a pile but long enough so that it will still fit comfortably into your tool belt when you need to use it.
To use one properly, grip the handle firmly with both hands and hit the end of the head against the top surface of a brick lying flat on a worktable.
You’ll need a hammer to break the cement and remove any excess material when laying bricks.
The handle and head should be constructed out of wood or aluminum and not steel; it will last longer, not rust, and is lighter.
If you want a more powerful tool, a sledgehammer can be used instead of a brick hammer.
In general, though, brick hammers are easier to use for beginners. Most hammers have two sides one curved (for setting bricks) and one flat (for trimming excess mortar).
Remember that your goal is to create good-looking joints, so don’t go too crazy with force; hit the side gently a few times until the brick settles into place.
Whether tacking or tying brick, a mason hammer is an ideal tool.
Small and lightweight, yet sturdy and durable, it’s perfect for ensuring your brick is securely fastened together during construction.
A brick hammer will also make it easier to give extra room for error when laying bricks the hit on the bricks is less severe than using tools like a sledgehammer or a pile driver and won’t send small chips of cement flying at your face and hands.
But there are disadvantages: You might accidentally strike parts of the wall instead of the bricks if you’re not careful with your aim, which can damage your wall even more.
4. Bricklayers Line Pins
Line pins are a big part of the bricklayers’ toolkit. Some claim that the line pins were developed for measuring distances on horizontal or vertical surfaces with a straight edge, such as when installing units in masonry walls.
Others believe they were first developed to help plasterers draw a line on their surface while creating decorative designs.
We don’t know what the actual story is, but it’s clear that they have become an essential part of the basic skill set for any mason working with brick.
Line pins can measure odd angles or irregularly shaped spaces where you want to ensure your mortar joints will fall perfectly in place.
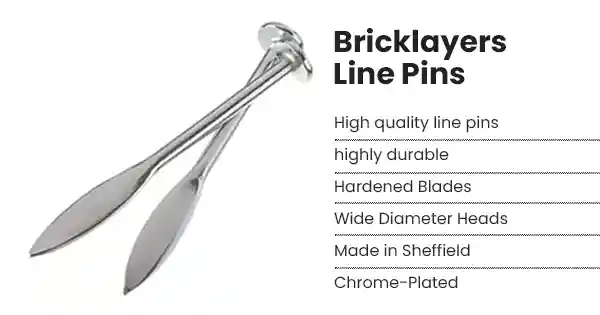
Bricklayers use line pins to hold the first bricks laid on a wall. Line pins are the same as chalk lines, but they’re designed specifically for laying bricks.
These tools are made of tapered wooden sticks with either brass or steel hooks to hold onto your string.
The hook is wrapped in leather or soft plastic to protect against scratches, scuffs, and abrasions during heavy use.
Line pins are also necessary because they allow you to preserve the measurements of your wall while you lay each course of brick; if you didn’t have them, chances are you would have to re-measure after every two rows of bricks had been laid down.
The bricklayer’s line pin is a great tool every bricklayer should have.
Depending on the job and the accuracy required, you can use it as a corner, knee, or shoulder template. The most important benefit of the line pin is its versatility.
While not quite accurate, it’s still an excellent choice for laying bricks on any wall surface you want.
The main weakness of using a line pin is its lack of accuracy; you’ll need two or three people per line if you want things to look professional.
5. Spirit Level
A tool used in spirit-level construction and renovation projects. It can tell precisely whether an object is horizontal or vertical.
It lets you see when something is up to 3/8 inches off.
A spirit level is a weight that ensures the two surfaces are equal. It does not consider the difference in area between the two surfaces.
A traditional spirit level is a long, rectangular piece of glass or plastic. You have to put it on the tested surface.
Then carefully adjust the other surface until both ends of the spirit level are perfectly aligned.
Using this tool, you can find out if you have a flash. But it doesn’t help much when you must ensure that two things are the same on one side.

The spirit level tool ensures that the given surface is perfectly flat.
A regular carpenter’s level won’t give you the precision you need for complex framing or plumbing work.
But there are other options.
A manufacturer’s layer can be used instead of a traditional carpenter’s. And a torpedo layer works as its name implies.
It provides layers that are more flexible than a traditional layer. Laser layers are available for professionals and consumers who use lasers instead of gravity-based bubbles to detect height changes.
Finally, digital angle gauges combine an electronic protector with two laser beams to make anything measured as accurately as possible.
A classic tool for spirit-level bricks and masonry.
It is an integral part of any brick-level kit, and the device can be used for many other DIY home improvement projects.
But when putting bricks, what are the pros and cons of using a spirit level?
There are two important things you need to think about. First, there’s weight.
A soul level with nothing to do with weight is desirable because it is much easier to keep above your head than a few pounds.
Second, where do you get the level from?
Is it attached to something else, or is it folded to carry itself? Again, the more portable your device, the better!
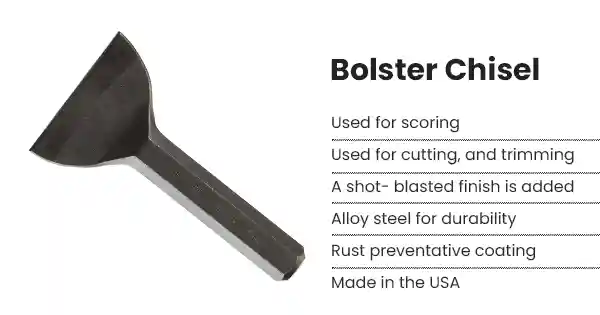
6. Bolster Chisel
For bricklaying, a bolster chisel is designed for cutting bricks or pavers.
It’s used with a mason’s mallet or hammer to knock away small portions of mortar.
This helps you quickly set stone or brick in place without much risk of cracking the surface.
Bolster chisels are also great for squaring up edges when placing paving stones in an area where walls meet one another.
To use it, position the blade on the joint between two masonry units (bricks, pavers, etc.) and tap the tool with your mallet until you’ve cut enough mortar away for it to move into place quickly.
The bolster chisel removes mortar or soft brick while the bricklayer works on a wall.
It can also score a shallow trough in the face of a brick when laying bricks. The bolster chisel has two different faces: one flat and one convex.
The chisel is held with the flat side down to force mortar from between bricks or to pry up loose individual bricks and score them in preparation for removal.
To use it for removing mortar, strike it with a wooden mason’s hammer.
The bolster chisel marks out curved and semicircular lines for brick and stonemasons.
The bolster chisel has a small pointed tip for precise marking in narrow spaces.
It also has a chisel point for etching fine details into the surface of stone or brick, and as such, it’s commonly used for creating decorative work on columns and friezes.
Chisels are also used as hammer stones when preparing a surface before applying a coat of mortar; they’re also helpful when moving rocks around or knocking off debris without damaging the masonry work underneath.
Bolster chisels have one advantage over other marking tools; their shape means they have an increased ability to absorb shock, which makes them very durable in harsh working conditions.
7. Cold Chisel
A cold chisel is a primary masonry tool to cut and remove bricks or other masonry. A cold chisel is also known as a cold chisel mason.
Iron keeps it cool, hence the name. A cold chisel’s primary concern is breaking its tip since it contains iron.
However, these are fine compared to other bricklaying tools, so extra care should be taken.
Cold chisels come in various shapes, from those designed for mortar to those designed for laying bricks, and are available at most home improvement stores.
It is a large metal wedge ideal for splitting, shaping, or cutting concrete.
The main difference between a cold chisel and an ordinary hammer is that the hammer has a blunt edge, while the sharp cutting edge of the previous one makes it ideal for cutting concrete pieces.
The edges of a traditional carpenter will also work as a cold sieve.
Chisels are essential in any manufacturer’s toolbox because they can cut bricks, remove mortar around brickwork, or break down old concrete.

A cold chisel is similar to a regular chisel but has a smaller, narrower blade, and the metal is more complicated.
These are great for cutting through the large mortar joints found in older brick walls and can be used in applications where other tools won’t work.
The main disadvantage of a cold chisel is that it needs to be sharpened more often than standard chisels.
They are also more expensive than regular chisels.
A side benefit of using cold chisels over regular ones is that they don’t make noise when you strike them against the bricks, so your neighbors won’t complain about the noise from your workspace!
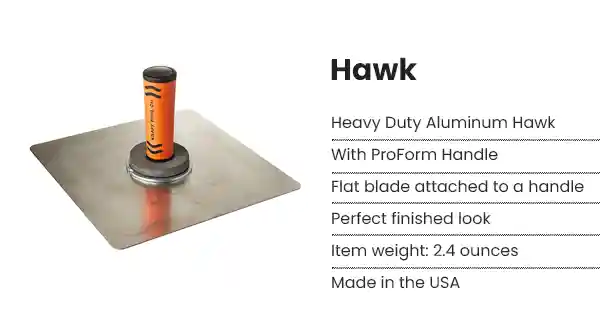
8. Hawk
A hawk is the trademark name for a bricklaying trowel, often made with carbon or zinc-plated steel.
Like all trowels, the Hawk is a flat blade attached to a handle used when brick masons lay mortar on bricks.
Hawk blades are thinner than those found on utility knives, but they have an identical shape.
They are also available in various sizes the size should be determined by how many bricks you plan on laying at once.
While it’s possible to buy kits that include one Hawk, many contractors prefer having multiple ones handy to swap out their blades depending on the project type they’re working on.
The Hawk is a heavy, hooked tool with a metal or rugged plastic grip.
The claw of the Hawk is used to dislodge air pockets that develop between bricks as you lay them.
A hawk can adjust bricks if they are not perfectly level on the wall or floor.
However, using a rubber mallet (or crusher) instead of the claw when moving bricks into place is best.
The reason is simple: the claw could damage existing mortar or break existing tiles if you press too hard on them.
Rubber hammers offer sufficient force without damaging your work area unnecessarily.
However, there may be times when only a hawk will do.
The Hawk looks like a sledgehammer with a broad face and a smooth head. The Hawk is most commonly used for brick walls of only one course.
When making repetitive strikes with the Hawk, you must strike the same spot as hard as possible.
This can crack or break the brick. When it hits the ground, your Hawk will bend over time.
Though professionals occasionally use it, they prefer to use (1) a Trowel or (2) a Setting Maul because of their consistent performance and ability to cause less damage to the built wall.
Just remember to use it with caution.
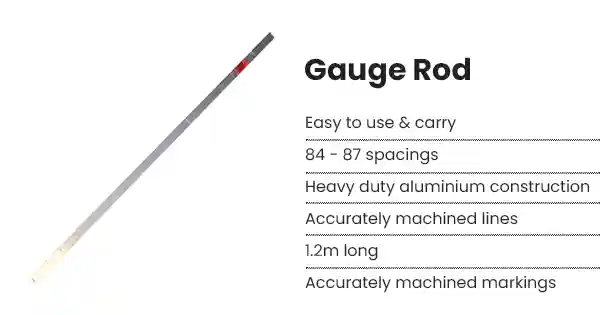
9. Gauge Rod
A gauge rod is an essential tool for all masonry and bricklayers alike.
The gauge rod is traditionally a round, tapered wooden rod with engraved graduation grooves and a handle attached at the top.
You use a gauge rod to measure the distance from the last brick at the bottom of the foundation.
The exact length is as follows: If this is a freestanding brick wall, subtract one-fourth of an inch from the height of your walls.
The foundation of your bricks should be about the same height as they should be.
But, as long as you can travel up or down, they are all exposed to the same wind, rain, and sunshine.
Check Prices on Amazon
When working with bricks, your bricks must be the same size.
Different lengths cause structural integrity problems, which can cause the entire wall to collapse. To get the right size brick, you have three options.
Choose more giant bricks; Cut them off, Or use a gauge rod to make them all the same length.
Gauge rods come in two main styles vertical and horizontal. And available at most hardware stores for just a few dollars.
Each kind has its own set of pros and cons. So make sure that you’re able to pick the right one.
For example, masons commonly use vertical gauges on scaffolding with limited space.
The two primary advantages of using gauge rods are easy measurement and controlled mortar application.
This allows you to measure any length and find the right amount of mortar with each strike.
As a bonus, many masons prefer working with gauge rods; It is much more hands-on than other tools, which means you get better results from your skills.
But, of course, there are disadvantages in particular, accuracy.
10. Tape Measure
A tape measure is a flexible tool that is used to find the size of something.
It consists of a long strip of thin material (typically plastic or metal) on which multiple-length units.
Usually, inches are marked in various ways (or centimeters).
Both metric and imperial units are commonly used in tape measurements.
The tape measure was first manufactured of paper in 1790 when it was conceived by William Stanley, an American mechanic and inventor.
This tool’s versatility makes it a helpful resource for runners.
Photographers using a tape measure to capture distances between objects and buildings are in the same boat.
The best thing about a tape measure is that it can be utilized professionally and personally.
Interior designers and developers who need exact proportions to build aesthetically pleasing projects will find it invaluable.
Likewise, this tape will be helpful when making your home. Large and tiny distances, curves, and other complex shapes can all be measured with it.
The most common tape measure has a spring-loaded reel that stretches up to 100 feet (30 meters).

There are different ways to measure things, but the tape measure is the most important.
Every do-it-yourself job needs a tape measure. Because it can help you make sure things are the proper size.
Here are some tips for using a measuring tape: First, ensure the tape measure is calibrated correctly.
To achieve this, click the button on the back of the tape measure labeled “Reset.”
A tape measure can be used to calculate the size of an object. It consists of a long, thin strip with a sliding Vernier scale and a hook at one end.
A tape measure is an excellent bricklaying tool for working smartly.
Tape measurements are often used in carpentry, building construction, and sewing. This tool also measures the length of particular objects, like walls or trees.
A measuring tape is a fundamental instrument. But with different types and sizes of tape measures on the market.
It could be challenging to choose between the two possibilities. Now a day, various measure tapes are used as essential bricklaying tools.
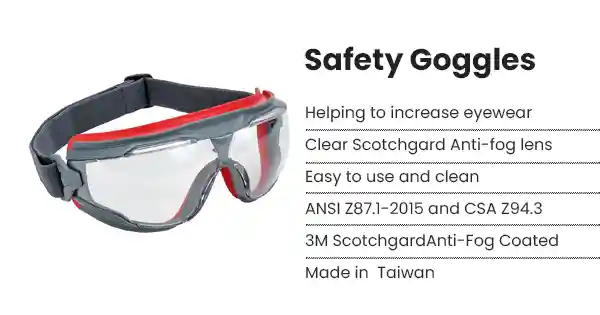
11. Safety Goggles
A brick mason can protect the eye from flying debris, dust, and anything else. Safety goggles are also waterproof, so they are ideal for working in all types of weather.
Although safety goggles are not technically a tool, most building supply stores sell them as part of a kit.
If not, ask if you can buy them individually. They are getting the most complete range for the best field of view.
Also, ensure your glasses fit comfortably around your ears so that nothing is interrupted when you wear your tight that later.
Glasses are used to protect our eyes from water, dirt, or mortar, as well as flying debris.
Frames are usually made of plastic with a soft foam seal around the mouth. When wearing safety goggles, care should be taken not to press the seal against the eyes.
Applying tape to the bridge of your nose can help prevent early wear on the glasses when tapping your facial lenses.
If you work indoors and on the porch, find out if your company requires a hard helmet. They can reduce damage by up to 85 percent in a falling accident.
Goggles are an essential part of the job but must be remembered. Protective and eyewear are the two main goggles you need as bricklayers.
Many sites will tell you that you only need the latter. But I recommend keeping both for maximum protection.
Safety goggles (also called goggles only) cover the entire area of your eye from debris. They have foam inserts that seal the contaminant.
Eyewear protection is very similar to goggles. But it does not cover your face like goggles designed just for your eyes.
12. Shovel
A shovel is a broad blade or scoop attached to a long handle. As you know, a shovel is mainly used for digging something.
Shovels can be used to loosen the soil. Also, it can move dirt, coal, gravel, grain, snow, or other material from one place to another.
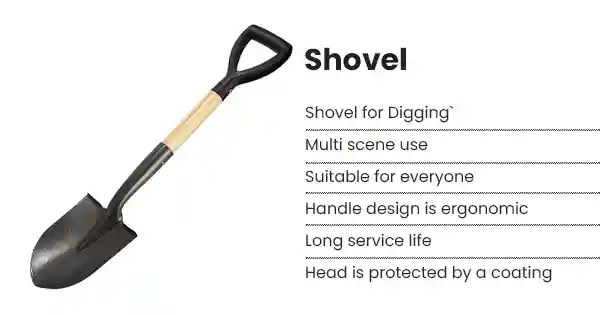
Shovels are used to dig trenches, straight-edged openings or channels, cut and lift turf, and edge blossom beds or yards.
Shovels are one of the most common bricklaying tools for daily life.
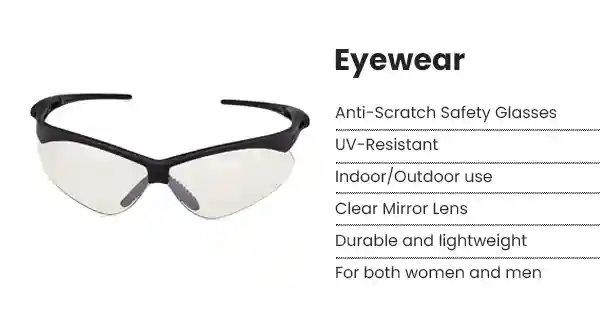
13. Eyewear
The tool is called eyewear, and it is an option for a special kind of surveyor.
Eyewear is used for close observation and requires both hands to be used properly.
Check Prices on Amazon
One of the top bricklaying tools is safety goggles. The function of safety goggles is to protect the eyes from flying objects and dust.
That may be found while working on a building site.
The downside to using safety goggles in conjunction with bricklaying is that it is difficult to work correctly, and your vision becomes blurred.
However, goggles are vital and should always be worn when laying bricks.
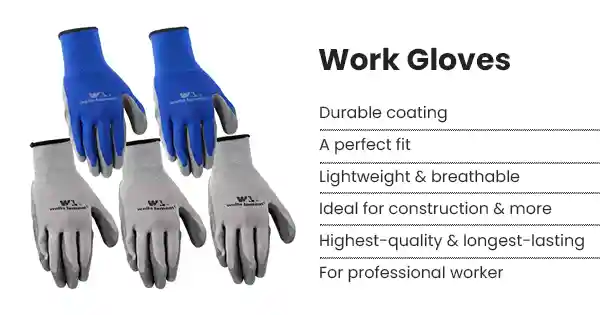
14. Work Gloves
A work glove is a piece of personal protective equipment (PPE) that covers the hand. It is usually a rigid, impact-resistant material.
Work gloves are usually used when working in rough conditions, cutting hands, or stabbing.
In 1824 Thomas Hancock invented the first type of work glove for use with a new method of mixing Portland cement.
He tried animal skins but eventually settled on canvas as the most suitable material to protect workers from high temperatures and sharp lime dust.
They protect hands from rough or sharp surfaces. Work gloves can be waterproof, non-slip, heated, or not.
They are designed for use in many environments, including indoor and outdoor.
Check Prices on Amazon
Used in the manufacture of latex, PVC, vinyl, and neoprene work gloves, highly flexible rubber provides breathability.
But low levels of heat transfer compared to other materials such as cotton or leather.
Have you ever noticed how hard your fingers get when you do a lot of construction work?
And yet, if you break the skin and it becomes infected, he wrote it all down.
When working with bricklaying business equipment, brick, or anything else, there are three main types of hand protection.
Work Gloves These are heavy-duty work gloves that may be utilized for different tasks in the construction industry.
The advantage is that they keep your hands warm and are less durable when used regularly.
However, sometimes they feel uncomfortable and may interfere with movement.
Work gloves will help with everyday tasks but are only suitable for simple tasks like cutting bricks.
Still, work gloves are great bricklaying tools for our daily life tools.
Advantages and Disadvantages of 14 Different Types of Bricklaying Tools
Bricklaying tools include 14 varieties. However, only some tools can be used in some projects.
Understanding the advantages and disadvantages of selecting the right tool for the job is essential.
The best way to learn about the best bricklaying tools is from a trained professional. Who will show you how each tool operates and when it should be used?
Effectiveness of Bricklaying Tools
If you are new to bricklaying, you have various tools you need. Starting with a good set of bricklaying tools will help you run your work more smoothly.
Our top 14 recommended bricklaying tools will help make your brickwork easier and faster.
The most successful bricklaying tools are those you are most at ease with.
The 3 main reasons for the effectiveness of a bricklaying tool are weight, length, and design.
When considering these factors, it is also essential to think about how much comfort you value.
Also, consider how convenient bringing the device to the office is.
Conclusion: Types of Bricklaying Tools
14 types of bricklaying tools (pieces of equipment) are required for each brick kiln. Follow these tips, get started on your next project, and use your time wisely.
Although it may be scary at first, you will soon become an expert with practice.
At Main Bricks & Stone, we are proud to offer high-quality products repeatedly proven by the most trusted contractors in New Jersey.
This article contains facts that will help you make the best decision possible.
We hope you found this helpful information! Let us know by visiting our website if we can do something else for you.
If you liked this article and want to read more, we hope you’ll check out our other content.
Related Article: How to Choose the Best Shovels for Gardening?