Welcome to the captivating world of pyrography! Have you ever seen beautiful artwork burned into wood and wondered, “How do they do that?” That’s pyrography—a relaxing, creative hobby that anyone can learn.
In this guide, we’ll answer the question: what is pyrography? explore the tools you need, and walk you through how to get started.
Table of Contents
What is Pyrography?
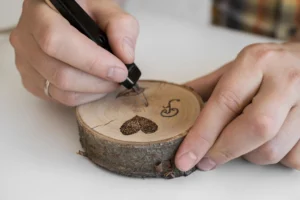
Pyrography is the art of decorating wood (or other materials) using a heated tool to burn designs onto the surface. The word comes from Greek—“pyro” means fire, and “graphy” means writing.
It’s also known as wood burning. You can create patterns, lettering, shading, and even realistic portraits using just heat and pressure.

What Can You Make With Pyrography?
Pyrography is incredibly versatile. You can burn designs into:
- Wooden signs and wall art
- Coasters and cutting boards
- Leather wallets and bookmarks
- Bamboo spoons, boxes, and more
Once you master the basics, the possibilities are endless!
Is Pyrography Hard to Learn?
This is the best part: the basics of pyrography are surprisingly easy to pick up! If you can hold a pen, you can learn to wood burn. While mastering photorealistic portraits takes years of practice, creating beautiful, simple designs, lettering, and patterns is achievable for a complete beginner within your first few sessions.
The key is starting with the right tools and materials, which is where many beginners stumble.
The Essential Tools to Get Started
Add Image: The-Essential-Tools-to-Get-Started-Wood-Burning-Infographic.webp
You don’t need a studio full of expensive equipment to begin your pyrography journey. At its core, you only need three things:
A Pyrography Tool
This is the heated pen you’ll use to burn your designs. For anyone new to the craft, we highly recommend starting with a simple, affordable solid-point burner. These are user-friendly and perfect for learning heat control.
To see our top recommendations, check out our detailed guide: The 5 Best Pyrography Kits for Absolute Beginners.
A Piece of Wood
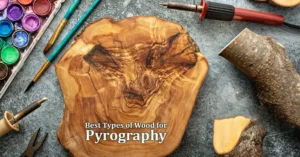
Not all wood is created equal! Starting with the right kind of wood is crucial for a smooth, enjoyable experience. You want a soft, light-colored wood with a minimal grain.
For an in-depth look at what to buy and what to avoid, read our post: 7 Best Types of Wood for Pyrography.
Sandpaper
Sanding your wood before burning helps create smooth lines and better detail.
Pencil & Stencils
Sketch your design first with pencil or use stencils to trace on the wood.
A Simple Design
Start with a simple outline or pattern. You can draw it yourself or transfer it using graphite paper.
That’s it! With these five items, you can start creating your very first piece of wood-burned art today.
Step-by-Step: How to Start Pyrography?
- Choose your wood – Go for clean, light-colored wood with minimal grain.
- Sand the surface – Use 220-grit sandpaper for smooth results.
- Draw your design – Lightly sketch with a pencil.
- Burn slowly – Start with a low heat and trace your design.
- Add shading or color – Once your lines are burned, you can add color with watercolors or pencils.
- Seal your artwork – Use a clear sealer to protect the finish.
Fire up your creativity with the gorgeous pyrography projects for beginners in this wood-burning book.
Tips for Beginners
- Always work in a well-ventilated area
- Test your burner on scrap wood first
- Practice pressure and speed to get even lines
- Don’t rush—take breaks and enjoy the process
Is Pyrography Safe?
Yes—if done safely. Use natural wood, avoid burning treated or painted surfaces, and wear a mask or use a fan to avoid breathing in smoke.
Final Thoughts
So, what is pyrography? It’s the beautiful, beginner-friendly art of wood burning—and it’s easier to start than you might think.
With the right tools, some practice, and creativity, you can turn plain wood into stunning pieces of art.
👉 Get Your First Pyrography Kit Here and start burning today!
As an Amazon Associate, I earn from qualifying purchases. This helps support the blog at no extra cost to you. Thanks for your support!FAQs: What is Pyrography
Q: Is pyrography expensive?
A: No. It’s budget-friendly. A starter kit costs under $30, and you can use cheap wood like plywood or plaques.
Q: Can I burn other materials besides wood?
A: Yes. Leather, gourds, cork, and thick paper also work well. Just ensure good airflow when burning anything.
Q: Is wood burning toxic?
A: Burning natural wood is usually safe. But always work in a well-ventilated area. Use a mask or fan, and avoid burning painted or treated wood.
Q: Can I add color to my wood burning?
A: Yes! Watercolors, colored pencils, or light acrylics work great. Always burn first, then color.
Q: How do I seal finished pyrography art?
A: Use a clear spray sealer (matte or satin). You can also try wax, Danish oil, or wipe-on polyurethane.